 |
| A portion of a 17th century map of Montgomery |
I had originally thought to continue the British Civil War (BCW) adventures of Sir William Brereton by putting on a recreation of the Battle of Hopton Heath (also discussed briefly here), but I had second thoughts. Hopton Heath is not one of the larger battles of the war (less than 3,000 combatants total), and I was afraid that I might end up with more players than commands, so I moved to a slightly larger action. I picked the 1644 Battle of Montgomery, which was much larger (over 5,000 combatants).
Alas, I chose Montgomery without knowing that not just one but two other GMs had portrayed this battle at AOCM in recent years.
Montgomery is in some ways a challenging action to make a fun game out of. For wargamers, fun battles are those where both sides feel as if they have a good chance to win. This may come from both armies having roughly comparable numbers of troops; or if the armies are unequal in numbers, the smaller side has better training or morale, or a terrain advantage, or better weapons and equipment. At Montgomery, the main difference seemed to be that the smaller side (Parliament) had some stellar leaders (Sir John Meldrum, an experienced professional Scots military officer, and my buddy Sir William Brereton, an experienced officer who had held Cheshire for Parliament) who managed to rally their force when things looked black and turn a defeat into a resounding victory.
I hoped to give Parliament the chance of creating this same event by giving their commanders, especially their CinC, Meldrum, and their infantry commander, Sir William Fairfax, top ratings. Sir William Brereton and Maj Gen Lothian also got highly rated. The Royalists under Sir John Byron got good officers, but not outstanding ones.

On the day, after some tiresome delays with getting things printed, I got to the shop and started getting set up. I briefed the Royalist players, then watched them set up while the Parliamentarian players did some shopping, then the Royalists stepped away while I briefed their opponents and they set up.
Mission
The Parliamentary forces that had been gathered to relieve the Royalist siege of Montgomery Castle consisted of about 2,000 foot, men of Yorkshire and Cheshire, along with 1,500 horse under Sir Thomas Myddleton, men from Denbigh and Cheshire. Their intent had been to chase off the Royalist army and to restore the town and castle of Montgomery to Parliament. But the Royalists had also assembled a large force (2,800 foot, 300 dragoons, 1,400 horse), considerably outnumbering Parliament's troops. So while their goal remained to defeat the enemy, Parliament's back-up plan was to fall back across the river Camladd and towards Welshpool. In order to do so, they would need to hold Salt Bridge, the one crossing point accessible to their army.
The Royalists, rather more simply, needed to attack and disperse the enemy force. Historically, Sir John Byron took the opportunity of attacking on the day that a large body of enemy horse had been sent out to forage, thus accentuating his advantage in numbers.
Troops
The Royalists deployed first, along a ridge overlooking the Camladd river, with a road (I think what is now the B4388 Welshpool-Montgomery road) running perpendicular to their front along their left flank, towards Salt Bridge.
They arrayed their infantry to the left--with dismounted dragoons screening the flank and heading towards some rough country, perfect terrain for them--and their horse on their right, massed to make a single strike force.
The Parliamentary players decided on a more traditional formation: infantry in the center, with horse on both flanks. They had another force of mounted troops off-board, the foragers under Sir William Brereton, due to return shortly after the beginning of the battle.
Terrain
West of the road and south of the river there was an area of bad ground--shrubberies, swamps, and broken terrain--which the Royalist dragoons hoped to make their own. East of the ridge along which the Royalists deployed there was an area of many small hills, but the battle never reached that area. Most of the combat took place up and down a rolling hillside, not terribly steep, and quite open. Looking at satellite imagery of the area on Google Maps and assuming that at the time it was not as enclosed as similar land might be in central England, this looks like perfect cavalry terrain.
Execution
In our battle, Sir John Meldrum and Parliament had the initiative at the outset, and they lost no time in attacking on their left with two units of horse. On the right, one unit of horse surged forward, hoping to overthrow the Royalist dragoons, which were dismounted and holding a line along the Royalist flank. In the center, the Parliament's foot held its ground.
The attacks on both flanks went poorly. The horse vs. horse action on the eastern flank was very evenly matched, but Parliament lost both of the initial encounters. On the west, the dragoons levelled and gave a devastating opening volley, putting the brakes on the enemy's cavalry charge. Parliament's cavalry on this side of the battle remained in a confused and disordered state, unable to advance and unwilling to go backwards. Once the foragers arrived, these horse had just decided to retire and turned the tricky operation of deploying a force in march column across a defile into an unfortunate traffic jam.
On the east, several squadrons of Royalist horse pursued their defeated foes far into the rear of the Parliamentary lines. More engagements went much the way of the first, with the one Parly horse unit that defeated an enemy troop quickly hit by another Royalist cavalry unit and forced to retire.
The Parliamentary foragers did return quite speedily and might have turned the tide against the King's men. Unfortunately, I had misread the historical course of events and had them enter from Parliament's rear area rather than from their left flank. As a result, the horse were held up for some time crossing over Salt Bridge and trying to deploy while the rest of Parliament's forces were being pushed back towards them.
In the center, the Royalists had taken the initiative in the foot battle, with their more numerous pike and shot pressing the Parliamentary center so hard that they took to flight. True to history, these footmen fell back toward the river and then (most of them) rallied and faced the enemy again. As in 1644, the men of Cheshire refused to be defeated.
By that point, however, the Parliamentary commanders had failed their personal morale checks and conceded the battle.
Aftermath
I think the scenario is still a viable one, but I think it needs some retouching. For one thing, the Parliament's foragers need to come on in the right place! Having three additional units of horse on the flank where the cavalry battle is taking place would make the chances that Parliament could historically defeat the Royalist horse much higher.
For another thing, deployment should probably be set, not free form. Our Parliament players split their horse between two wings, even after seeing the Royalist deployment with all its horse on one wing, and one of those Parliament wings accomplished essentially nothing in the ensuing battle, as it was left unused after its initial repulse by the Royalist dragoons.
Both sides should have a slightly higher number of officers; this is a judgement call, as there is nothing comparable to the historical unit structure to say how many officers should be represented in a C&G order of battle. But given the importance of officers in the combat and morale system of C&G, the scenario should probably represent all the major officers, not just most of them.
Finally, while chance delivered something like the remarkable rally of the Cheshire foot that took place historically, it would behoove the moderator to award the Parliament player a few "resets" of troop morale for their foot to represent what took place at the original battle. This would allow the OB to keep most of them as trained, rather than veteran troops, while giving them a chance to repeat the dogged determination of their historical forebears.
Photos
I do have some photos to add, but I didn't want to wait to post this any longer. I'll have a follow-up post with photos.
Other References
Wikipedia article on the relief of Montgomery Castle
Cromwell Association page on Montgomery
Photos of a Montgomery game using a different set of rules
Montgomery is in some ways a challenging action to make a fun game out of. For wargamers, fun battles are those where both sides feel as if they have a good chance to win. This may come from both armies having roughly comparable numbers of troops; or if the armies are unequal in numbers, the smaller side has better training or morale, or a terrain advantage, or better weapons and equipment. At Montgomery, the main difference seemed to be that the smaller side (Parliament) had some stellar leaders (Sir John Meldrum, an experienced professional Scots military officer, and my buddy Sir William Brereton, an experienced officer who had held Cheshire for Parliament) who managed to rally their force when things looked black and turn a defeat into a resounding victory.
I hoped to give Parliament the chance of creating this same event by giving their commanders, especially their CinC, Meldrum, and their infantry commander, Sir William Fairfax, top ratings. Sir William Brereton and Maj Gen Lothian also got highly rated. The Royalists under Sir John Byron got good officers, but not outstanding ones.

| Sir John Meldrum |
On the day, after some tiresome delays with getting things printed, I got to the shop and started getting set up. I briefed the Royalist players, then watched them set up while the Parliamentarian players did some shopping, then the Royalists stepped away while I briefed their opponents and they set up.
Mission
The Parliamentary forces that had been gathered to relieve the Royalist siege of Montgomery Castle consisted of about 2,000 foot, men of Yorkshire and Cheshire, along with 1,500 horse under Sir Thomas Myddleton, men from Denbigh and Cheshire. Their intent had been to chase off the Royalist army and to restore the town and castle of Montgomery to Parliament. But the Royalists had also assembled a large force (2,800 foot, 300 dragoons, 1,400 horse), considerably outnumbering Parliament's troops. So while their goal remained to defeat the enemy, Parliament's back-up plan was to fall back across the river Camladd and towards Welshpool. In order to do so, they would need to hold Salt Bridge, the one crossing point accessible to their army.
The Royalists, rather more simply, needed to attack and disperse the enemy force. Historically, Sir John Byron took the opportunity of attacking on the day that a large body of enemy horse had been sent out to forage, thus accentuating his advantage in numbers.
Troops
The Royalists deployed first, along a ridge overlooking the Camladd river, with a road (I think what is now the B4388 Welshpool-Montgomery road) running perpendicular to their front along their left flank, towards Salt Bridge.
They arrayed their infantry to the left--with dismounted dragoons screening the flank and heading towards some rough country, perfect terrain for them--and their horse on their right, massed to make a single strike force.
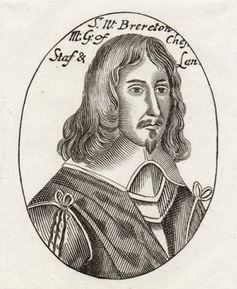 |
| Sir William Brereton |
Terrain
West of the road and south of the river there was an area of bad ground--shrubberies, swamps, and broken terrain--which the Royalist dragoons hoped to make their own. East of the ridge along which the Royalists deployed there was an area of many small hills, but the battle never reached that area. Most of the combat took place up and down a rolling hillside, not terribly steep, and quite open. Looking at satellite imagery of the area on Google Maps and assuming that at the time it was not as enclosed as similar land might be in central England, this looks like perfect cavalry terrain.
Execution
In our battle, Sir John Meldrum and Parliament had the initiative at the outset, and they lost no time in attacking on their left with two units of horse. On the right, one unit of horse surged forward, hoping to overthrow the Royalist dragoons, which were dismounted and holding a line along the Royalist flank. In the center, the Parliament's foot held its ground.
The attacks on both flanks went poorly. The horse vs. horse action on the eastern flank was very evenly matched, but Parliament lost both of the initial encounters. On the west, the dragoons levelled and gave a devastating opening volley, putting the brakes on the enemy's cavalry charge. Parliament's cavalry on this side of the battle remained in a confused and disordered state, unable to advance and unwilling to go backwards. Once the foragers arrived, these horse had just decided to retire and turned the tricky operation of deploying a force in march column across a defile into an unfortunate traffic jam.
On the east, several squadrons of Royalist horse pursued their defeated foes far into the rear of the Parliamentary lines. More engagements went much the way of the first, with the one Parly horse unit that defeated an enemy troop quickly hit by another Royalist cavalry unit and forced to retire.
The Parliamentary foragers did return quite speedily and might have turned the tide against the King's men. Unfortunately, I had misread the historical course of events and had them enter from Parliament's rear area rather than from their left flank. As a result, the horse were held up for some time crossing over Salt Bridge and trying to deploy while the rest of Parliament's forces were being pushed back towards them.
In the center, the Royalists had taken the initiative in the foot battle, with their more numerous pike and shot pressing the Parliamentary center so hard that they took to flight. True to history, these footmen fell back toward the river and then (most of them) rallied and faced the enemy again. As in 1644, the men of Cheshire refused to be defeated.
By that point, however, the Parliamentary commanders had failed their personal morale checks and conceded the battle.
Aftermath
I think the scenario is still a viable one, but I think it needs some retouching. For one thing, the Parliament's foragers need to come on in the right place! Having three additional units of horse on the flank where the cavalry battle is taking place would make the chances that Parliament could historically defeat the Royalist horse much higher.
For another thing, deployment should probably be set, not free form. Our Parliament players split their horse between two wings, even after seeing the Royalist deployment with all its horse on one wing, and one of those Parliament wings accomplished essentially nothing in the ensuing battle, as it was left unused after its initial repulse by the Royalist dragoons.
Both sides should have a slightly higher number of officers; this is a judgement call, as there is nothing comparable to the historical unit structure to say how many officers should be represented in a C&G order of battle. But given the importance of officers in the combat and morale system of C&G, the scenario should probably represent all the major officers, not just most of them.
Finally, while chance delivered something like the remarkable rally of the Cheshire foot that took place historically, it would behoove the moderator to award the Parliament player a few "resets" of troop morale for their foot to represent what took place at the original battle. This would allow the OB to keep most of them as trained, rather than veteran troops, while giving them a chance to repeat the dogged determination of their historical forebears.
Photos
I do have some photos to add, but I didn't want to wait to post this any longer. I'll have a follow-up post with photos.
Other References
Wikipedia article on the relief of Montgomery Castle
Cromwell Association page on Montgomery
Photos of a Montgomery game using a different set of rules
No comments:
Post a Comment