Prologue
 |
Sir William Howe (Anne SK Brown MHC)
|
Depending on how one chooses to date, 1777 might be said to have been the third year of the American Revolution. In 1775, the frequently violent political unrest in New England had become open warfare when British troops, searching for
cannon stolen from the militia depot in Boston, came under fire from American rebels in
Lexington and Concord. After the sanguinary
battle of Bunker Hill, a siege of Boston had ensued. This was brought to a head in January 1776 by the arrival at the siege of
a "noble train of artillery", cannon, howitzers, and mortars from the captured British fort at Ticonderoga, weapons that, once emplaced on Dorchester Heights, rendered the city indefensible. In March the British army evacuated Boston for Halifax, Nova Scotia, where it was retrained and reinforced.
In late June and early July of 1776, the British army under its commander in chief
General William Howe sailed south to New York; in August they
landed on Long Island and chased the American army from their positions there. September saw the British occupy Manhattan while the American army fell back to
Harlem. In October the Americans lost another
battle at White Plains. They fell back into New Jersey in November after the loss of Forts
Washington and
Lee, then fell back before another British advance, ending the year in Pennsylvania.
 |
| Gen. Geo. Washington, 1776 (Brooklyn Museum) |
Although his army was exhausted and about to dissolve as enlistments expired, Continental commander in chief
Gen. George Washington persuaded his men to make one more effort. In a lightning strike, he attacked the British Army's outpost at
Trenton on Christmas Day, 1776, retreated, and attacked again in a feint at Brunswick, the main British depot in the Jerseys. Under pressure from a British sally from New York under
Lt. Gen. Lord Cornwallis, Washington conducted an effective fighting withdrawal to a strong defensive position on
Assunpink Creek, then stole a march on the British,
attacking their rear echelon at Princeton, before falling back to winter quarters at Morristown in New Jersey's
Watchung Mountains.
After doing nothing but taking body blows for a year, the American army had retorted with several shrewd jabs. It could not yet take on the British Army in the field without a tremendous advantage in numbers or position, but British hopes for a speedy end to the war with a quick victory over green militia had been decisively dashed. The Americans meant to fight.
1777: What Next?
Howe (now Sir William, after being knighted for his successful campaign in New York) began the new year with a divided command and a strategic puzzle. The main portion of his army was in and around New York City; it had spent the rest of the winter fighting
a bitter petite guerre, a war of outposts and skirmishes, with the Americans over what supplies could still be foraged in the Jerseys. Now that Spring was drawing near, Howe wanted to find some way to come to grips with Washington and his army. But as Commander in Chief in North America, Howe's responsibilities (and available forces) lay beyond just the army in New York.
Another portion of the army held Rhode Island; a relatively simple operation the previous year under
Lt. Gen. Lord Percy and
Maj. Gen. Henry Clinton had seized Newport as a foothold in New England for the Crown Forces. (Clinton had earlier tried without success to capture the southern city of Charleston, South Carolina.)
Canada had originally held a small garrison under
General Guy Carleton. This force had proved sufficient to fight off a confused and undersupported
attempt to invade Canada by various American forces in 1775. Carleton's counteroffensive in 1776 had gotten far enough to drive American naval forces from Lake Champlain, but he had not done so soon enough to allow him also to recapture Fort Ticonderoga, the crucial base at the south end of the lake, from the rebels before winter set in.
 |
| Maj. Gen. Burgoyne (Frick Collection) |
And in the meanwhile,
Maj. Gen. John Burgoyne, having undermined Carleton's reputation with the government in London, had wheedled away command of British forces in Canada for himself. He aimed to move south to capture Albany and isolate the rebellion in New England from the rest of the American Colonies. His plan depended upon support from an ancillary force of British, Loyalist, and Native American troops moving east from Lake Ontario along the Mohawk Valley, which he hoped would distract the commanders of American forces in upstate New York. He also looked south to Howe for help.
Howe had originally suggested that if he were given a considerable reinforcement of troops, he could conduct operations against the American main army and also support an attack south from Canada. If he did not get these reinforcements, however, he planned to seize the American capital at Philadelphia, both for the moral effect of capturing or dispersing the enemy government and in hopes that this threat would be enough to bring the American main army to the one conclusive battle he still hoped could destroy it and end the war.
No Peace Without Victory
General Sir William Howe and his elder brother Vice Admiral Richard, Viscount Howe, had been named in 1776 as peace commissioners by the British government, though with only limited ability to make terms. Sir William
had met in September 1776 with a group of Congressmen representing the American government, but no one had been able (or willing) to make the necessary concessions that would have led to a suspension of hostilities. Howe felt sure that until he could completely defeat and disperse the American army under Washington, Congress would continue to believe that it could face down the Crown. Britain held one of the most wealthy and important cities in revolt (New York). If they could seize another in Philadelphia (and even, in one of Howe's early plans, reach out from Rhode Island and recapture Boston), it would force the colonies to their knees economically and bring the American army out of hiding in the mountains of New Jersey to the open plain, where he could crush them.
Unearthing the Fox
But attacking Philadelphia would almost certainly require moving the entire army by sea again, as it had been moved from Halifax to New York. Recovering from that move had taken nearly a month. The army could move by land across the Jerseys, but that area had been stripped bare of supplies in the winter's Forage War, and the army would still have to cross the Delaware River, a major obstacle (Howe's engineers began assembling a bridging train to support that option). Faster and less troublesome than either of these alternatives, though, would be to fight the Americans here in the area around New York. Howe made several attacks and feints, hoping to prod Washington into attacking back or to lure him into assaulting the British while they were on the march. These led to the battles of Bound Brook in April 1777 and of Short Hills the following June.
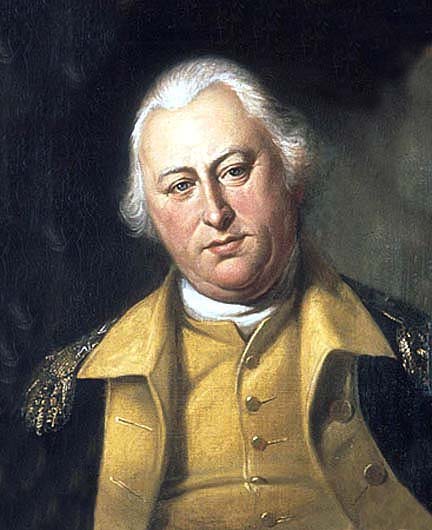 |
| Maj. Gen. Benjamin Lincoln (City of Philadelphia) |
Bound Brook
In April 1777,
Maj. Gen. Benjamin Lincoln commanded a Pennsylvanian brigade of Continental regular infantry and artillery and state militia. This force was stationed at the town of Bound Brook, where the stream of the same name entered the Raritan River. They served to guard the approaches from the British base at Brunswick to the American army's winter quarters at Morristown. They were also positioned to intercept supplies moving to British along the Raritan.
Originally around 1,000 men, this garrison had dwindled to about 500 as enlistments ran out. It was not intended to stand up to a full assault by British regulars, but it could delay a moving column long enough to send word to the next largest American outpost and then fall back. And it provided the troops for patrols around the countryside, interfering with British foraging and intelligence gathering and carrying out those tasks themselves.
Howe calculated that attacking such a post might draw the American army into an engagement, perhaps piecemeal as a larger force reinforced Lincoln, thinking he was only somewhat overmatched. Then, as that force became overwhelmed, it would call out for help. As long as none of the American forces could be extricated whole, the British could slowly swallow the whole American army in this trap. And, if the Americans did not reinforce the post, at the very least he would have captured a major general and a good quantity of men and guns.
Howe sent Cornwallis, easily his most able general and likely burning for another chance to bag Washington, in command of this force. Taking no chances, Cornwallis took 4,000 men-- a force of British infantry commanded by himself and
Maj. Gen. James Grant, one of Hessian troops under
Col. Carl von Donop, and a detachment of light infantry and light dragoons under Lt. Col. William Harcourt of the 16th Light Dragoons. The force advanced in four converging columns, seeking to surround the American base. Grant's advance guard, under the aggressive and talented jaeger officer Capt. Johann von Ewald, made contact first and nearly overran the American position before finding themselves outnumbered. Von Donop's force came up in good time, and he and Cornwallis put the Americans to flight. Harcourt's column came across Lincoln and his staff staying at a large house outside of the town and nearly captured them, but the American general and most of his men managed to escape, leaving behind three brass cannon and most of the American artillery detachment that manned them.
Maj. Gen. Nathanael Greene commanded the nearest American supporting force. On learning of the British attack, he moved his force immediately towards Bound Brook, but they were too late to do anything but harass Cornwallis' force as it returned to Brunswick.
Realizing this position was exposed and too far from the main American army at Morristown, Washington relinquished the Bound Brook post in May but moved his forces south from Morristown to Middlebrook, still protected by the Watchung Mountains but closer to the British base of operations. He could see Howe's plan to draw him out of his hilly stronghold, but he was not foolish enough to comply.
A Tentative Order of Battle for Bound Brook
Accounts differ as to who made up the different British columns, even as to how many columns there were. Cornwallis nominally commanded the raid, but it would appear that he did not participate. Grant notionally led the main attack column, but although von Ewald was supposed to be under his command, von Ewald arrived at the town first and von Donop's grenadiers ended up arriving second and providing him support, not the rest of Grant's column. Some authors say that Grant's role was to stay at Raritan Landing and provide support if needed, so I've left him there, along with the larger of several accounts of his force. Von Donop may have had guns with him also, which would make sense in military terms since they had intelligence that the Americans had constructed a fort*, but to include these in the game seems like over-egging the British pudding.
Strengths are a combination of recorded numbers at the time of the actual skirmish and unit strengths from Brandywine in September. If I can find better numbers, I'll update them. (Note: The larger number next to a unit is its historical strength, or my best approximation of it. The number in brackets is the number of stands used in the game to represent it: four-figure stands for infantry, two-figure stands for cavalry.)
Lieutenant General Charles, Lord Cornwallis
Capt. Johann von Ewald (arriving first)
Hesse-Kassel Feld Jaeger Korps (30 [1]): Elite, Crack, Good, Excellent
Col. Carl von Donop (arriving second)
Linsing Grenadier Battalion (430 [5]): Elite, Veteran, Good, Poor
Minningerode Grenadier Battalion (430 [5]): Elite, Veteran, Good, Poor
Lt. Col. William Harcourt (arriving a rather late third)
16th Light Dragoons (detachment) (50 [1]): Line, Veteran, Average, Poor
1st Battalion, the Light Infantry (two wings of 300 [6] each): Elite, Crack, Good, Good
2nd Battalion, the Light Infantry (one wing of 300 [6]): Elite, Crack, Good, Good
1st Battalion, the Grenadiers (two wings of 350 [7]): Elite, Crack, Good, Average
Maj. John Maitland (arriving a very late fifth, if at all)
2nd Battalion, the Light Infantry (one wing of 300 [6]): Elite, Crack, Good, Good
Maj. Gen. James Grant (in reserve at Raritan Landing)
1st Battalion, combined Foot Guards (two wings of 245 [5] each): Elite, Veteran, Good, Average
16th Light Dragoons (detachment) (50 [1]): Line, Veteran, Average, Poor
Maj. Gen. Benjamin Lincoln
8th Pennsylvania Regiment (200 [3]): Line, Veteran, Average, Average
Wyoming Valley militia (200 [3]): Militia, Raw, Contemptible, Poor
1st New Jersey militia (300 [4]): Militia, Raw, Contemptible, Poor
2nd New Jersey militia (300 [4]): Militia, Raw, Contemptible, Poor
Proctor's Company, Pennsylvania Artillery, two sections of two six-pounders) (100)
I've bumped up the American numbers to what they were mid-March when the operation was originally planned by von Ewald (at Cornwallis' direction). And I added one gun, so the Americans could have both the two by the American HQ at Horne's Plantation and two more in the Half Moon Battery.
Maj. Gen. Nathanael Greene (arriving after receiving intelligence that the British were advancing from Brunswick)
This is simply a very crude approximation based on Greene's organization at Brandywine, five months later. The numbers are a guess based on his having
2,500 men at Brandywine. If I can find better organization for mid-April and better numbers,
I'll update them.
Brig. Gen. Peter Muhlenberg
1st Virginia Regiment (200 [3]): Line, Crack, Average, Average
5th Virginia Regiment (250 [3]): Line, Veteran, Average, Average
9th Virginia Regiment (250 [3]): Line, Trained, Average, Average
13th Virginia Regiment (300 [4]): Line, Trained, Poor, Average
The German Battalion (250 [3]): Line, Veteran, Average, Average [not actually part of 1st VA Bde. until May]
Brig. Gen. George Weedon
2nd Virginia Regiment (200 [3]): Line, Crack, Average, Average
6th Virginia Regiment (250 [3]): Line, Veteran, Average, Average
10th Virginia Regiment (250 [3]): Line, Trained, Poor, Average
14th Virginia Regiment (300 [4]): Line, Trained, Poor, Average
Pennsylvania State Regiment of Foot (250 [3]): Line, Veteran, Average, Good ]actually reorganizing until 30 April, probably not available for Bound Brook]
Next time:
The action at Short Hills.
* Rall is criticized for not constructing a redoubt at Trenton. Lincoln's men at Bound Brook had done so, but we see what happens when a force is surprised and greatly outnumbered by an aggressive enemy arriving late at night or early in the morning, fort or no. What Rall should have done (and what Lincoln largely did) was set out more and better pickets and be ready to retire in the face of superior numbers.