Background image is Les Dernières Cartouches (The Last Cartridges) by Alphonse de Neuville
Showing posts with label Normandy '44 (game). Show all posts

Wednesday, June 10, 2015

Commemorating the D Day Landings: Replaying the Normandy Invasion

What Are the Mission Goals?

As we prepare to dive into the German's first player turn, let's review what is driving the two sides' decisions.

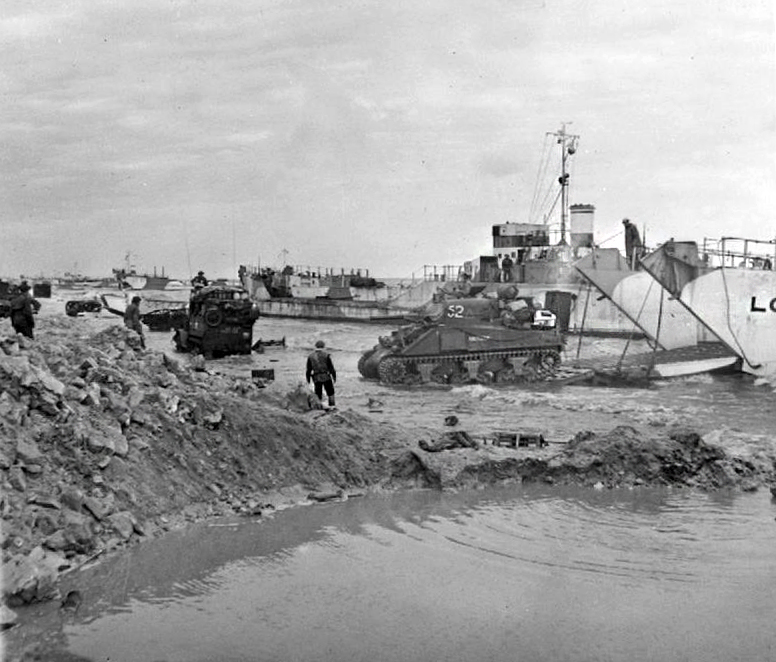
Gold Beach on 7 June 1944. (Wikipedia)
In the same way that the rules for movement and combat in wargames try to drive outcomes that have a credible historical character, the victory conditions for games ("how you win") are designed to drive players towards taking actions that, across the sweep of the game, will reflect the goals that the commanders on each side were striving for. They will generally be defined in terms that can be measured explicitly in the game, but they will be aimed at creating the same pressures that the historical commanders experienced.

The full campaign game of Normandy '44 takes 22 turns, covering the period from June 6th to June 27th. For the purposes of this demo, I'll just be running the seven-turn mini-campaign, which runs through June 12th. There are "automatic victory conditions" for this scenario (ones that award victory to a player as soon as they are fulfilled) that are the same as those for the full campaign. In addition, there are "end game victory conditions", ones that will determine the winner at the end of the game if no automatic victory has taken place.
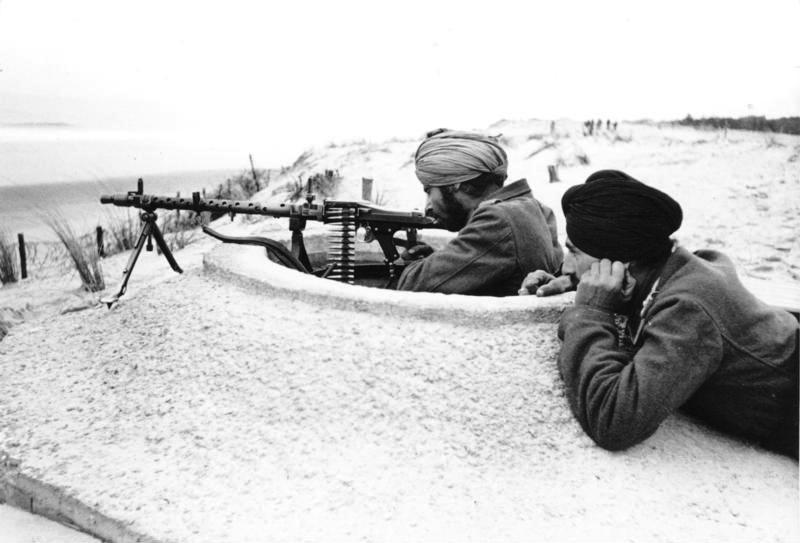
Indian soldiers serving in the German Army, manning a "tobruk" (reinforced foxhole). (Wikipedia)
Automatic Victory

The campaign's automatic VCs reflect the overall goals of the invasion campaign. The Allied armies sought a foothold in Europe, but a foothold that could be expanded to push the Germans out of France and, eventually, force them to surrender unconditionally, as had been agreed at the Casablanca Conference of the Allied leaders in 1943. To that end, they needed not just a lodgment on the French coast, but the ability to drive into the heart of France. So the Allies win the campaign automatically if they have three or more units, in supply, on the east or south edge of the map at the end of a German turn. In other words, a penetration of the German lines so complete that, given a player turn to work with, the Germans cannot displace or isolate enemy units far beyond their at-start frontline and in a position to head towards the French interior.

For the automatic Allied victory, all beaches must be open (i.e., German troops must not recently have been in possession of any of the Allied landing grounds) and all four hexes of the city of Caen must be Allied controlled. This largest city in the landing area lay at the hub of the region's road network. Until Caen was Allied controlled, supplies could not flow forward to forces fighting in the interior.

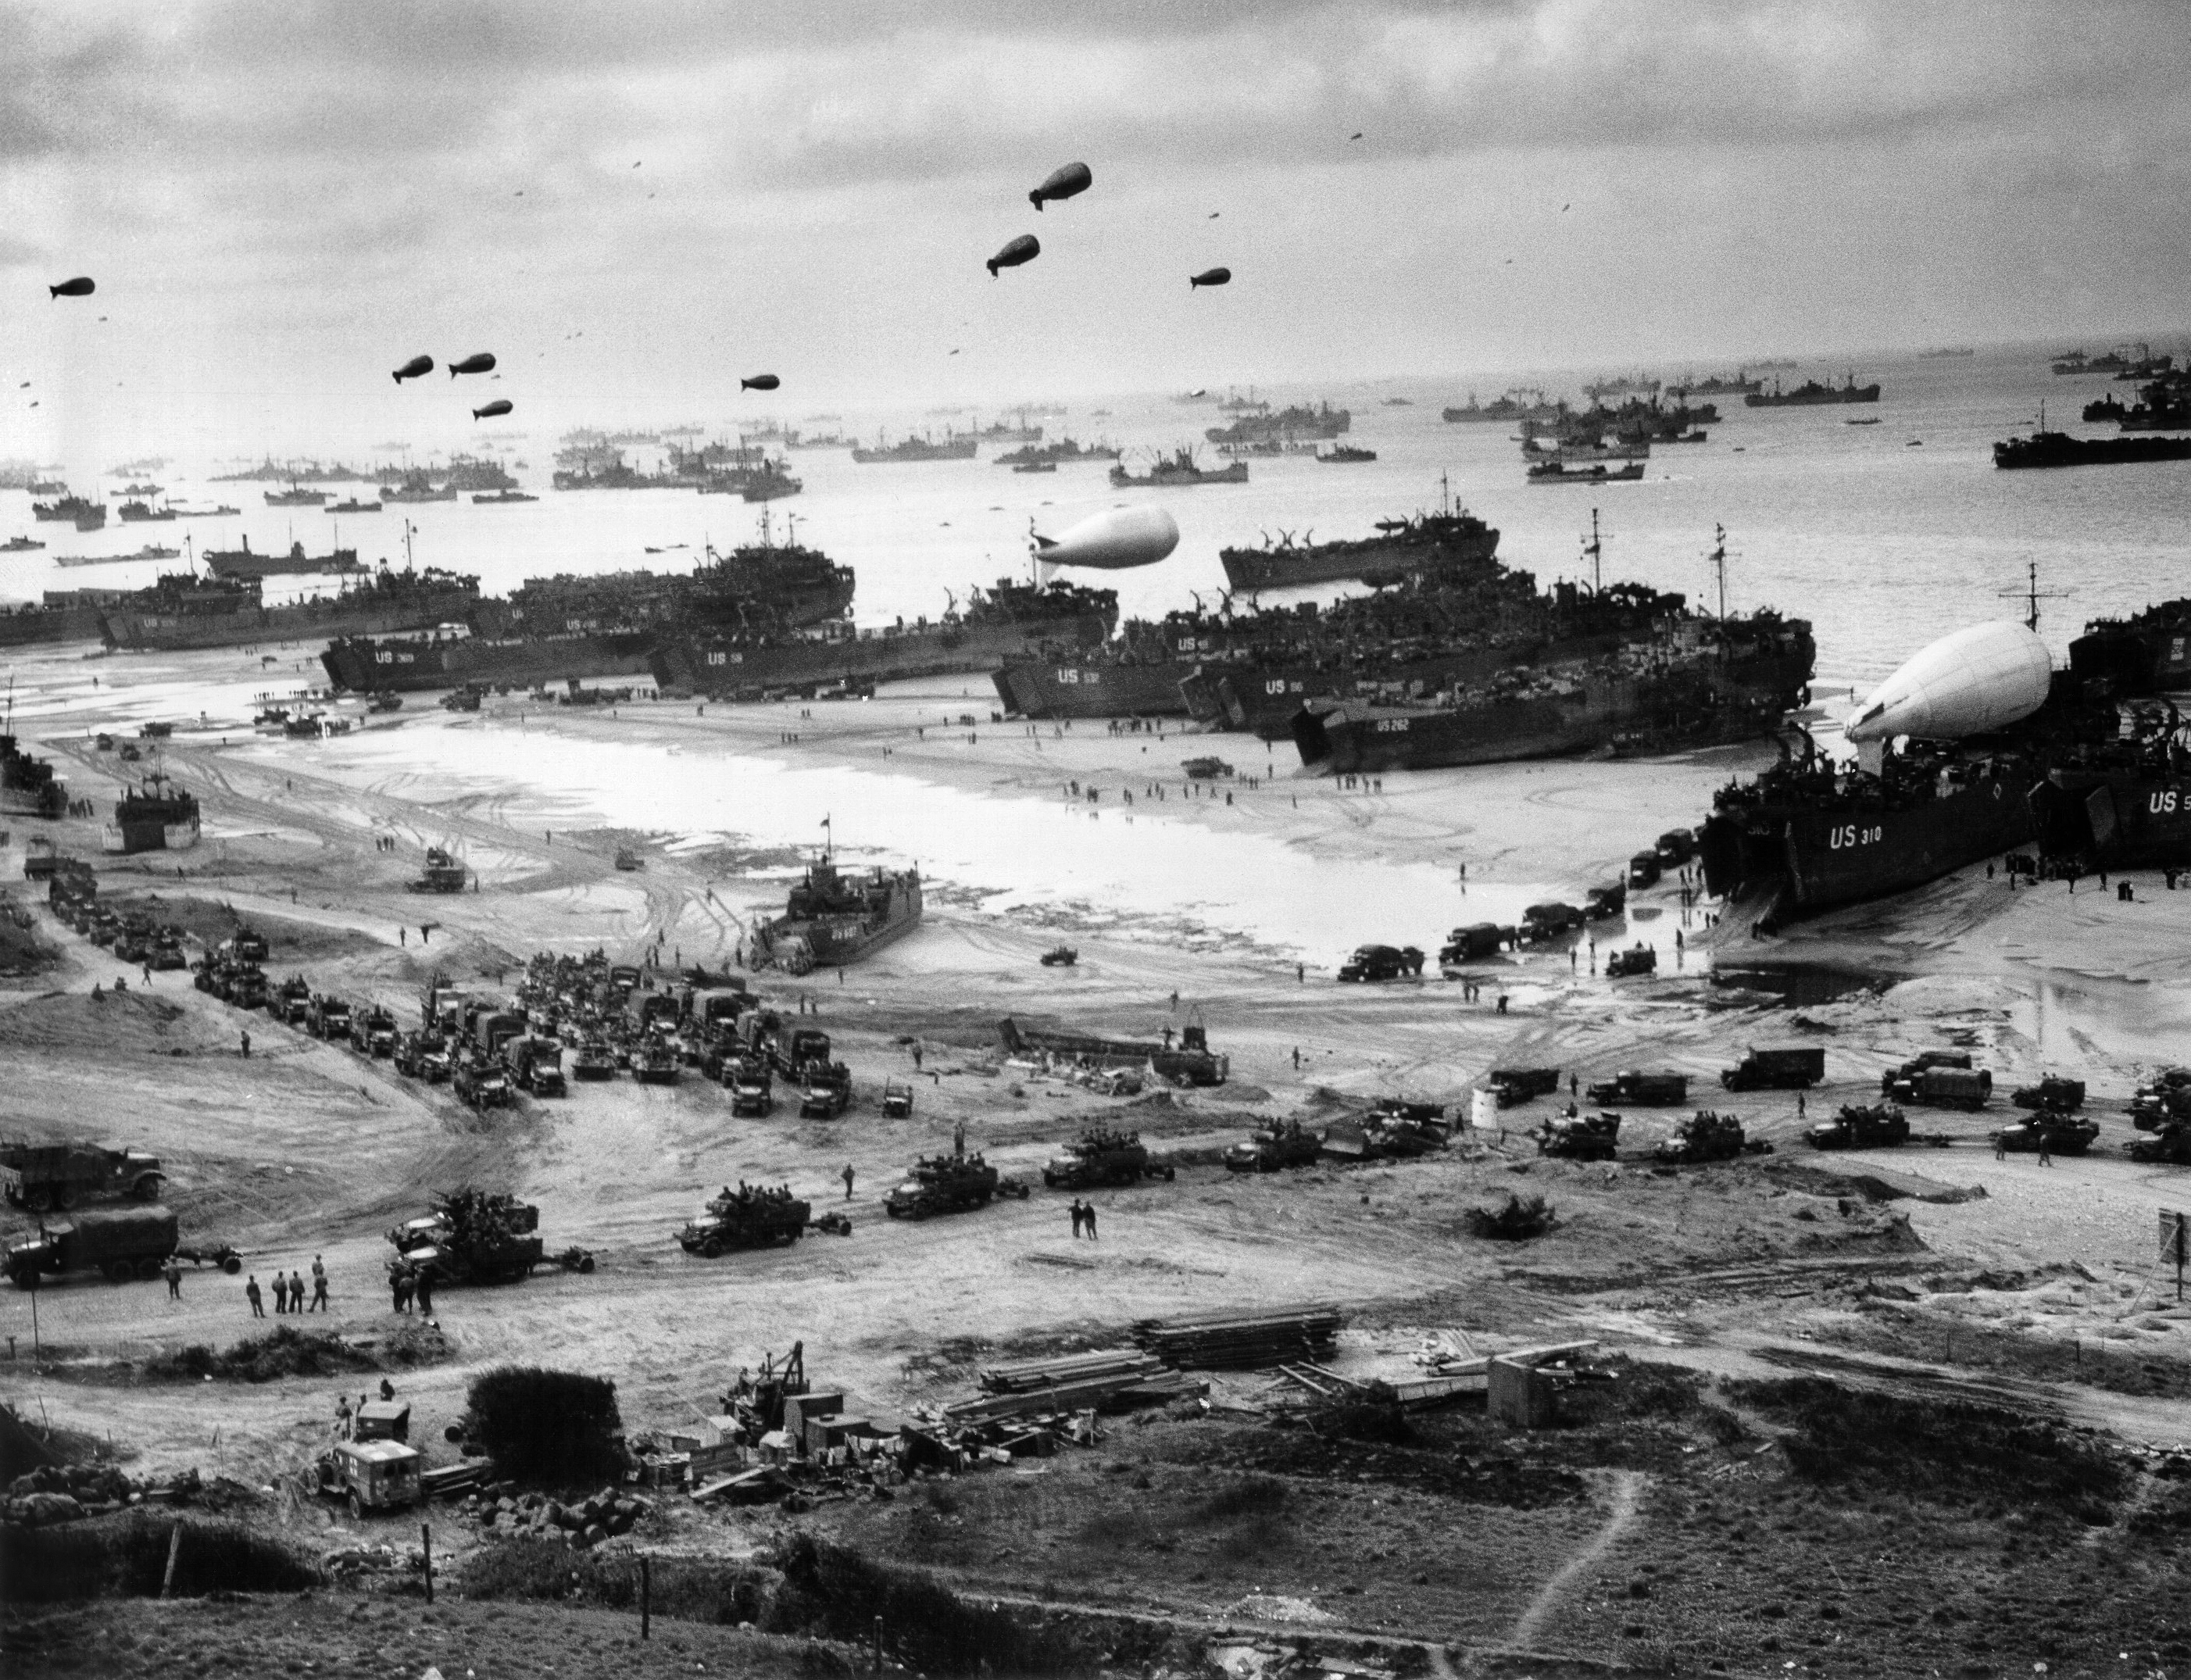
Supplies being landed on Omaha Beach. (Wikipedia)

The Germans, too, have automatic VCs. If they close three or more Allied beaches or Mulberries, or eliminate or reduce seven US three-step units to cadre status, or eliminate or reduce five British three-step units to cadre status, then they win. These events would represent, in the first place, the inability of the Allies to reinforce and supply their invasion force or, in the second and third cases, such a devastating loss of manpower that Allied morale would plummet.

End Game Victory

Should none of these decisive outcomes arise, at the end of the seven-turn mini-campaign the Allied player counts up victory points (VPs); if she/he has 14, the Allies have won. Otherwise, victory goes to the Germans. The Allies are awarded VPs for controlling the Allied drop zones, for linking up the US and UK beaches (defined as having a clear road from Juno Beach to St Mere Eglise obstructed by no German units or ZOCs not occupied by Allied troops), for controlling the city of Bayeux, and for each hex of city or town outside the Allied Naval Bombardment zone. They lose points for closed beaches.

Essentially, this requires the Allies (who will never get an auto victory in seven turns) to seize and hold their beach objectives and push far enough inland to link up the US and the UK forces. If they protect the beaches (don't lose VP), hold all the airborne drop zones (9 VP), fulfill the link-up conditions (3VP) and control Bayeux (2 VP), they can get the 14 VPs they need to win.

Tuesday, June 9, 2015

Commemorating the D Day Landings: Replaying the Normandy Invasion

D Day: The Amphibious Landings

Allied ground forces were slated to land on a series of five "beaches" (actually sections of three separate areas of beachfront on the Norman coast). The invasion force for each named beach had specific units, specific conditions to land under, specific goals to achieve, and an overall mission to accomplish.

The US Beaches

Utah Beach, on the east side of the Cotentin Peninsula, would receive the US 4th Infantry Division, with support form the 70th Tank Battalion, 18 warships of the combined Allied fleet, and 300 B-26 bombers of IX Bomber Command. Landing inland from the beach were the 82nd and 101st Airborne Divisions; they would try to ensure that the critical causeways leading inland from the beaches through flooded ground were secured. In addition, they would block German counterattacks and attempts to relieve the defenders of the immediate beach area.
American troops landing on Utah Beach. (Wikipedia)
In the event, currents pushed the first wave of landing craft south along the coast from their intended destination. The general officer accompanying the first wave decided that this area actually looked more suitable for landing than the planned beach and directed that follow-on forces reinforce this position. Enemy resistance was relatively light, so engineers and specially equipped tanks began clearing obstacles while infantry and armor began pressing inland to link up with the airborne troops. Fewer than 200 men were killed or wounded in the landings at Utah.

Omaha, known afterwards as Bloody Omaha, was a different matter. The terrain was more defensible in this area than at Utah; allied bombers and naval gunfire did much less damage to the defenses; and German forces that the Americans expected to encounter further inland proved to have been shifted forward to supplement the first line of defense.

Six battalions of infantry and two of tanks constituted the first wave. While the tanks had been fitted with flotation equipment to be amphibious, the strong waves in the area that morning swamped many of them before they got to shore, and later groups, brought closer to shore before being landed, were knocked out by German guns as soon as they began maneuvering on the beach. Infantry and engineers were swept away from their assigned landing zones, as at Utah; but at Omaha, this simply caused confusion and gridlock, as fresh troops landed in areas already filled with men and machines (some destroyed, some functioning). Eventually troops on the beach regrouped and fought their way through the German defenses, but not before taking nearly 3,000 casualties.

Between Utah and Omaha Beaches were the bluffs of Pointe du Hoc, a 100 foot cliff topped by heavy concrete casements for 155mm cannon that posed a serious threat to the Utah and Omaha landing forces. The initial force of three Ranger companies landed, scaled the cliffs under covering fire from US and UK destroyers, and captured the casements. The guns, which had been removed, were found nearby and neutralized. An additional force of Rangers, originally held as a reserve in case the initial force could not capture the guns, was diverted to Omaha Beach, where it proved of great value in effecting the breakout.

The Commonwealth Beaches

The British 50th Infantry Division and 8th Armoured Brigade encountered fierce resistance at Gold Beach. Most of the beach area ran up to rocky cliffs; only about a quarter of the broad stretch of sand proved practical as a landing zone. Supported by bombers and gunfire from Royal Navy cruisers, the British forces still found it difficult to make progress in the face of well-positioned artillery pieces in strong bunkers and German troops well fortified in towns near the beach. Only after heavy fighting and the arrival of tanks delayed by rough seas were British troops able to move off the beaches and begin linking up with their allies. Arromanches, one of the British objectives, was captured in the afternoon, but Bayeux and Port-en-Bessin, the other objectives, were not captured until June 7th.

Royal Canadian Navy Commandos on Mike sector of Juno Beach. (Wikipedia)
East of Gold along the same stretch of shoreline was Juno Beach, the responsibility of the 3rd Canadian Infantry Division. Bombers of the Royal Canadian Air Force proved less than effective at knocking out German beach defenses, but direct attacks by rocket-armed Hawker Typhoon aircraft and bombardment by Canadian, British, and French warships proved more effective.

Again, rough seas and high tides prevented armoured forces from providing as much support to infantry landings as planners had hoped they would. And as at Omaha, slow progress by first-wave troops created traffic jams as later waves arrived on the crowded beaches. Nonetheless, by the end of the day, though they had not captured all of their objectives (Carpiquet Airfield outside Caen was still under Axis control), Canadian forces had advanced further inland than any other Allied troops.

Like Gold Beach, much of Sword Beach's nominal expanse was obstructed, in this case by shallow reefs just off the shoreline. The British 3rd Infantry Division stormed ashore supported by the 27th Armoured Brigade and the 1st Special Service Brigade (Royal Marine Commandos). While Omaha, Gold, and Juno had been defended both by the German 352nd Infantry Division, a regular line infantry unit at full strength, Sword was defended only by the 716th Static Division, an understrength unit made up of reservists and non-German conscripts. One regiment of the 716th had been detached to support the 352nd, leaving only a single infantry regiment and an artillery regiment.

However, behind Sword in the city of Caen (one of the 3rd Division's objectives) was the 21st Panzer Division, the only German armoured unit that participated in the fighting on D Day. Though the Germans were not able to drive the British back into the sea, they did penetrate at one point as far as one section of the landing beaches. The attack prevented the British at Sword from linking up with Juno's Canadians, and it prevented the British from achieving their goal of capturing or even fully screening the city of Caen.

Normandy '44 Replay

Like the airborne landings, the beach landings are resolved using a series of die rolls. In each beach landing hex, the Allied player rolls for the assault troops and, separately, for any of the amphibious (Duplex Drive or DD) armoured units slated for that beach. At Utah Beach and Sword Beach there is one assault beach each; likewise there is one attack at Pointe du Hoc; at Omaha, Sword, and Juno, there are two assault beaches each.

Since the initial landing forces and beach defenders are set and the supporting air and naval forces are assumed to be operating according to the invasion plan, the only factor other than Fate that determines the outcome is which landing point is being attacked. In every case but one, the defenders will be eliminated--the question is how much damage will they inflict on the attacker. Utah Beach has the least chance of the attacker taking damage. Omaha Beach is the exception; a very unlucky attacker there can take losses, do no damage to the enemy, and be forced to make another landing attempt.

So, working from west to east:

Utah Beach: 4, A1/D1, Adv 2. US troops take one step loss but get to advance past the beach into the hinterland. DD Tanks: 1, -1 step. The surf is heavy...

Pointe du Hoc: 6, D1, Adv 2. The Rangers scale the cliffs and easily overrun the battery, moving inland. 5th Rangers: 1, the 5th Battalion land with their Ranger brothers at Pointe du Hoc.

Omaha, Charlie and Dog Beaches: 4, A1/D1, Adv 1. Some losses, but not as bad as it could be. DD Tanks; 6, NE. Tanks swim ashore.

Omaha, Easy and Fox Beaches: 4, A1/D1, Adv 1. The invasion is not as brutal as some officers had feared... DD Tanks: 3, -1 step.

Gold, Jig Beach: 4, A1/D1, Adv 1. The Dorsets and Hampshires make it to land. DD Tanks: 3, -1 step.

Gold, King Beach: 4, A1/D1, Adv 1. I'm waiting for the other shoe to drop. DD Tanks: 6, NE. The waves seem to have died down.

Juno, Mike Beach: 6, D1, Adv 2. The Royal Winnipeg Rifles storm ashore to find RCAF rockets have cleared most of the pillboxes on the beach. DD Tanks: 3, -1 step. The 1st Hussars lose some brave lads.

Juno, Nan Beach: 5, A1/D1, Adv 2. The Canadians are living up to their historical record of making the biggest gains on the first day. DD Tanks: 3, -1 step. An 88mm emplacement near Bernières takes out several tanks of the Fort Garry Horse.

Sword, Queen Beach: D1, Adv 2. Lion sur Mer is full of Yorkshiremen. DD Tanks: 3, -1 step. Choppy seas swamp some 13th/18th Hussars Shermans.

That's tremendously better results than the historical landings. The Allies are ashore with a firm foothold here. Let's see what Jerry does next.

The game after the airborne and beach landings.
Next: German Turn 1. Some restriction of German movement: German Ost units (made up of conscripts and volunteers from USSR territories), some units of the 711th Division (the defenders of the Cabourg/Deauville area), and the units of the Cherbourg garrison cannot move on Turn 1, and the 21st Panzer Division has reduced movement on that turn.


Monday, June 8, 2015

Commemorating the D Day Landings: Replaying the Normandy Invasion

D Day: The Airborne Landings

Gen. Eisenhower addresses US paratroopers of Co. E, 502nd PIR prior to D-Day. (Wikipedia)
The first troops of the Allied armies to arrive in France were pathfinders, small parties of paratroopers sent ahead of the main forces to set up radio and visual beacons to guide the main parachute formations to their drop zones. Both in the US and the UK drop zones, however, pathfinders had difficulties that led to poor performance of their principal mission. Some teams were
dropped in the wrong locations. Others lost their way and set up far from their intended landing zones. Some teams lost critical equipment when planes carrying it developed mechanical problems and crash landed without reaching Normandy. Others dared not light their visual beacons (without which their radio transponders were almost useless) because German troops nearby would be alerted to their presence and ambush the paratroops as they dropped. In one instance, a British pathfinder team suffered perhaps the worse fate of all; waiting to guide paratroops to land near the Merville Battery, they were bombed by RAF aircraft trying to damage the battery ahead of the paradrop.

British pathfinders synchronize watches. (Wikipedia)
Problems continued as the airborne operations went forward. Transports carrying the main forces were plagued by the same poor visibility and navigational problems that had caused some pilots to drop their pathfinder passengers in the wrong locations. Those aircraft searching for the signals of pathfinders who had lost their equipment or who had set up in the wrong position were baffled. German anti-aircraft guns had begun firing by this point, destroying and damaging planes and causing others to veer off course or accelerate beyond the speed at which it was safe to deploy parachutists. Some "chalks" of paratroopers jumped too soon, landing short of their drop zones, while others jumped too slowly, burdened by heavy equipment, and were spread far apart. Some aircraft switched on their emergency transponders, identical to the transponders used by the pathfinders, further confusing other pilots.

British paratroops and commandos in Normandy. (Wikipedia)

As a result, many American and British paratroops landed far from their intended drop zones. Individual units often found themselves scattered widely over the Norman countryside, much of it flooded by the Germans in anticipation of an Allied assault. Nearly half of one American regiment landed on the far side of the flooded Merderet River and contributed little to the division's mission on D Day. One British battalion commander took three hours to assemble a force that amounted to less than half of his unit.

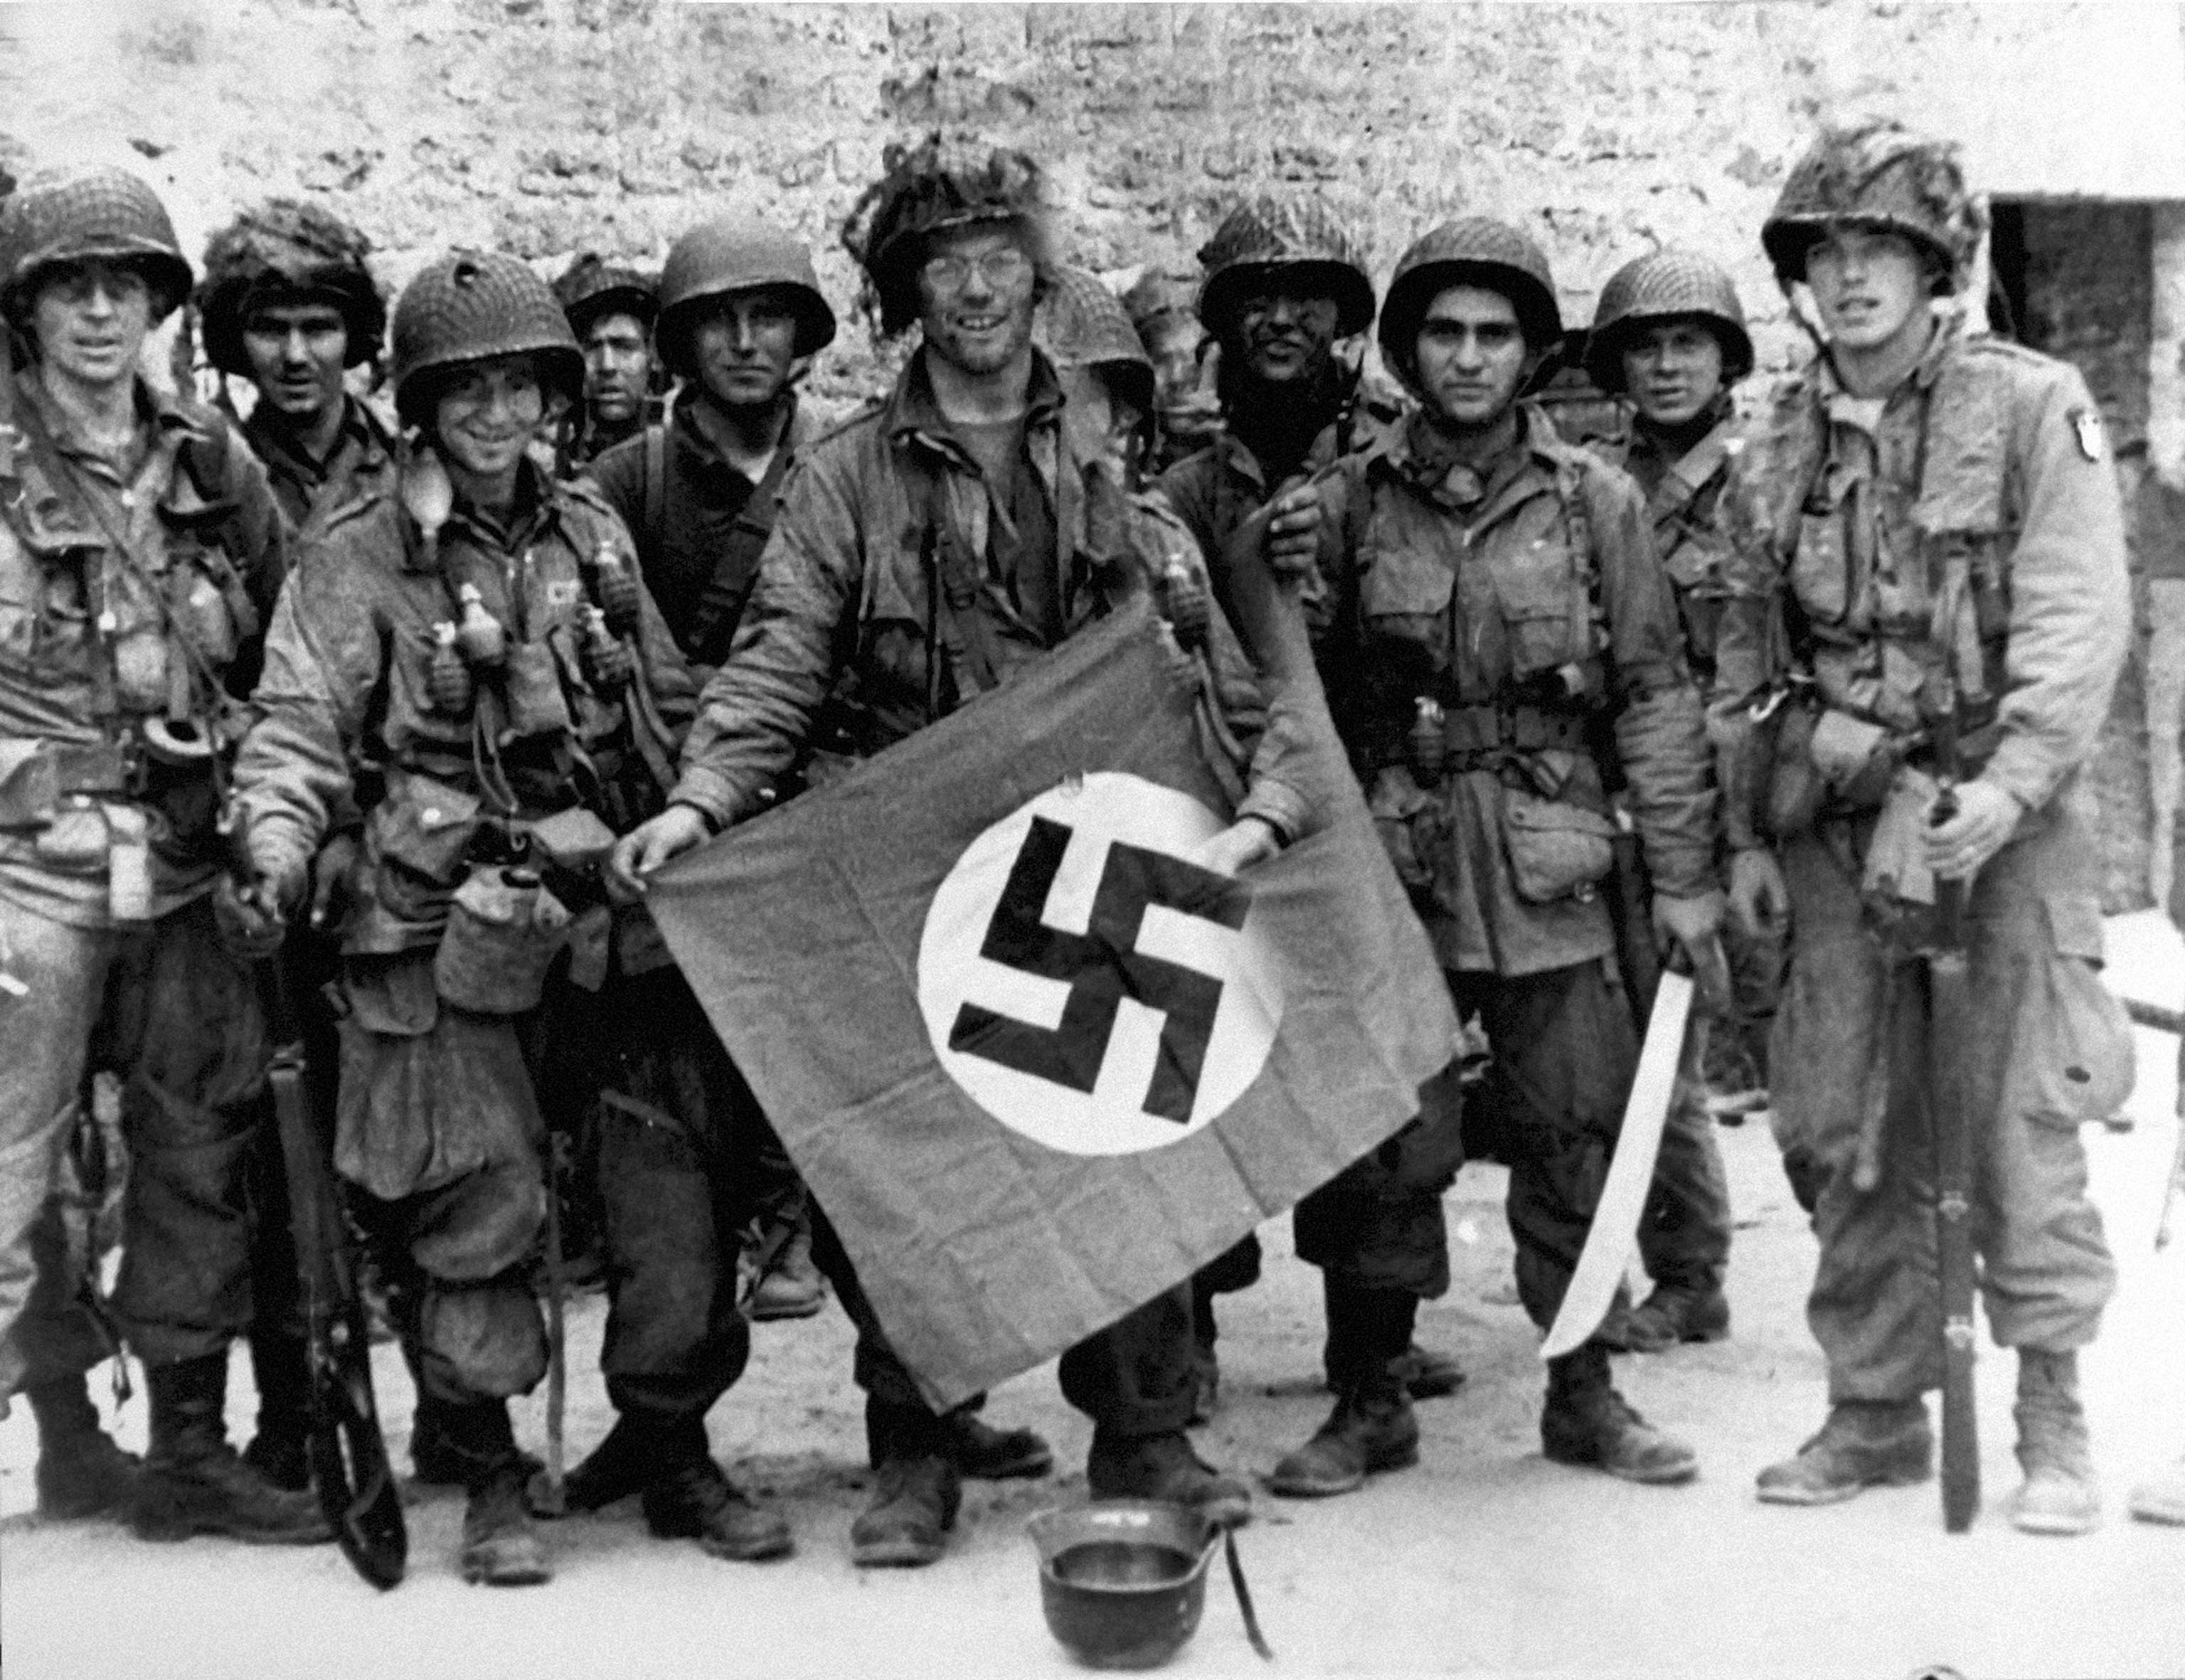
Troops of the 101st Division with a souvenir--a Nazi flag used for air identification. (Wikipedia)

Nevertheless, the US 82nd and 101st and UK 6th Airborne Divisions accomplished almost all of their D Day missions. The British 6th Airborne seized the Caen Canal and Ourne River Bridges and captured the German battery at Merville (although the battalion that assaulted the latter had only about a quarter of its men assembled when they attacked). Mission Albany, the 101st Airborne's attempt to seize the exits from Utah beach and disrupt German forces attempting to counterattack the landings, was mostly accomplished. Mission Boston, the 82nd Airborne's plan to seize Ste. Mere Eglise and establish blocking positions to protect the beachheads from German attacks, also succeeded, with the "All American" holding the pivotal town and establishing fields of fire over the Merderet crossings.

Normandy '44 Replay

In our battle for Normandy, each of the Allied units arriving by air rolls a die to see how badly they are disrupted by the weather, German flak, equipment failure, human error, and other problems. Results can include "no effect" (perfect landing), "scattered", and the possible loss of one or two steps.

Steps represent damage to the combat ability of the unit; some units have only one step, while others have two or even three steps. Each unit is rated for its ability to move, to fight, and an overall quality rating; when it loses a step, those ratings are reduced. Losing a step could represent casualties, a loss of morale, depletion of ammunition, destruction of critical equipment, or a combination of all these factors. Under some conditions, steps can be added back as replacements bring up the strength of depleted units, more ammunition and equipment are brought forward, and morale improves.

Each division had different challenges to contend with, so each has it's own column to roll on for losses. The British 6th Airborne units, dropping mostly into open terrain not affected by the flooding and close to the coast, has the best chance of arriving unharmed. The units of the 82nd, landing much further from the coast in densely hedged and wooded farm country along the flooded banks of the Merderet River, have the worst table. That of the 101st is of medium grimness.

In our game, the 82nd has problems with its drop. The 507th Parachute Infantry Regiment (PIR) is scattered and takes two step losses. One of these goes into the airborne replacement pool; it represents men who have just become temporarily separated from their units and will rejoin them later. The 505th PIR does better: scattered, but only one step lost (this also becomes a replacement). And the 508th is golden--they take no losses and arrive intact. The two scattered regiments cannot move or attack, accrue replacements, or dig in effectively. But they can defend at full strength, and they will recover after the first full Allied turn is complete.

The 101st likewise has a mixed bag of results. the 506th PIR lands without a hitch, but the 501st and 502nd both become scattered and each takes a step loss.


The British, with their usual sang-froid, roll two 5s and a 6; not even a button out of place, their troops assemble quickly and quietly in the drop zones to carry out a bloody night's work.


Next time: The main beach landings and the drama of the Rangers at Pointe Du Hoc.

Sunday, June 7, 2015

Commemorating the D Day Landings: Normandy '44 and setting the scene.

Being a historian, I feel a connection to dates, times, places that have historic meaning. As a military historian, I feel that connection especially when it comes time to recall and commemorate the great battles of the past. And as a wargamer, I find that exploring those events through games, seeing and understanding the factors that framed those events, the choices that commanders had, and the decisions that they made an especially satisfying way to get closer to those events.

Two of the most momentous events of Western military history occur in June. One is the last string of battles of France's First Empire, often called The Hundred Days (after the time that elapsed between Napoleon I's flight from Elba to his surrender and exile) but which consisted of a brief campaign starting when the French Army crossed the Belgian frontier on 15 June 1815 and reaching its crescendo a mere three days later at the battle of Waterloo on 18 June.

But nearly 130 years later, an army even more massive sat waiting for a battle even more decisive, the battle that would open the American, British, and French campaign to liberate Europe from the armies of Nazi Germany. Trained, organized, and expectant, the Allied armies sat in Britain, waiting for an opportunity to cross the narrow sea to France. If their landings were defeated, their campaign would be as short as Napoleon's, and their defeat might be as bitter. Even if the landings were successful, they would just be the first in a long series of bitter battles before success could be achieved. Originally called Operation Overlord, these landings, which began on the night of 5 June and continued throughout the day of 6 June 1944, have become famous simply as D Day.

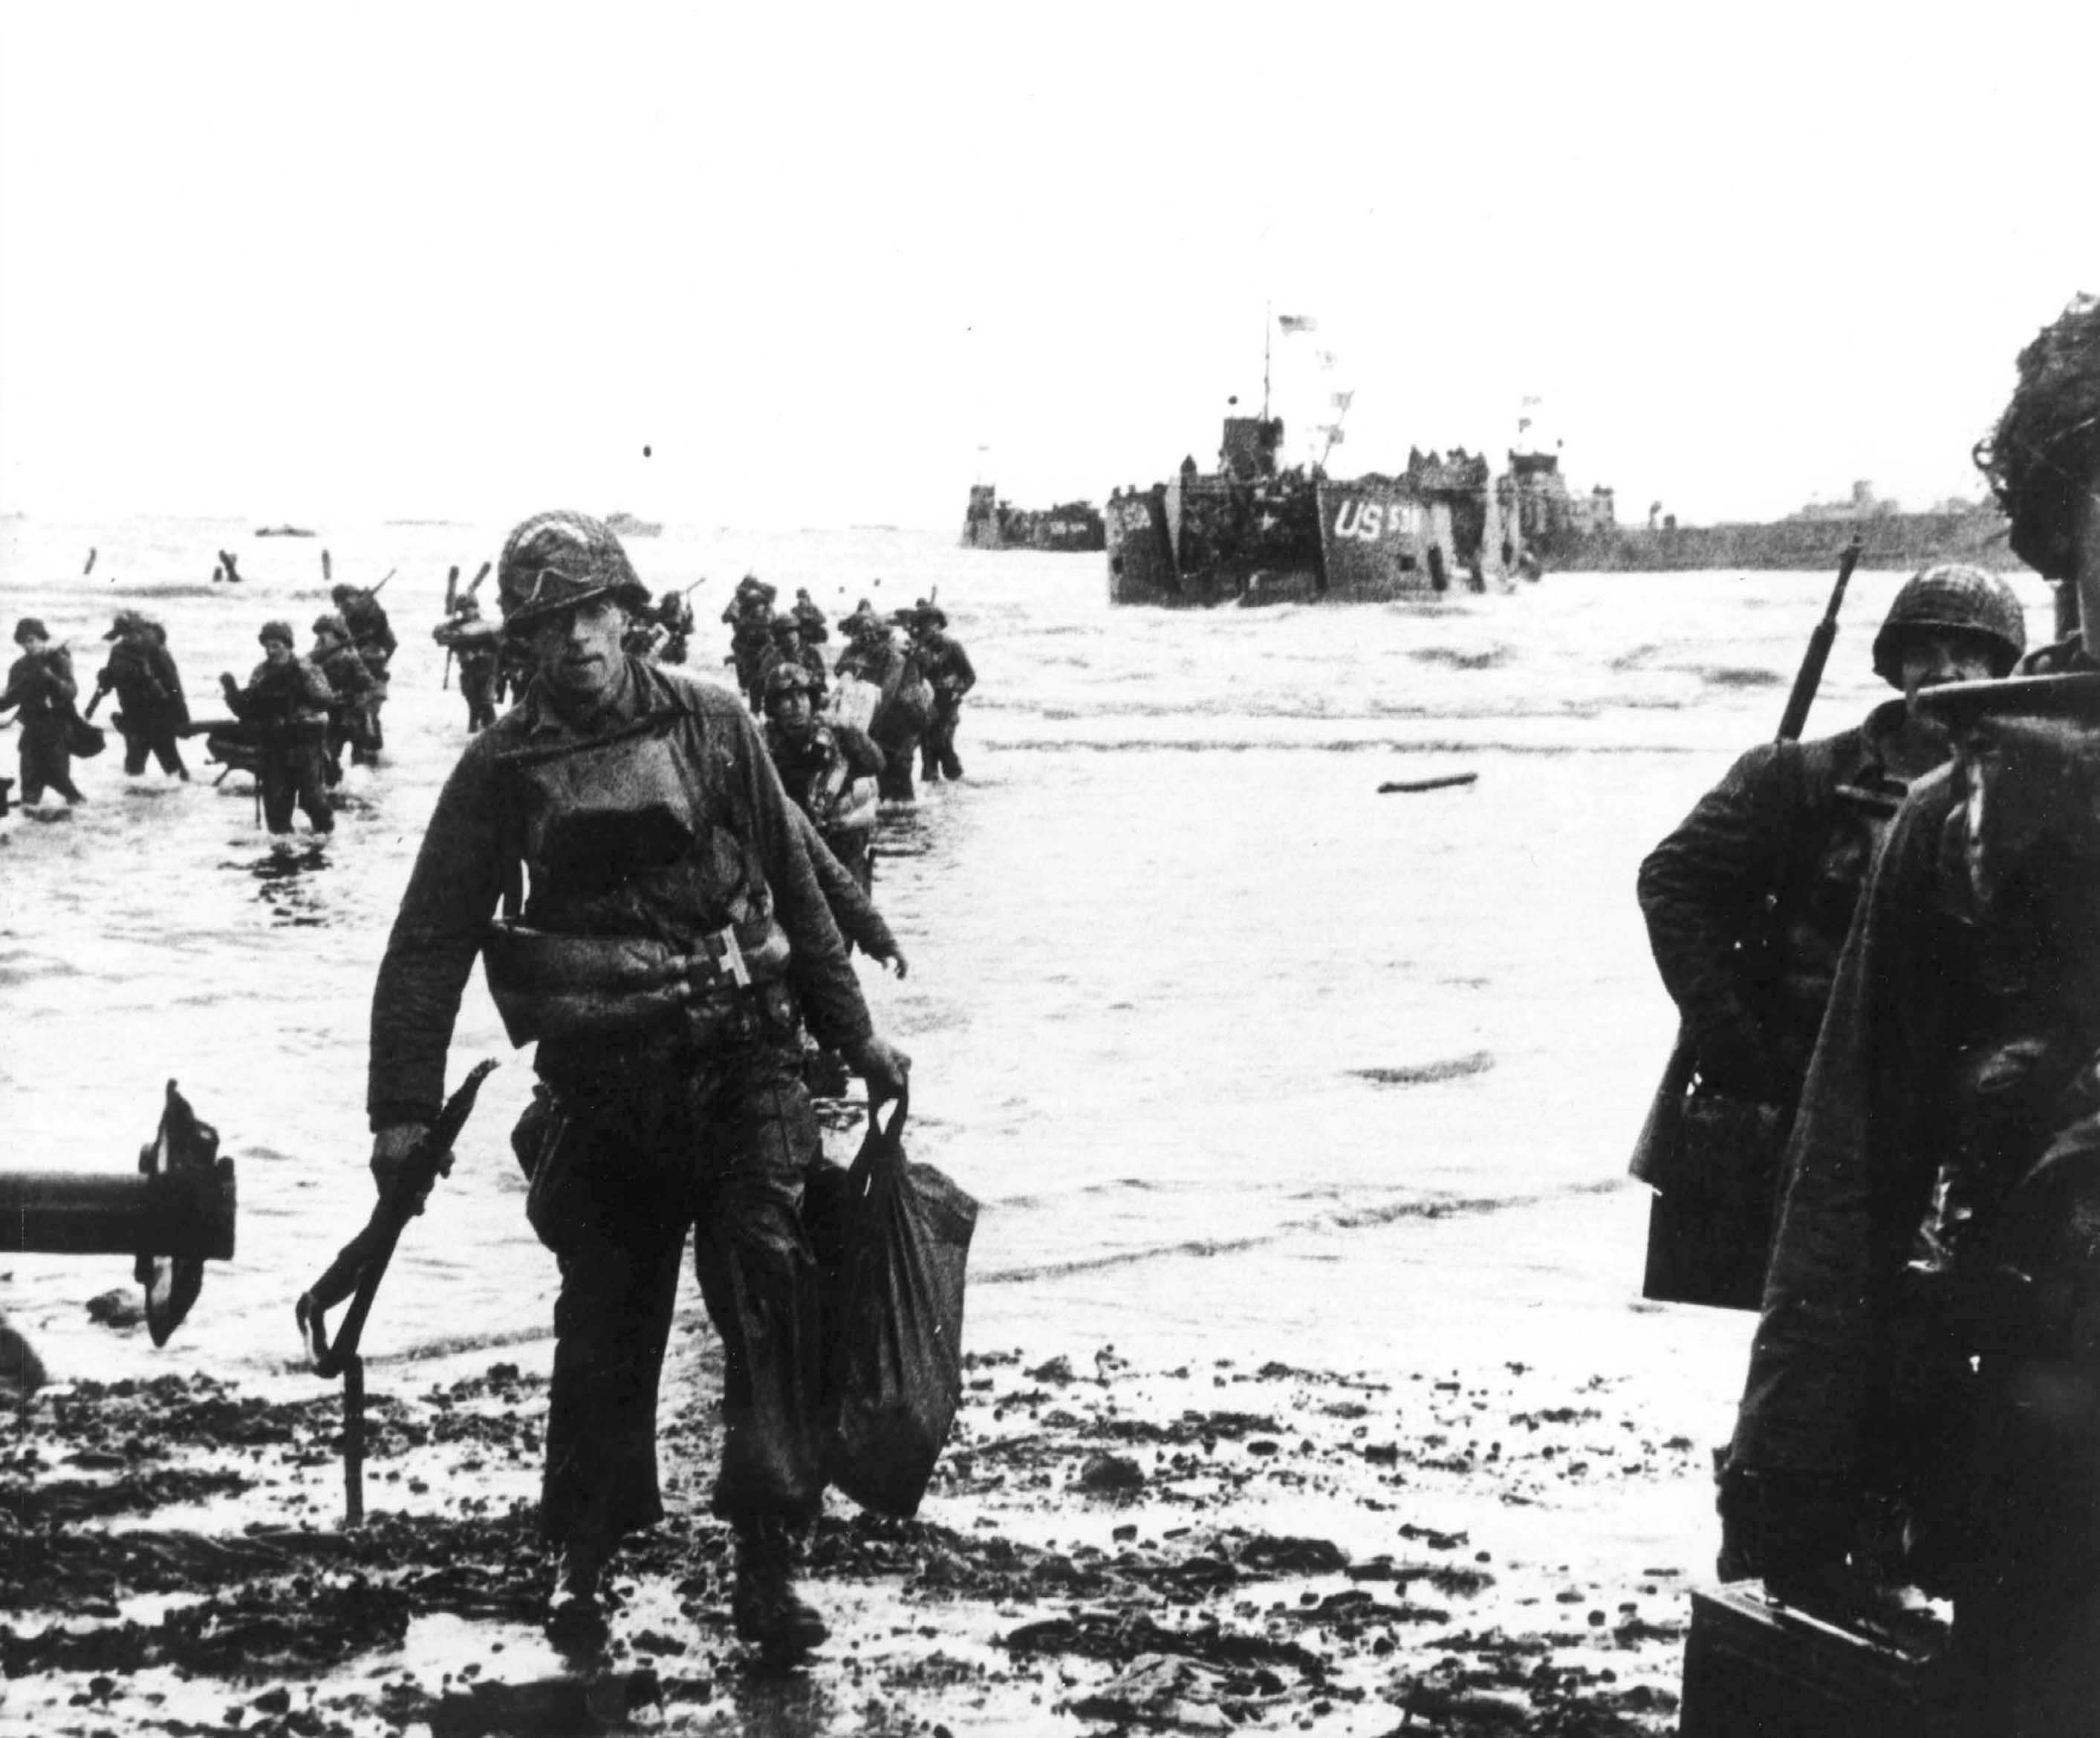
"Into the Jaws of Death" by Chief Photographer's Mate Robert F. Sargeant,
one of the most famous photographs of the D Day operation.

Allied troops had landed in Sicily, captured Corsica, and landed in Italy. But German forces in the Italian peninsula had proved tough defenders, and ultimately the Alps would prevent American and British armies from liberating Europe from the south. Armies must be landed in France, and invading northern France would allow the Allies to use Great Britain as their training ground, jumping-off point, and depot. But where in northern France should they land?

As this map shows, the two obvious locations were the Pas de Calais, where France and England stood closest, and Normandy, the next stretch of coastline to the south and west. North of Calais stood the Dutch and Belgian shore, an area of mudflats, marshes, and tidal estuaries, a chancy place to land and difficult to drive out from after landing forces had established themselves. Brittany, the long peninsula to the west of Normandy, was a rocky shore, hard to land on and, with its limited road and rail infrastructure, too easily isolated from the rest of France.


While Calais was closer to Allied troops across the Channel, Allied planners in the end felt it was too obvious a choice. It would be better defended; it was closer to Germany, so its defenders could be more easily reinforced; and its air defenses, being on the route between Alllied airfields and Germany's industrial heartland, made it less likely that American and British aircraft would be able to establish the air superiority over the landing beaches that planners believed essential to a successful invasion. So, while strong intelligence efforts were mounted to convince Germany that Calais was the Allies' goal, planning proceeded on seizing Normandy.

Many wargames have been published on this campaign. For illustration, I'll be using one, GMT Games's Normandy '44. It's an excellent game of medium complexity and medium size. Normandy '44 has the added benefit that the publishers have kindly allowed a VASSAL module to be created for it which allows me to play through the campaign and share screenshots of the maps as I go. Here's an overview of the map, with some notes about operational and strategic considerations that motivated Allied planners.


The map shows the game's basic setup for the Normandy campaign. German counters (mostly in shades of grey) are shown defending the beaches and waiting in reserve throughout the area "behind" (inland from) the beaches. Some US (green) and UK (brown) airborne troops are shown where they are slated to land on the night of 5/6 June. Other US and UK forces and the warships supporting them are shown offshore, with arrows pointing toward their landing areas.

Not explicitly shown are the air forces. The Allies bombed the Normandy area heavily before and during the invasion, seeking as much to damage and interdict German reserve forces that could be used to reinforce the defenders as to attack the actual defensive fortifications. These efforts are for the most part represented in an abstract way by increasing the movement costs for German units in good weather (when aircraft would be most active) and by limiting what reinforcements are available. Once Allied forces got ashore, they began organizing close air support operations, and these are represented in later turns by close air support rules that aid Allied ground forces in combat and inflict limited losses on high-value German units. Some Luftwaffe units were available to counter ground-support aircraft, and these are reflected by modifiers to the Allied air support.

The map shows the critical strategic terrain of major towns and cities in the region and the road network linking them. Cherbourg, at the north end of the Cotentin peninsula, was an especially important Allied goal; it was a large deep-water port, essential to quickly bringing supplies in to the Allied armies. Le Havre, to the east, was another, but it was thought to difficult to capture quickly and intact. Giant artificial harbours were constructed (codenamed "Mulberries") that would serve until Cherbourg could be captured. Once supplies landed, they had to be brought forward to the fighting forces; clear roads and bridges would be needed for that. And the fighting forces themselves would need roads and bridges to move deeper into France, towards Paris (an important political goal) and towards Germany (the long-term military goal).

So US forces were aimed at two sets of beaches: one, codenamed Utah, would receive forces intended for the capture of Cherbourg. Another set, named Omaha, would be the landing area for troops headed inland to seize the road juncture of St. Lo. Elite Ranger units would be sent in to Pointe du Hoc, between Utah and Omaha, to neutralize powerful guns mounted there which might damage Allied naval forces.


The beach at Utah, though a good landing zone, could be isolated from the towns inland by the marshy areas, so the causeways leading out of the beach area had to be seized. And the crossings over the Merderet River had to be secured to prevent German counterattacks from bottling up American forces at Utah Beach. These tasks were given to the US airborne forces.


Meanwhile, to the east, Commonwealth forces were given three beaches of their own. Gold and Juno would be attacked by British and Canadian forces respectively. These troops would move inland, linking up with the US troops through the city of Bayeux to the west and beginning operations to take the city of Caen, which could serve as a major air staging area once it was secured.


Further east, British and Free French special forces and British infantry and armour would secure Sword Beach, including the resort town of Ouistreham. Flowing into the sea at Ouistreham was the Ourne River, which would could serve as a strong defensive barrier on the Allied flank, if needed,

But in order to prevent the Germans from using it likewise as a strong blocking line, British paratroops and glider-borne infantry would be landed east of the river to control the crossing points of the Ourne and of the Caen Canal that flowed parallel to it. Additional troops were dropped to secure another battery of heavy guns, at Merville, that threatened the Allied fleet.


Thus, the stage is set for the invasion. The game does not concern itself with the deception operations at Calais or with the naval operation that gets the landing forces to the Norman coast. A special series of actions on Turn 1 determines the extent to which the airborne forces land safely and achieve their initial objectives and the degree to which the Allied amphibious operations successfully defeat German beach defenses (and the vagaries of time, tide, and pre-GPS navigation) and deliver troops to (and hopefully off of) the invasion beaches.

Next time: The Turn 1 Special Invasion Operations.