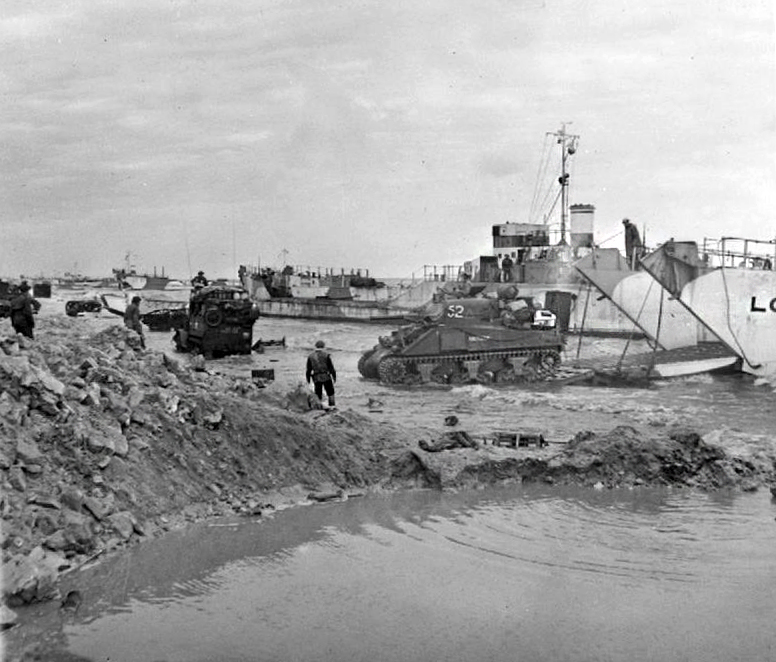
Background image is Les Dernières Cartouches (The Last Cartridges) by Alphonse de Neuville
Showing posts with label board wargaming. Show all posts

Monday, January 11, 2016

Starting Off the New Year with a Bang!: Ukraine '43


Well, that was vastly frustrating. I'd written up a long, detailed post on the playing that my friend Mr Invisible and I had started recently of GMT's Ukraine '43. Than I mis-keyed and deleted the whole damn thing.

*sigh*

We took advantage of a brief lull in his work-related travel schedule to get a coupel of games in. I've mentioned our playing of Rebel Raiders. The second GMT title we broke out was Ukraine '43. I'd owned the first edition for some time without playing it; he had recently gotten the second edition, so that was the one we set up.

Having set up and played through the opening of sister-game Normandy '44, I had some familiarity with some of the concepts common to these games: multiple flavours of movement (normal, extended, Tactical, Strategic), ZOC bonds, combat shifts, disruption, determined defense... But there is something new in each of these titles, always something that makes the specific campaign different (plus Mr Simonitch keeps refining the system).

Our set up. (Morning coffee giving way to afternoon beer.)
Having read a lot of the comments on BGG, I was expecting to have a very bloody game on my hands as the Soviet player. Perhaps I was merely too cautious, but I never had huge Red Army dead piles. But I also didn't see the huge breakthroughs that I've seen described. The Germans in the hills east of Stalino were too tough for serious attacks given what I had there, though a better setup once I sussed the game better might have helped. North of Stalino the river line was like adamant--no way I was going to penetrate that! I finally got some traction through the woods and rivers east of Kharkov after several turns, but only after pulling off most of my mechanized troops from the fronts south of there.

The Soviet steamroller lumbers into action.
I did manage to create some holes in the German line north and west of Kharkov, seizing a couple of VP in the process. But he was able to pull his own mech forces north and, with the aid of the horrifying Gross Deutschland mechanized division, he was putting together a defense that stood a good chance to contain my forces unless I came up with some magic.

Killing units is remarkably hard in this game. Time and again, I was able to surround units, either partly or fully, only to see them hang on stubbornly against my attacks until their friends were able to break through to them. Even boxing a unit up with ZOC bonds wasn't enough to cut it off and destroy it utterly in most cases. With armour shifts and more airpower and elite force bonuses, he broke though time and time again and pulled his metaphorical chestnuts out of the figurative fire.

We played only the first three (or was it four?) turns of the scenario's seven before we had to call it a day. But I do look forward to a rematch and to playing more of the related games from Mr Simonitch's stable.

Zhukov begins making holes, but too few and too small.

Thursday, December 24, 2015

Christmas Eve: Best Wishes and Battles


The bitter battle of Lund, 1757.
I was idly speculating about what game I might pull out if I had some spare time to do a little solitaire play over the holiday. I had gone a fair way down this road until I realised that, as I'm not taking any time off work for Christmas (other than the Christmas Day I am kindly granted by my employer), and since family will be in town after The Day for a visit, the chances that I'll have any such time are minimal. Still, since I'd thought about it, the brainpower might aw well not go to waste, so I thought a blog post might be in order.

The whole idea had been sparked off by a fellow wargamer asked a group devoted to games from the late, great Simulations Publications Inc. which SPI title on the Battle of the Bulge (a famous Christmas battle) had been their favourite. I started wondering about the different Bulge games that I have, which include GMT's Ardennes '44 and Tigers in the Mist, SPI's Wacht am Rhein, Avalon Hill's Bitter Woods, and the ASL modules Wacht am Rhein (Lone Canuck), Baraque de Fraiture (Front Line Productions), Battle of the Bulge (Time on Target) and Kampfgruppe Peiper I and KGP II (Avalon Hill). I could have sworn I owned 3W's Race to the Meuse, but perhaps I sold that years ago when I foolishly thinned out my collection a bit; it doesn't seem by the ratings to have been that good, so perhaps I'm not missing anything.

But what about other winter battles? There have been plenty, surely. What other titles in my collection would be suitable? (And, given the horrendously unseasonable weather we're having here in the Washington, DC, region, maybe give me a little illusory chill?)

Lund, 1676: The cold radiates off the map.
Of course, go early enough in history, and everyone had enough sense not to go out and fight when it was bloody cold and snowing. I think the battle of Lund between Sweden and Denmark was the first I could find in my collection (in GMT's Nothing To Gain But Glory) that features a frosty battlefield, the engagement taking place over the course of a very long December 4th, 1676. The map itself does a grand job of showing how miserable and cold the men must have been during what was one of Europe's most lethal battles.

Clash of Arms Leuthen: Frederick's Greatest Victory
Spin ahead eighty years, and in the midst of the Seven Years War, one finds the battle of Leuthen, fought in Silesia on 5 December 1757. At one point almost dramatically won by the Prussians' skillful pre-battle maneuvering, Leuthen eventually ground to a deadlock, as the Austrian army refused to accept that it had been defeated. I have two ways of trying out this game, either in COA's Leuthen: Frederick's Greatest Victory (a debateable title, in my opinion) or in GMT's Prussia's Glory, which includes Leuthen with Zorndorff, Torgau, and Rossbach, the latter easily beating out Leuthen for title of Frederick's greatest victory.

Move ahead to the Napoleonic era and there are two snowy battlefields that stand out boldly. One is a confused, messy, filled with glorious exploits, but overall a picture of bloody devastation, not unlike the battle of Lund on a larger scale. This was the battle of Preussisch-Eylau, fought on the 7th and 8th of February 1807. In it, two armies each of about 75,00 men traded hammerblows for two days in snow and freezing cold, each eventually losing as much as a third of their army in killed, wounded, or missing. On one side of the battle, the Russian army under Count von Bennigsen gathered together a huge battery of over 70 artillery guns to smash a French assault on his center, riposted with a massive column of infantry, and broke the center of Napoleon's army. In return, the French emperor called on the flamboyant Gascon cavalry commander Joachim Murat and flung him and a massive cavalry force of 11,000 men into the flank and center of the Russian counterattack, crushing it and scattering its men far and wide. Both French and Russian armies paused, like a boxer battered nearly into insensibility, and then, reinforced (Napoleon by more French under Marshal Michel Ney, von Bennigsen by a corps of Prussians under A.W. von L'Estocq) pounded each other for several more hours, until nearly midnight. When he surveyed the battlefield the next day, Ney said, Quel massacre! Et sans résultat ("What a massacre! And without result").

Napoleon and his Garde Imperiale in LBdP-E
Preussich-Eylau has been covered by several designers and publishers. Probably the grandest is Mattson, Spors, and Wimble's La Bataille de Preussisch-Eylau from Clash of Arm's Games. A chapter in the grand La Bataille system, it covers the battle down to the individual companies and battalions. A massive undertaking, it's detail is unmatched.

Another storied series that has covered the battle is Fréderic Bey's Eylau 1807, part of his Jours de Gloire system published by the French wargaming magazine Vae Victis: no less glorious, but somewhat more manageable than La Bataille.

The third entry in my library for this battle is Avalanche Press's Eagles of the Empire: Preussisch-Eylau. Characterized by an innovative area-movement system, this game can be played in a mere three hours, compared with Bey's four and the optimistic six predicted for La Bataille.

Napoleon at the Berezina
The other great battle in the snow from the Napoleonic period is the even more depressing and awful battle of the Berezina, where a French Grande Armée, limping shredded and starving out of Russia, turned at the last great river obstacle and fought to keep itself from being overwhelmed by the (equally battered and starving ) Russian armies that pursued it. This is depicted by the veteran game designer Rob Markham in his Napoleon at the Berezina. That unusual of beasts, a solitaire wargame, NaB challenges the player to find a way for the French to cross the river to (relative) safety before being mauled to death by three converging Russian armies. Fréderic Bey has also covered the Berezina battle in his JdG series, but I do not have a copy of that title (yet).

Of course, World War One is most famous for its Christmas Truce of 1914. I do not, I regret, have any games that depict the famous football match that took place before Germans and British were ordered back to their lines.

World War Two, besides the Bulge, has two other theatres where winter fighting was endemic. Since I'd like to finish this post and get to Christmas Eve festivities, I'll just quickly list some of the relevant titles from the famous Finnish Winter War and from the grim battles of the Eastern Front.

Finland: The earliest game I recall playing on this theatre was James Goff's excellent Winter War (SPI, 1972). Another great title is David Ritchie's Arctic Storm (GMT, 1992). A modern classic on a smaller scale is Mark Mokszycki's Red Winter: The Soviet Attack at Tolvajärvi, Finland, December 8-12, 1939 (GMT, 2012). And, of course, Advanced Squad Leader is represented by (inter alia) MMP's Hakkaa Paalle! module and Critical Hit's Jatkosota: Finland's Continuation War.

Frosty fighting in the streets of Cholm.
Russia: A quick trip to the Ostfront here for me, as my collection of Russian winter battles consists largely of a great older title, GDW's White Death: Velikiye Luki, the Stalingrad of the North and a newer one, ATO's Wintergewitter, about the attempt to break out of the Stalingrad kessel. ASL is represented here by the package Kampfgruppe Scherer: the Shield of Cholm by the talented team at Le Franc Tireur.

I'll close with one that still has not made it to my table, but that I'm interested to try one day. Into a Bear Trap: the Battle for Grozny 1995 is the brainchild of the prolific designer Perry Moore. This well-rated game from ATO depicts the modern urban combat waged over the capital of Chechnya by the Russian army and the irregular forces of the Chechen resistance.

As a wrap up, this blogpost by someone much more dedicated than I to the topic lists more than a dozen different battles (or battle-like events) that took place on or around Christmas, for your extended Christmas warfare pleasure.

Merry Christmas to everyone who celebrates it, and happy holidays to all!


Monday, December 21, 2015

So, here's a quick one

Mr Invisible and I are trying to decide what to play next. We've put together three lists: games we've not played yet, games we'd like to play again, and games we think the other chap isn't likely to pick.

Here are our lists, combined. You readers get to bid on what we should play next! When I went to Blogger Help to see if I could make this a poll, all the articles on polls seemed to be questions about why the polling tool doesn't work. So I'm going to skip using that and ask you to post suggestions in the comments section.

New (to us) games:


Played it once, let's play it again:

Really? You want to play that?

Rebel Raiders on the High Seas: A Test Game

USN Vice Adm. David Glasgow Farragut
My friend Eric "Mr Invisible" and I started off our inaugural monthly weeknight gaming session with a trial of GMT Games' Rebel Raiders on the High Seas. We have both recently read James McPherson's War on the Waters: The Union & Confederate Navies, 1861–1865 and were looking forward to exploring the naval portion of the American Civil War with this (relatively) new game on the subject.

We started off with dinner and some chat about work, and we had neither of us read the rules exhaustively beforehand, so we did not have time to play through the whole game at our first trial. Instead, we played the first three turns, trying out different gambits and exploring the ways that different rules provisions work. I think we'll be better prepared to  play a full game now that we've had a training session.

And play a full game I think we certainly will, as we both enjoyed the game a great deal. It has fairly simple mechanics and achieves detail through varying them in different circumstances. The same basic mechanic is used for ships trying to locate enemy ships in order to attack them, for instance; but CSA commerce raiders and be searched for in all sea and coastal areas, whereas the faster and more maneuverable blockade runners can only be found when they are in a "blockade station"--the approaches to a specific port--or in a port itself. Blockade runners being designed entirely for speed, however, are captured/destroyed if they are found, whereas the sturdier commerce raiders can give Union ships a fight for their money.

The land combat aspect of the war is highly abstracted; as the chiefs of naval operation, the players are most concerned with two main theatres: the maritime war of Southern commerce raiders and blockade runners and the Union attempt to gradually choke off their access to the sea, and the riverine warfare on the Mississippi and its tributaries. The armies appear in the form of assaults, which the Union can launch 2-4 times per turn (turns represent four months), and some supplemental card effects. The Confederates get a counterattack every so often, which can retake ground lost to the USA but cannot conquer any Union territory. Union assaults in the first year of the war are feeble stuff; over time they become more effective, as the wartime economy gears up and the ineffective generals are slowly weeded out.

U.S.S. St. Louis, Eads-built ironclad gunboat
Despite the preponderance of Union forces (as its increasingly capable armies capture more Confederate territory, the Union strips more and more of the resources the South needs to build more ships), the Confederacy wins the vast majority of games, according to player reports. This is not to say that the Confederacy wins the war and survives, but that players better the record of their historical counterparts. Though we played just the truncated year of 1861, I was certainly (as the Union player) feeling the frustration that McPherson describes as filling the Navy Department at the number of fast ships rushing in and out of Southern ports to pick up contraband in Europe and Cuba and bringing it back to Confederate shores with the Union Navy little able to respond due its woefully small numbers.

I tried an early assault on Norfolk, hoping to capture back the Navy Yard there and enable a two-track land
campaign against Richmond (hope of one of the CSA's major foundries and a big deal for naval support). But I fell at the first hurdle, as the Confederate defenses proved too much for my tiny armada. I did capture a few blockade runners and sank at least one commerce raider in the Gulf of Mexico.

Vicksburg, MS, levee and steamboats
But I also had little joy of attempts to push south in the riverine war; my attacks on Island Number 10 and on Forts Henry and Donelson achieved no progress but cost me a number of gunboats. Eric began fortifying Key West, clearly planning to use it as the base of a host of fast ships to run back and forth to Havana. I could see I'd have to turn my attention to reducing that soon, too. The early Union game feels entirely too much like a game of whack-a-mole.

Back east, things got worse, as Robert E. Lee came on the scene and prevented any land attacks in the Eastern Theatre, as the Army was too occupied defending against his wily thrusts to launch any of their own.

We stopped after the December 1861 turn for lack of time, and since it was a learning game we didn't even consider noting down all the locations of pieces for a later resumption. But I think we will get this back on the table soon. Especially if one doesn't interject any of the more specialized optional rules, RRotHS is a fast, fun, simple game that, at first glance seems to give a good impression of the naval aspects of the Civil War.

Wednesday, December 16, 2015

Boardgame: The Napoleonic Wars

My gaming opportunities have been unusually numerous of late, for which I am very grateful. Last Sunday, two friends and I managed to squeeze in a learning game of GMT's The Napoleonic Wars. The game has a well-deserved 7.06 rating on BGG; my own rating for it is higher, as it seems a very enjoyable game, with a lot of replayability, a lot of historical authenticity, and a high but not outrageous level of complexity. ADG's Empires in Arms will probably remain my all-time favourite Napoleonic game at the strategic level, but this comes a close second based on the most recent playing and rather vague memories of my first time through the game, several years ago.

TNW is another in GMT's stable of card-driven games (CDGs). Each of these titles has its own unique design elements, but they share a general mechanic: the meat of a turn's action consists of players alternating plays from hands of cards, each of which either results in a historical event taking place (with specific game-defined effects) or the player receiving a certain number of generic command points to conduct various operations. At the end of the turn, players refill their hands from the common deck based on some limit, sometimes being allowed to retain one or more cards from their old hand.

Events are often one-off (a given event can occur only once in the play of a given game), and players are often required to play a card for its event effect under a certain set of circumstances. Playing a card for event effect often puts it out of play for the remainder of the game (especially if the even effect is very powerful), whereas other cards are continually recycled. The more beneficial the event effect, the larger the number of operational resources allotted if the card is not played as an event, thus creating tension for the player in choosing between the two options, particularly when playing the event will remove the card from play. And the number of cards players receive is never sufficient for them to achieve all the tasks they would like to, presenting an excellent example of the quandary of resource allocation.

Some CDG innovations include splitting the deck into segments to represent different phases of the conflict, splitting the deck into opposing sides (so no cards are shared), varying the effect of event cards based on which player puts them into play, requiring  that Card A must have been played as an event before Card B can be played as an event, the opposite effect in which playing a particular event prevents another event from being played in the future, and giving players some "home" cards with event effects specific to their faction that they can play every turn.

My gaming comrade Eric (aka Mr Invisible) and I have played several of GMT's CDGs, including Paths of Glory, Here I Stand, and Stalin's War. Other CDG favourites of mine include Thirty Years War, Twilight Struggle, Wilderness War, and We The People/Washington's War (which I think started the whole CDG genre). TNW is a worthy entrant into that field.

Phil (Britain/Austria) contemplates his capture of Madrid, as Eric (Prussia/Russia) deplores the loss of Berlin.


We realized we would not be able to learn and play the entire TNW five-turn campaign scenario in the time we had for gaming Sunday (roughly six hours). We tried to shorten the learning process by reading ahead in the rules (the "living" version of the rules and the playbook are available on GMT's website), but no one ever has as much time as they hope to for read-aheads (as I can attest from many a professional conference). So we picked the one-turn scenario for the 1813 campaign as our test piece. And we finished the game handily within about five hours, allowing time for the standard wargamer "social conversation" periods in and around actual game learning and game play.

We took sides more or less by default after setting up: Phil got Britain, its minor ally Spain, and Austria, which begins the scenario neutral but enters after one complete round of play by the other powers. Eric got Prussia and Russia and their minor ally Sweden (ruled by the turncoat French Marshal Bernadotte), and I rather uncharacteristically played France and its tiny ally Denmark.

France starts out with a large hand of cards, which give it several advantages. First of all, it gives France lots of options and a better shot at getting the high-value cards. Second, it makes France the preempting player at the start of the scenario. This role is a TNW special feature; it allows the power with the largest hand (when players control more than one power, they must keep their cards separate) to interrupt a power before it plays its card. The interrupting power plays a card of its own, then the interrupted power may take its turn. Various details prevent the interrupting power from completely dominating play, and the more times a power interrupts, the fewer cards it has and thus the sooner it lose the ability to interrupt.

Joseph Bonaparte: Bro, can't you spare a general?
France starts with a moderate-sized army in Spain, but one that is spread out and has no army commanders to unify it and get it moving. The largest French armies are in Germany, with a few garrisons in Poland and Ruthenia and leaders in Paris and Naples ready to raise new armies and move them toward the theatres of war.

Britain has its classic small but powerful army in Spain; per the 1813 scenario rules, it cannot attack elsewhere until it has conquered Spain (naval action and diplomacy, two big British occupations historically, are not used in 1813; the Ottoman Turks are also omitted).

Russia and Prussia start with various armies scattered across north and eastern Germany, Poland, and Russia. Their greatest problem is coordinating their efforts; apart from Blucher, they don't have any leaders capable of commanding large armies to start with, so they have to subsist on army groups, which take more resources to move. Also, none of their generals are as good as Napoleon in battle, so they have to exhaust him with numbers. And the Russian numbers take time to build and move west to where the fighting is.

Austria sits quietly for the first set of impulses, but once they enter, Schwartzenberg is a capable army leader and the access of forces Austria brings to the Allies will stretch the French ability to react in all theatres at once. If the French don't keep multiple forces operating in central Europe, the Prussians or Swedes can squirt past and start liberating north Germany. If they don't keep armies operating in Italy, Austria will burst across the Alps and start liberating its former possessions. And if the French don't send a serious army commander south to Spain, Wellington will roll right through the garrisons they've left around and start eating up southern France (which will also allow them to land troops elsewhere on the Continent).

Unless France manages to drive one of the Allies out of the war at the end of the scenario (an uncertain thing at best), players decide victory by comparing how many keys each possesses. The map is made up of linked points, representing regions, cities, or major formations. Some points are considered crucial to victory and are referred to as keys: national capitols (e.g., Paris, Vienna, Berlin), major cities (e.g., York, Orleans, Zagreb, Warsaw), or strategic locations (e.g., Gibraltar). Essentially, whoever had captured more of the others' keys by the time we ran out of cards would be the winner.

I rather rashly took a chance, gathering up a large force under Marshal Davout and attacking the main Allied army in Germany. What I failed to consider is that armies can either attempt to evade (flee to an adjacent space when attacked) or intercept (reach out and attack an enemy army moving into an adjacent space). The Allies attempted to flee, failed, then called on nearby armies to "intercept" and join them. I won the resulting engagement, doing some damage to the Allies, but lost some troops myself, as I had fought more of the enemy than I intended.

The Prussians, feeling their oats after battle with Davout, moved west and liberated Hannover. This was a bit of a blow, and it left them crouching like a black vulture over the Low Countries and northern France, but I had Soult and an army in Paris that could be reinforced if need be, so I looked at what they had left behind--an open path straight to the under-garrisoned Berlin!

Graf von Kleist
Napoleon sprang into action, picking up several corps, including the doughty Davout, and racing towards Kleist and his band of defenders. After a brief thrashing, we drove the Prussians out of their capitol! It was at that point that I realised that possession of the capitol only allowed a *roll* for conquest, it didn't mandate it. And that the roll comes at the end of the turn (in this case, the entire scenario) rather than immediately. Curses! If only I had read fully, instead of skimming. Still, I held another Prussian key, knocking them down to three (Davout had captured Leipzig from Blucher).

The Russians struck France with a corn shortage, but it had little effect. Spain tried to bleed my armies with guerrillas, but Joseph must have been ruling well that month, as no losses resulted. Clearly Jupiter and Mars were on my side!

Wellington advanced on Madrid and was beaten back by its small garrison. But he rounded up more of the British expeditionary force and attacked again, steamrollering the garrison and liberating the Spanish capitol. Well, the gods are fickle.

I brought Murat up from his Naples vacation to command a new Army of Italy. I moved Soult south to face off against Wellington, while building up the Paris National Guard.

But doom was coming. My memory of the next few impulses is sketchy (it was so painful!), but I think it went like this.

Phil and Eric spent some time discussing what the best way of combining *all* the Russian and Prussian forces so as to generate a kill stack that could take on Napoleon. A Russian army group joined up with Kleist, and the next step would be for Blucher to gather them up and descend on Napoleon. So Napoleon decided to preempt that attack and intercept Kleist and his Russian friends before Blucher could join them.

The problem with this plan was ... luck. Although the French went into the battle with good odds, they completely whiffed. Napoleon had the second-worst day of his career. The French Army of Germany melted like early snow on a warm day. Napoleon, Davout, and a few scattered divisions fell back on Leipzig while the Prussians and Russians celebrated.

Then Blucher gathered up his forces, swung through Berlin to pick up the recently victorious armies of Kleist and Tormassov, and descended on Leipzig. Napoleon had quite definitely the worst day of his career; only he, Davout, and a few thousand troops escaped this battle. And, at that point, I decided to concede.

I had, if I recall correctly, three cards left, which would have been enough to rebuild one army and bring it back into combat with Blucher. But I had lost Hannover and Madrid and was about (as soon as Austria moved) to lose both Munich and Milan, and there was no way I could recoup those losses with the hand of cards remaining before the end of the turn. I'd gotten tossed out of Berlin, so I wouldn't be able to Conquer Prussia at the end of the turn; ditto with Spain.

We agreed that the game was challenging and enjoyable, one we would like to play again. Not only does the full scenario beckon (starting in 1805 and running as many as five two-year turns, though capable of ending sooner), but there is also an aftermarket 1792 scenario that I'd really like to explore. My rating for this game is 8 out of 10.

Thursday, December 10, 2015

DC Area Gaming Opportunities Upcoming

I decided a few weeks ago to post all notices of upcoming wargaming events here instead of advertising by email. It turns out the next will be sooner than I anticipated. This Sunday a couple of us are getting together in Wheaton for some board wargaming. Comment here or drop me a line and I can give you the details.

Likewise, my friend Mr Invisible and I are still planning a weeknight gaming session next Thursday. Same provisions apply.

At the same time, there are a couple of local gaming groups and shops that are worth checking out:

The Army of Central Maryland has a Yahoo group and a Facebook page.They can be found at the friendly and well-stocked Games and Stuff in Glen Burnie on most Sundays.

The Riverdale Gaming Conclave and the Non-Traditional Board Games groups can be found on Meet-up and on the Maryland side of DC.

The Washington Area DBA Gamers (WADBAG) and the DC Conscripts ASL group are still around but pretty quiet these days.

It's been a while since I talked to them, but the far side of the Potomac has the Northern Virginia Gamers (NOVAG), the Dulles Area Historical Gamers (DAHGS) and some other groups that hang out at the excellent Huzzah Hobbies in Ashburn.

And no local list would be comeplete without mentioning DC Game Night and the Games Club of Maryland or DC's own Labyrinth game store and College Parks's Board and Brew.

Wednesday, November 25, 2015

Trying Something New

My friend Eric and I have often bewailed the fact that we find it so difficult to get together with friends for a wargame. Schedules are full, life is busy, and coordinating a group of wargamers is like herding cats (which I've done, but it takes effort!) One starts out with a long list of prospective participants, tries to find dates that will work well for the largest number, then all those unanticipated things hit (partners and family making other plans, cars breaking down, jobs calling in everyone on the weekend).

So we decided to try an experiment. First off, we're going to coordinate more with other existing local groups. It turns out that every different social media platform (Yahoo, Facebook, Googlegroups, Meetup, Boardgamegeek) has its own set of cadres, and none of them talk much with each other (or even know about each other).

Second, we're going to try meeting up once a month on a week*night* (in addition to any sort of weekend games we play). While weekend days provide more time for play, they are also frequently in great demand by family and other hobbies. Weeknights offer less time, so the scope of games has to be smaller, but that smaller timeframe also means that they're less likely to fill up with other committments.

And, third, we're going to stop aiming for the stars. Usually when we try to organize events, we're hoping for half a dozen players or more and wind up disappointed when we're only able to collect two or three (including us!) For these events, we're going to plan on just the two of us and be pleasantly surprised if more folks show up. We've both got large enough game libraries that we could play for years and never exhaust our two-player titles, but if third, fourth, and fifth players show up, we'll still have plenty of options, either for one large game or several smaller ones.

So the first date we're aiming for is Thursday, December 17th. We're looking to play GMT Games' Rebel Raiders in the High Seas, a highly rated strategic/operational game about the maritime and riverine warfare during the American Civil War. If we get more players, we may simply add another game, or we may change over to something multiplayer.

We haven't picked a location yet, but if you post a comment here to indicate you're interested, I'll be sure to get back to you with information.

I'll post an AAR afterwards, and if we continue our experiment, I'll post here so that folks can contact us if they're interested in joining in.

Monday, July 13, 2015

Philip Passes with Flying Colors

Droits de L'Homme, 74, strikes her colors.
Last Saturday, I introduced my friend Philip to the boardgame Flying Colors, GMT's game of age of sail naval warfare. Phil is not a dyed-in-the-wool wargamer (yet ;-), but he's an aficionado of the period and the genre, being an avid consumer of Patrick O'Brian's tales of Captain Aubrey and Doctor Maturin.

I picked the Audierne Bay scenario as a good one to start with, given its lower vessel count and relatively straightforward nature. Phil took Sir Edward Pellew, commanding the frigates Indefatigable and Amazon, while I commanded the French 74 Droits de l'Homme. Packed with troops and unable to open her lower gun ports because of the heavy seas, DdH was fighting effectively as a heavy 4th rate. Holding the weather gauge, Pellew brought his frigates up to windward of the French ship as she carried a large body of infantry up the Brittany coast. Indy and Amazon are both 5th rates, though Indy being a 44 counts as heavy.

We read through the rules and played ten turns in about three to three and a half hours. Although this scenario features only three ships, I think that larger numbers will not take more time in direct proportion, since larger engagements are fought primarily in formations (to allow for command and control), so fighting a squadron of ten or fifteen ships will be more like maneuvering two or three multi-part elements than moving fifteen different ships.

My comments:

Though the French were able to concentrate considerable fire on the Amazon, cutting her rigging to shreds, the plucky 36 gave as good as she got, and the French ship of the line slowed considerably, her hull battered and blood streaming from her scuppers. Thinking she had at least temporarily immobilized the Amazon, DdH ran up the wind to engage the Indy (though the fight was bringing the whole group closer to shoal water along a lee shore).

But Indy dealt the French ship several shrewd blows, and the Amazon caught the wind and got enough speed to rejoin the fight in time to slam a broadside into the stern of the Frenchman, raking her decks cruelly and doing enough damage that the DdH finally struck her colors.

Fight of the Droits de l'Homme by Léopold Le Guen
His comments:
I was advised by a friend who also frequently war-games not to discuss what I had intended to do, or was planning as it might give others the key to beating me in the future. Since winning is not my over-all goal, but rather a more in-depth understanding of historical, martial decision-making I do wish to talk about how I went about this scenario.

My two frigates began running before the wind in line-abreast. As I had the weather-gage I had sought to maintain it for as long as possible. Additionally, I wanted to get into line-ahead. I turned to port (read larboard) into line-ahead with the Amazon in the van. Since I went from running to reaching I lost no speed.

After a series of turns on both sides, I broke from line-ahead and sent Amazon (running) to cross DdH's stern while Indefatigable continued on her base course with the hopes of taking DdH between two fires. I miscalculated here as I had forgotten that in Flying Colors, a ship of the line is able to turn as quickly as a frigate. And so DdH, after taking Amazon's raking broadside and returning her own, was able to come about and send a broadside with her port battery.

This left Amazon with substantial rigging damage and afire. Indefatigable at this point was on the other side of DdH and only able to play at long-bowls and so I had left her out of position to bring her heavier guns in close. Here I made another error. Even though Indefatigable's guns were having a gradual effect on DdH's firepower, in my over-concern for the Amazon I lost awareness of the wind.

View of the Wreck of the French Ship Droits de l'Homme by John Fairburn
And so because of this, and her damaged rigging, Amazon was already slow and forced to tack. She was virtually motionless for a period and so had to endure a raking broadside. Here, however, the British tactic of firing at the hull began to show an advantage. As DdH had turned to close Indefatigable, Amazon (while very slow) still had her full broadside available. After an exchange with Indomitable, Amazon was able to come up and so I finally had DdH between two fires. A turn later she was effectively armed "en flute" and so struck.

I took some lessons from this:

I gave up strength of formation for an easy, but unsupported stern rake. Had I kept to line ahead, I could have forced DdH to accept two broadsides while I took only one.

Giving up the weather-gage may have had to happen at some point, but losing awareness of the direction of the wind nearly cost me a frigate.

Wednesday, June 17, 2015

Waterloo's 200th: Two Battles and a Retreat

The games that started it all: SPI's NLB Quad,
After the initial skirmishes along the frontier and inland, Napoloen's army surged (in some cases in a rather confused way, feeling the loss of Berthier, Napoleon's long-time chief of staff) into Belgium. Meanwhile, the Prussian army continued to concentrate on the position that its forward elements had fallen back to, and hte Ango-Allied forces started to move, belatedly, towards the enemy's point of attack.

I'd continue to summarize the historic action, but I don't think I could improve on the excellent posts at JJ's Wargames (here are his posts on the initial contacts of the campaign, the first battles, and the Allied retreat).

Instead I'll continue my catalog of the treatments this campaign has received in the wargaming realm. In my last post, I mentioned The Emperor Returns, Kevin Zucker's game on the campaign published by Clash of Arms Games. Of course, the name Kevin Zucker translates into the common tongue as "obsessed with the Napoleonic Wars", so it's no surprise that this was neither his first nor his last game about the Hundred Days.

Zucker's mini-game of 1815.
In 1976, SPI published the now legendary Napoleon's Last Battles. A collection of four small games (or "quadrigame" as SPI liked to call these), it could also be played, linked-up, as a game of the whole 1815 campaign. It was among the first games I ever bought (and among, though not the first, I ever played), and I have it still. Zucker has, in a sense, been redesigning this game ever since--its systems serve as the core of many of his later Napoleonic games.

A few years later, Zucker and two other authors created Hundred Days Battles. This 1979 game The Emperor Returns in 1986. I used to have a copy of Hundred Days Battles, though I forget if I played it other than solitaire.
(republished in 1983) was a smaller treatment of the same subject, beginning the use of some of his systems seen in larger form in

In 1998, Zucker came back to Belgium with The Last Days of the Grand Armée. While TER and HDB are both in the 1x (or each turn = one day) family of Zucker's Napoleonic titles, LDGA is in the "Days" series, in which turns are six hours. I've played LDGA only once so far, a learning game with a friend in which the French were ruthlessly pounded. But, playing the Allies, I had the advantage of having played the system before (The Seven Days of 1809), so I don't think this was a representative run-through. Luckily, my friends are intrigued by the series, so I think we'll be playing these and other games in the series again before too long.

SPI's prequel to WV.
And now the maestro is at it again! Napoleon's Last Gamble has been announced, a quintet of tactical games at a scale where one turn is one hour. This should be a nail-biting experience. The traditional four battles of 1815 have been boosted by the addition of La Souffel, a rearguard action by French forces defending the eastern frontier against the Austrians.

Zucker is not alone in addressing the battles of the campaign, of course. Of the two great battles of June 16th, Quatre Bras has received more attention, at least in the boardgame world. I count at least eight other Quatre Bras games in addition to that in SPI's quadrigame. Of these I have three: Battles of Waterloo by the prolific and irascible Richard Berg, which includes a Quatre Bras engagement; Ney vs. Wellington, Joseph Balkoski's chip off Frank Davis's Wellington's Victory system, making the smaller battle a good taster for the WV system; and the visually unbeatable La Bataille des Quatre Bras by Ed Wimble.

A detail of the gorgeous LBdQB.
NvW I played many times in my salad days, both solitaire and (as I recall) in college against some of my gaming friends there. LBdQB I have set up, and I think I've played a few turns, but the game system, though intensely appealing to the would-be Napoleonic tactician, is just too complex for me to manage more than a few turns before collapsing in exhaustion. I keep all the La Bataille games, and get new ones when I can, hoping that some day I will have the space, the time, and the fortitude to play them. They are some of the most lovely games around. BoW I've set up a time or two but not gotten into the game, as the rules are well night impenetrable. They're not complex, just poorly organized, dull, and wearisome. I trust there's a good game in there somewhere, as Berg rarely disappoints, but if LB takes stamina, BoW takes patience I don't currently have,

But what of the other battle of the day, widely billed as Napoleon's last triumph? Ligny seems to get short shrift compared with Quatre Bras, perhaps reflecting the fascination of English-speakers (long the dominant segment of the wargame design community) with "the English battle" at the crossroads. Though an Anglophile, I've grown fond of the Prussians in the context of the Napoleonic Wars, and I find it sad that while QB gets nearly a dozen titles, Ligny subsists on only four.

Would Ligny get more games if Wellington had spoken German?
One is the entry in NLB, and one is the entry in BoW. Ed Wimble's La Bataille system, of course, includes a massive and spectacular La Bataille de Ligny, which I own but have yet to give myself the visual treat of setting up, let alone playing. The fourth is (to me) a dark horse, billed as a three-turn minigame and called simply Ligny, it calims descent from a system, March Into Battle, with which I am unfamiliar. Three turns, however detailed they may be, seems to me like too little to reflect the complexity of this huge engagement; time will tell whether the game becomes a hit or not.


Wednesday, June 10, 2015

Commemorating the D Day Landings: Replaying the Normandy Invasion

What Are the Mission Goals?

As we prepare to dive into the German's first player turn, let's review what is driving the two sides' decisions.

Gold Beach on 7 June 1944. (Wikipedia)
In the same way that the rules for movement and combat in wargames try to drive outcomes that have a credible historical character, the victory conditions for games ("how you win") are designed to drive players towards taking actions that, across the sweep of the game, will reflect the goals that the commanders on each side were striving for. They will generally be defined in terms that can be measured explicitly in the game, but they will be aimed at creating the same pressures that the historical commanders experienced.

The full campaign game of Normandy '44 takes 22 turns, covering the period from June 6th to June 27th. For the purposes of this demo, I'll just be running the seven-turn mini-campaign, which runs through June 12th. There are "automatic victory conditions" for this scenario (ones that award victory to a player as soon as they are fulfilled) that are the same as those for the full campaign. In addition, there are "end game victory conditions", ones that will determine the winner at the end of the game if no automatic victory has taken place.
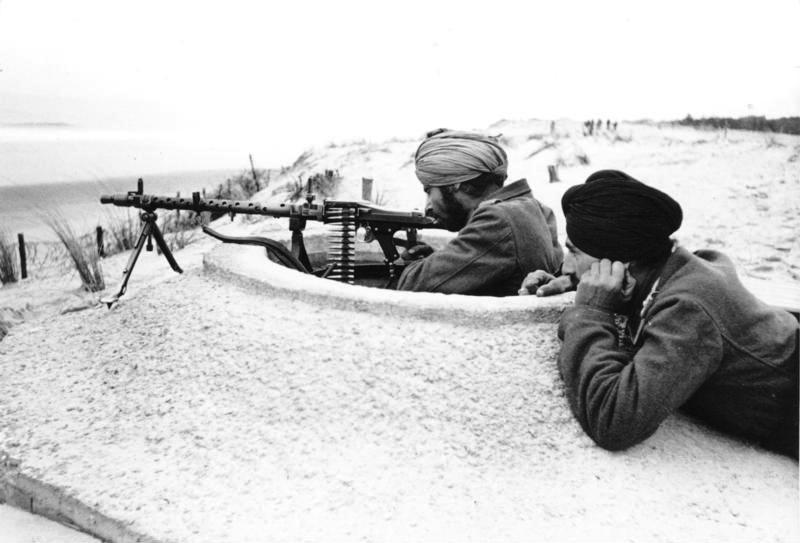
Indian soldiers serving in the German Army, manning a "tobruk" (reinforced foxhole). (Wikipedia)
Automatic Victory

The campaign's automatic VCs reflect the overall goals of the invasion campaign. The Allied armies sought a foothold in Europe, but a foothold that could be expanded to push the Germans out of France and, eventually, force them to surrender unconditionally, as had been agreed at the Casablanca Conference of the Allied leaders in 1943. To that end, they needed not just a lodgment on the French coast, but the ability to drive into the heart of France. So the Allies win the campaign automatically if they have three or more units, in supply, on the east or south edge of the map at the end of a German turn. In other words, a penetration of the German lines so complete that, given a player turn to work with, the Germans cannot displace or isolate enemy units far beyond their at-start frontline and in a position to head towards the French interior.

For the automatic Allied victory, all beaches must be open (i.e., German troops must not recently have been in possession of any of the Allied landing grounds) and all four hexes of the city of Caen must be Allied controlled. This largest city in the landing area lay at the hub of the region's road network. Until Caen was Allied controlled, supplies could not flow forward to forces fighting in the interior.

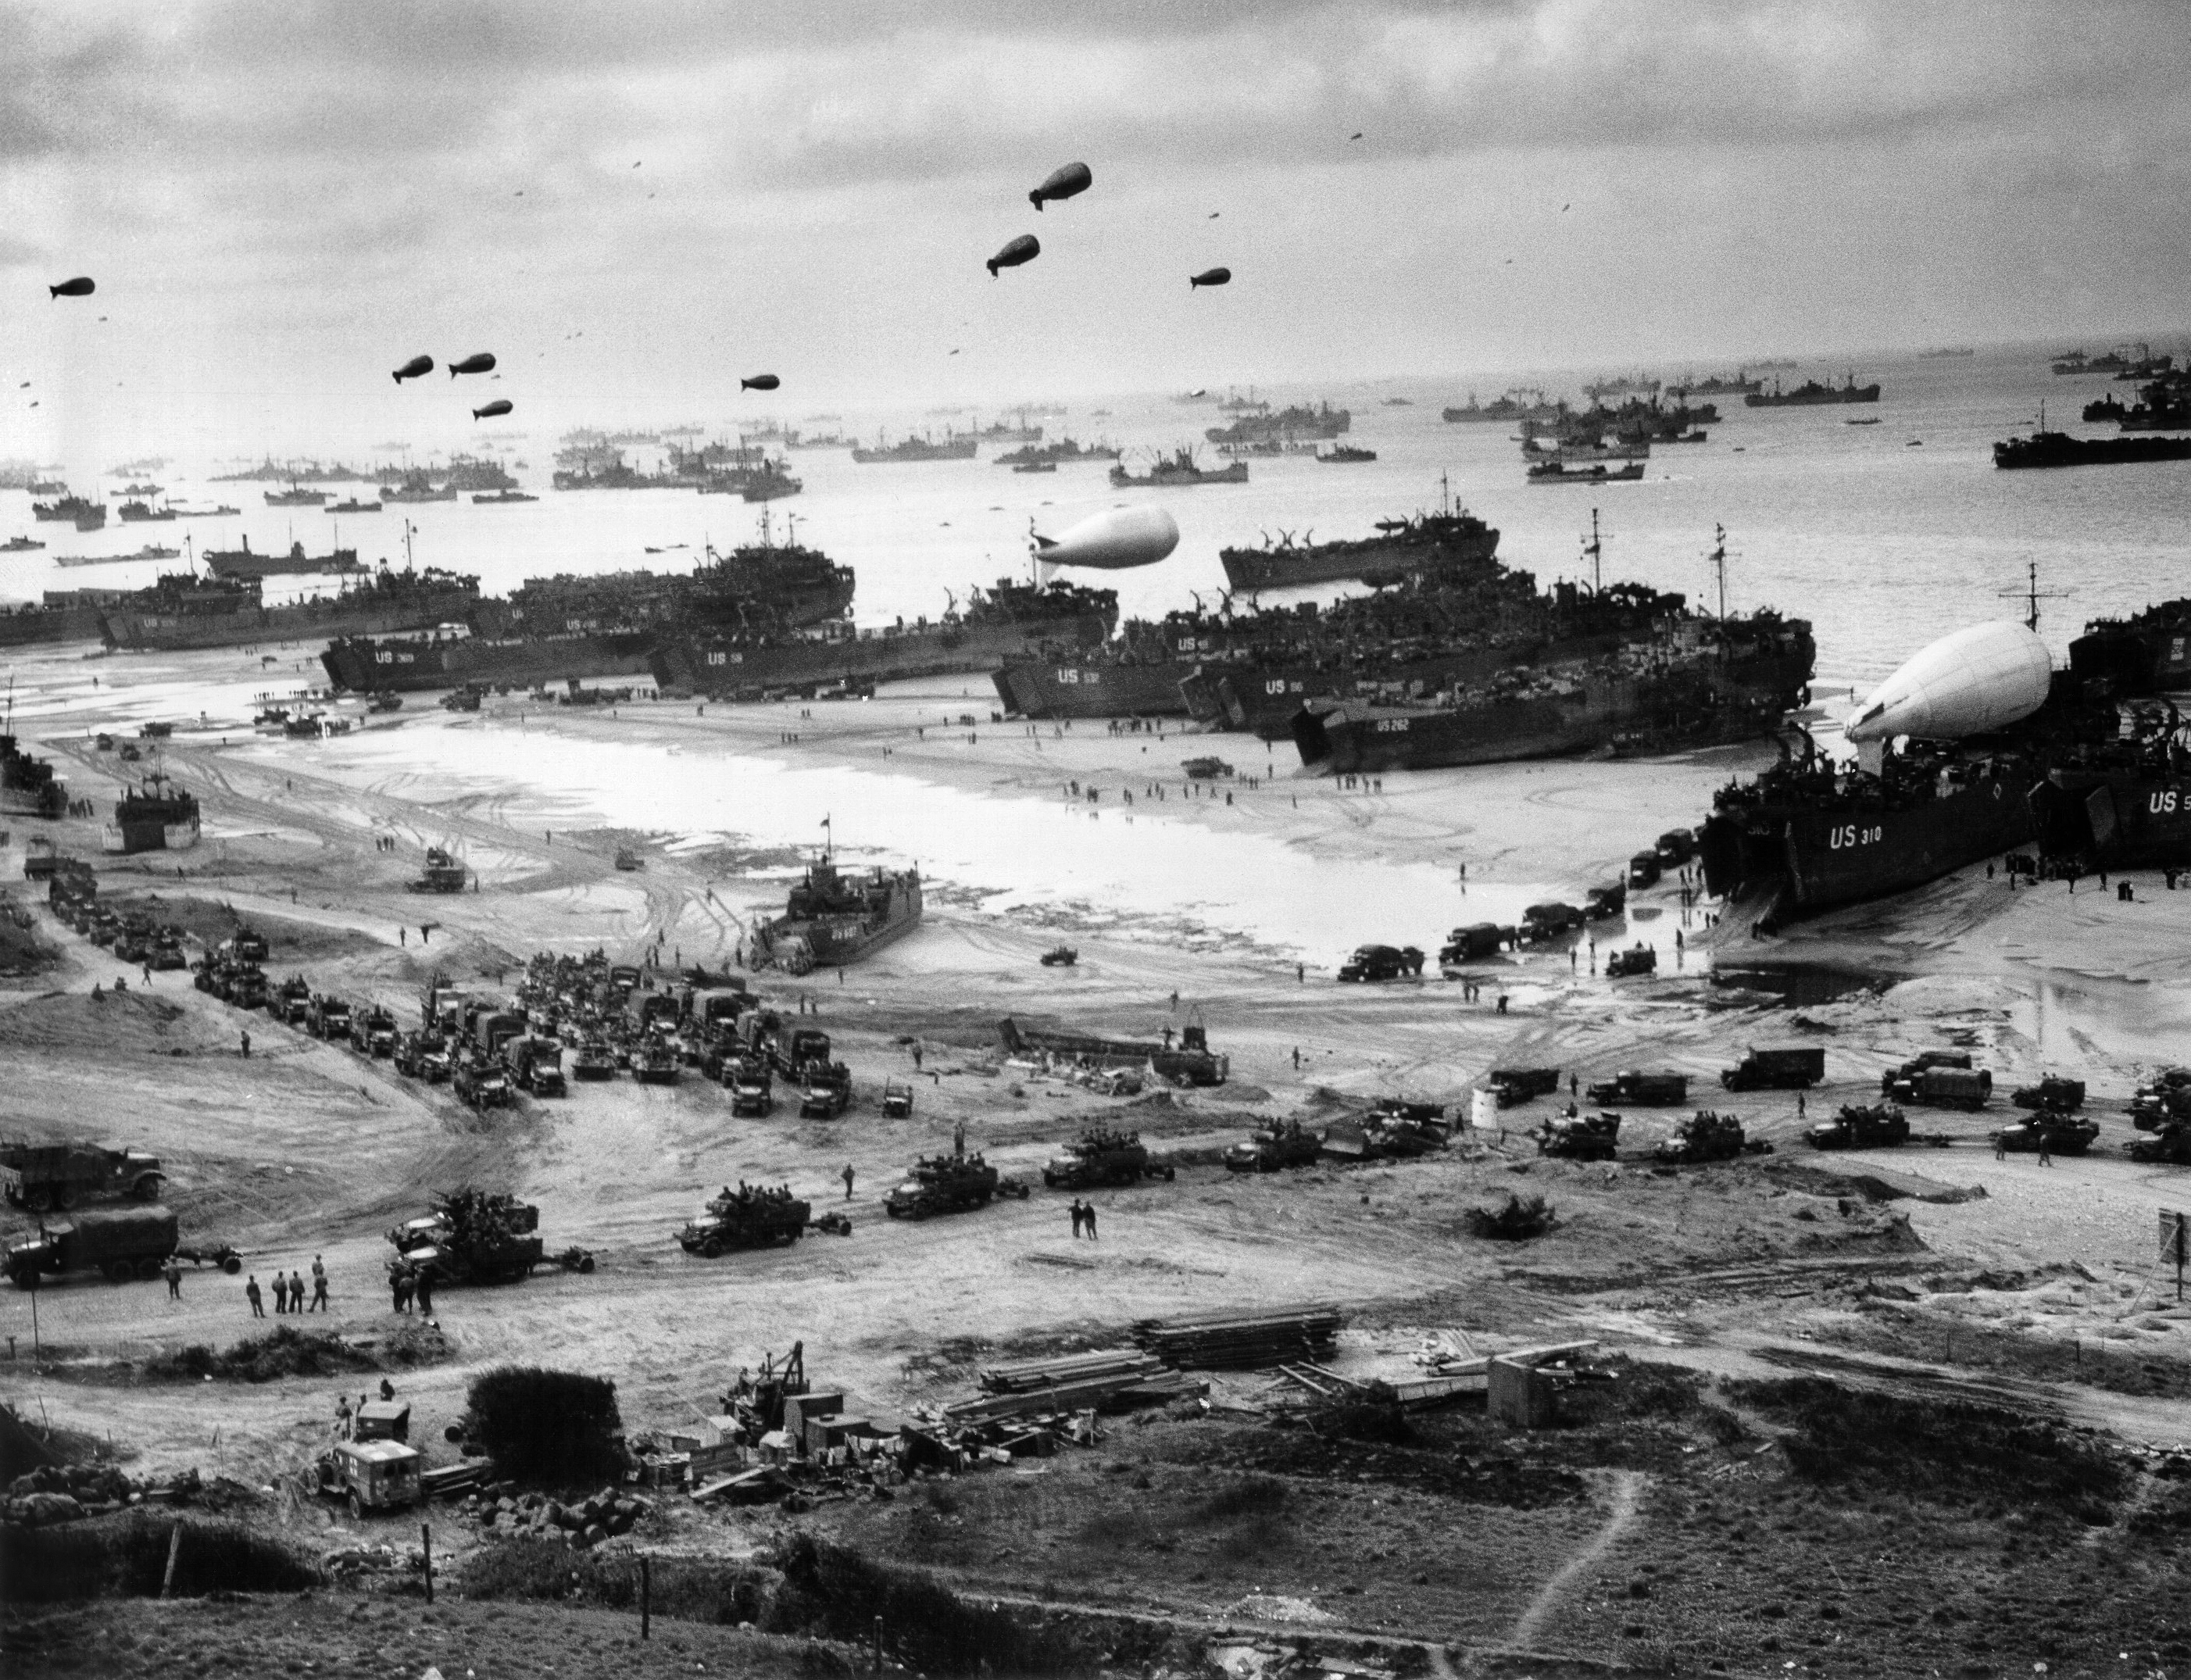
Supplies being landed on Omaha Beach. (Wikipedia)

The Germans, too, have automatic VCs. If they close three or more Allied beaches or Mulberries, or eliminate or reduce seven US three-step units to cadre status, or eliminate or reduce five British three-step units to cadre status, then they win. These events would represent, in the first place, the inability of the Allies to reinforce and supply their invasion force or, in the second and third cases, such a devastating loss of manpower that Allied morale would plummet.

End Game Victory

Should none of these decisive outcomes arise, at the end of the seven-turn mini-campaign the Allied player counts up victory points (VPs); if she/he has 14, the Allies have won. Otherwise, victory goes to the Germans. The Allies are awarded VPs for controlling the Allied drop zones, for linking up the US and UK beaches (defined as having a clear road from Juno Beach to St Mere Eglise obstructed by no German units or ZOCs not occupied by Allied troops), for controlling the city of Bayeux, and for each hex of city or town outside the Allied Naval Bombardment zone. They lose points for closed beaches.

Essentially, this requires the Allies (who will never get an auto victory in seven turns) to seize and hold their beach objectives and push far enough inland to link up the US and the UK forces. If they protect the beaches (don't lose VP), hold all the airborne drop zones (9 VP), fulfill the link-up conditions (3VP) and control Bayeux (2 VP), they can get the 14 VPs they need to win.

Tuesday, June 9, 2015

Commemorating the D Day Landings: Replaying the Normandy Invasion

D Day: The Amphibious Landings

Allied ground forces were slated to land on a series of five "beaches" (actually sections of three separate areas of beachfront on the Norman coast). The invasion force for each named beach had specific units, specific conditions to land under, specific goals to achieve, and an overall mission to accomplish.

The US Beaches

Utah Beach, on the east side of the Cotentin Peninsula, would receive the US 4th Infantry Division, with support form the 70th Tank Battalion, 18 warships of the combined Allied fleet, and 300 B-26 bombers of IX Bomber Command. Landing inland from the beach were the 82nd and 101st Airborne Divisions; they would try to ensure that the critical causeways leading inland from the beaches through flooded ground were secured. In addition, they would block German counterattacks and attempts to relieve the defenders of the immediate beach area.
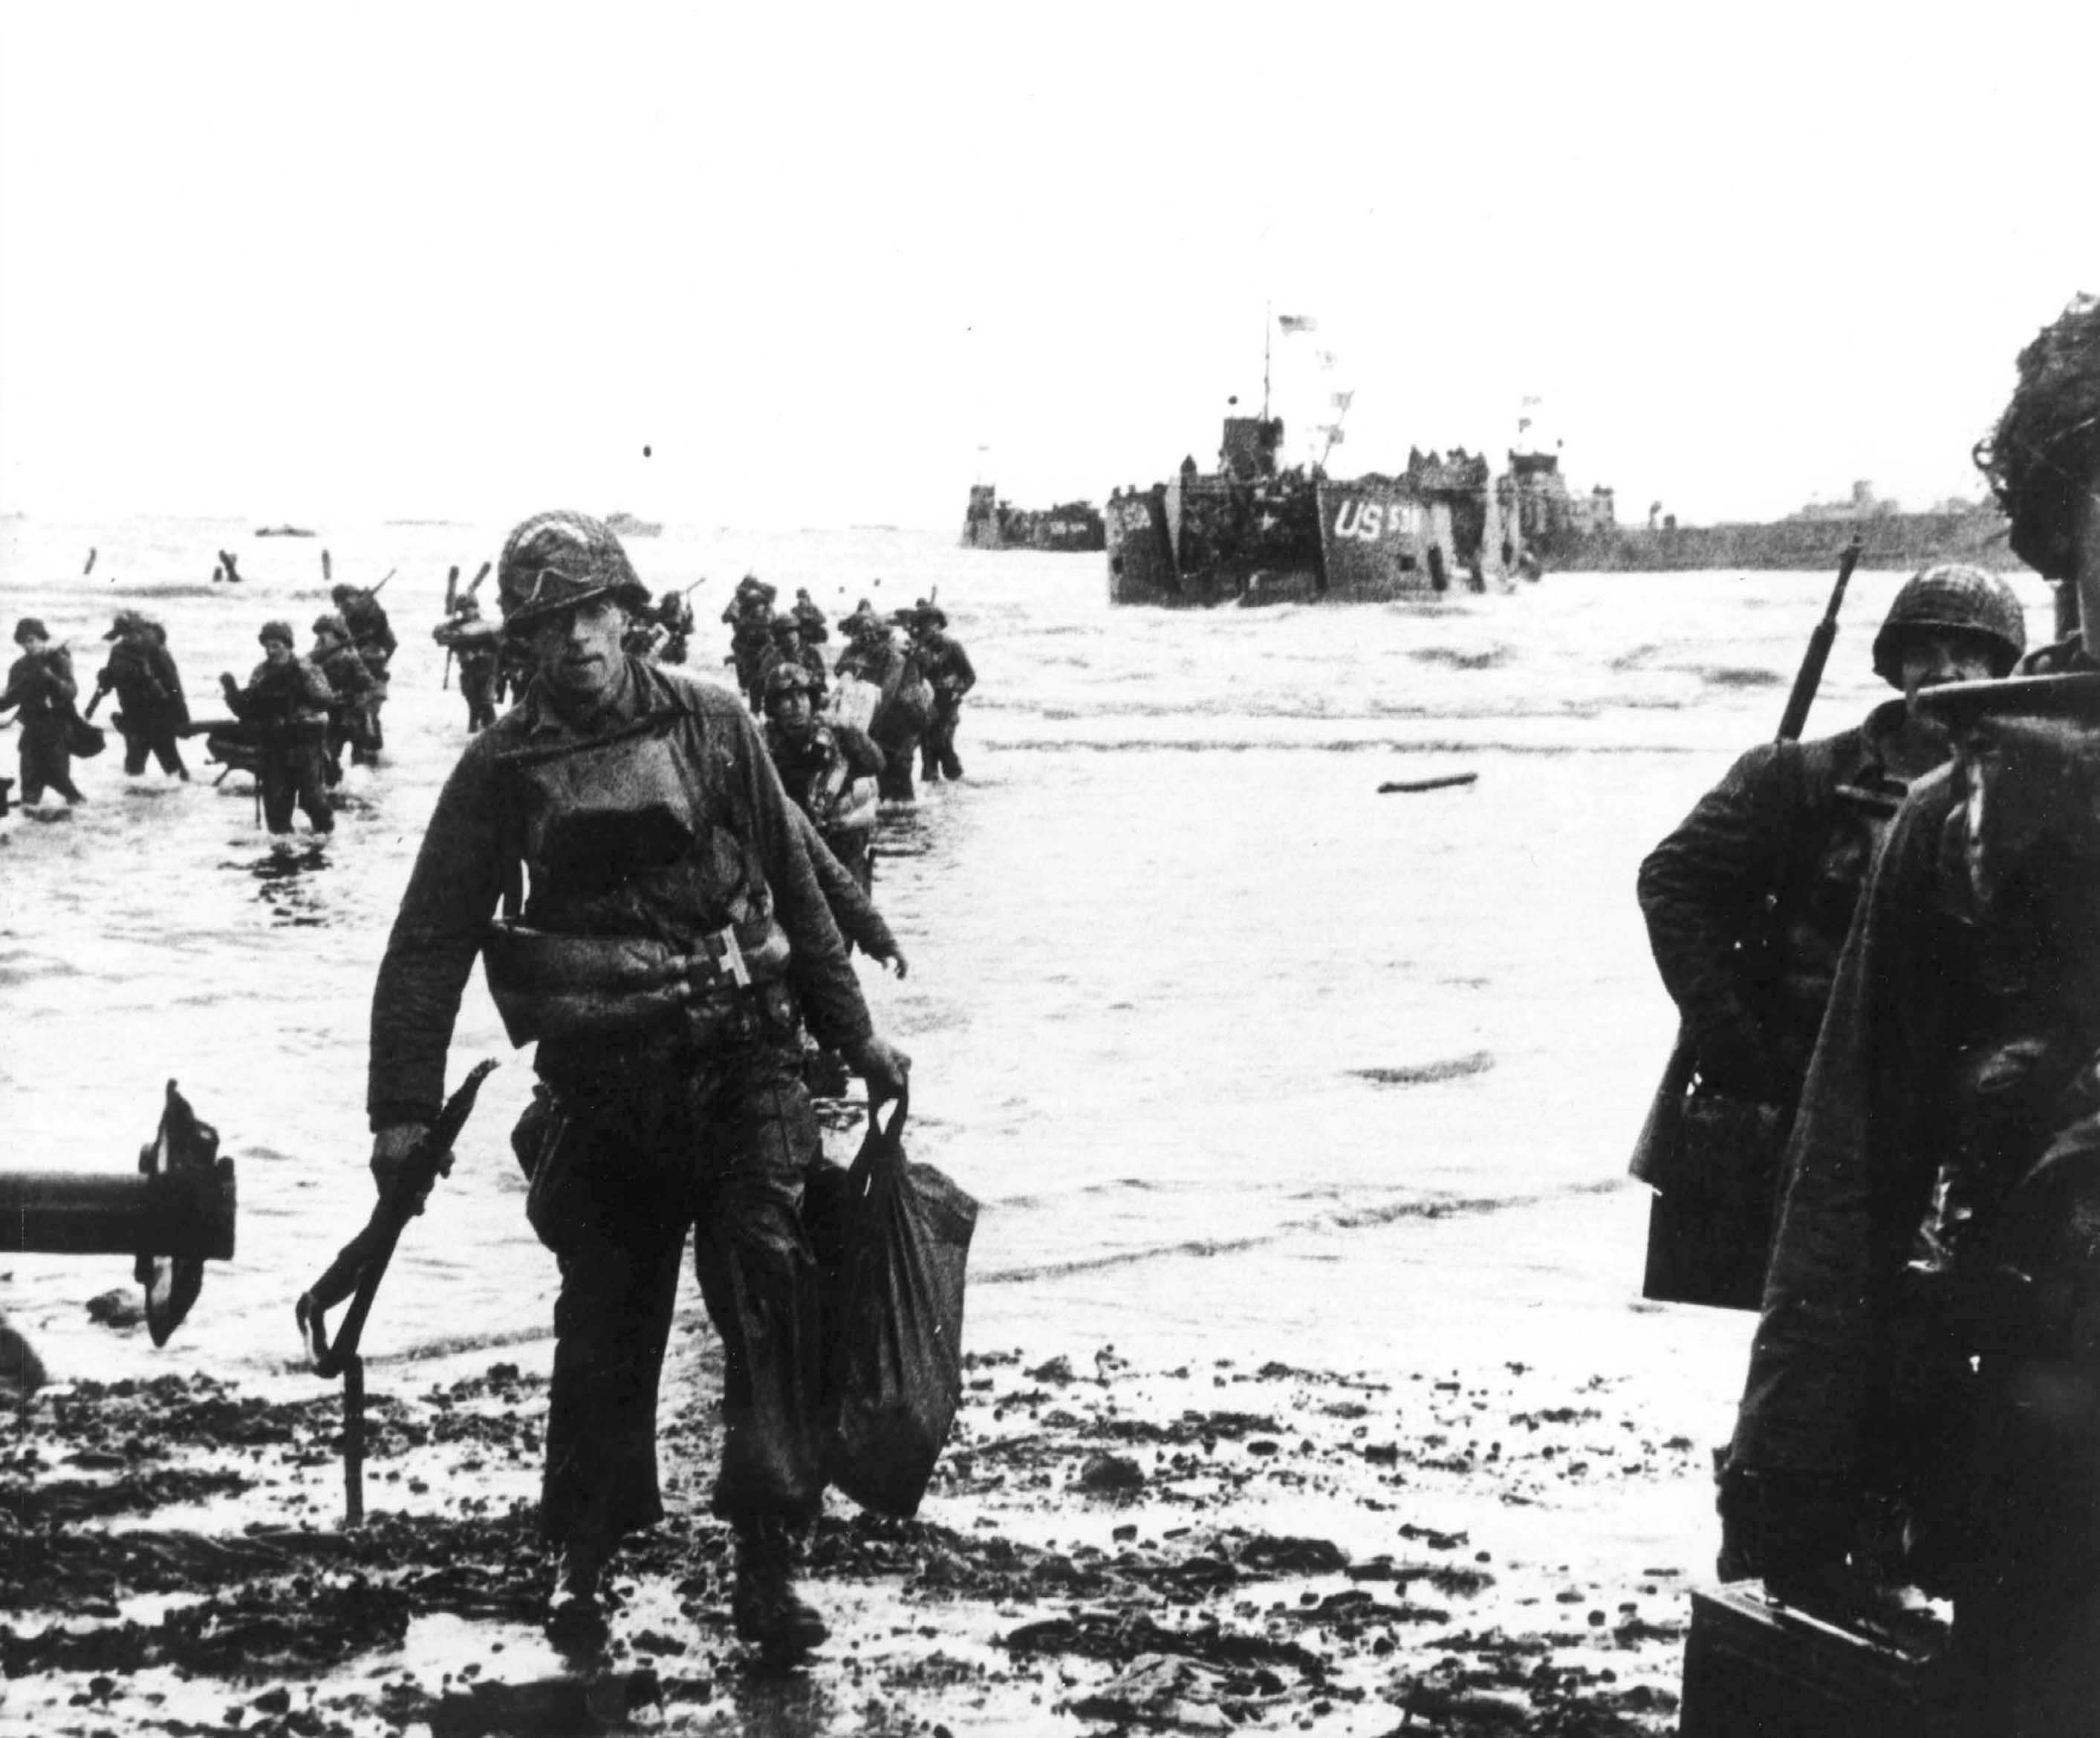
American troops landing on Utah Beach. (Wikipedia)
In the event, currents pushed the first wave of landing craft south along the coast from their intended destination. The general officer accompanying the first wave decided that this area actually looked more suitable for landing than the planned beach and directed that follow-on forces reinforce this position. Enemy resistance was relatively light, so engineers and specially equipped tanks began clearing obstacles while infantry and armor began pressing inland to link up with the airborne troops. Fewer than 200 men were killed or wounded in the landings at Utah.

Omaha, known afterwards as Bloody Omaha, was a different matter. The terrain was more defensible in this area than at Utah; allied bombers and naval gunfire did much less damage to the defenses; and German forces that the Americans expected to encounter further inland proved to have been shifted forward to supplement the first line of defense.

Six battalions of infantry and two of tanks constituted the first wave. While the tanks had been fitted with flotation equipment to be amphibious, the strong waves in the area that morning swamped many of them before they got to shore, and later groups, brought closer to shore before being landed, were knocked out by German guns as soon as they began maneuvering on the beach. Infantry and engineers were swept away from their assigned landing zones, as at Utah; but at Omaha, this simply caused confusion and gridlock, as fresh troops landed in areas already filled with men and machines (some destroyed, some functioning). Eventually troops on the beach regrouped and fought their way through the German defenses, but not before taking nearly 3,000 casualties.

Between Utah and Omaha Beaches were the bluffs of Pointe du Hoc, a 100 foot cliff topped by heavy concrete casements for 155mm cannon that posed a serious threat to the Utah and Omaha landing forces. The initial force of three Ranger companies landed, scaled the cliffs under covering fire from US and UK destroyers, and captured the casements. The guns, which had been removed, were found nearby and neutralized. An additional force of Rangers, originally held as a reserve in case the initial force could not capture the guns, was diverted to Omaha Beach, where it proved of great value in effecting the breakout.

The Commonwealth Beaches

The British 50th Infantry Division and 8th Armoured Brigade encountered fierce resistance at Gold Beach. Most of the beach area ran up to rocky cliffs; only about a quarter of the broad stretch of sand proved practical as a landing zone. Supported by bombers and gunfire from Royal Navy cruisers, the British forces still found it difficult to make progress in the face of well-positioned artillery pieces in strong bunkers and German troops well fortified in towns near the beach. Only after heavy fighting and the arrival of tanks delayed by rough seas were British troops able to move off the beaches and begin linking up with their allies. Arromanches, one of the British objectives, was captured in the afternoon, but Bayeux and Port-en-Bessin, the other objectives, were not captured until June 7th.

Royal Canadian Navy Commandos on Mike sector of Juno Beach. (Wikipedia)
East of Gold along the same stretch of shoreline was Juno Beach, the responsibility of the 3rd Canadian Infantry Division. Bombers of the Royal Canadian Air Force proved less than effective at knocking out German beach defenses, but direct attacks by rocket-armed Hawker Typhoon aircraft and bombardment by Canadian, British, and French warships proved more effective.

Again, rough seas and high tides prevented armoured forces from providing as much support to infantry landings as planners had hoped they would. And as at Omaha, slow progress by first-wave troops created traffic jams as later waves arrived on the crowded beaches. Nonetheless, by the end of the day, though they had not captured all of their objectives (Carpiquet Airfield outside Caen was still under Axis control), Canadian forces had advanced further inland than any other Allied troops.

Like Gold Beach, much of Sword Beach's nominal expanse was obstructed, in this case by shallow reefs just off the shoreline. The British 3rd Infantry Division stormed ashore supported by the 27th Armoured Brigade and the 1st Special Service Brigade (Royal Marine Commandos). While Omaha, Gold, and Juno had been defended both by the German 352nd Infantry Division, a regular line infantry unit at full strength, Sword was defended only by the 716th Static Division, an understrength unit made up of reservists and non-German conscripts. One regiment of the 716th had been detached to support the 352nd, leaving only a single infantry regiment and an artillery regiment.

However, behind Sword in the city of Caen (one of the 3rd Division's objectives) was the 21st Panzer Division, the only German armoured unit that participated in the fighting on D Day. Though the Germans were not able to drive the British back into the sea, they did penetrate at one point as far as one section of the landing beaches. The attack prevented the British at Sword from linking up with Juno's Canadians, and it prevented the British from achieving their goal of capturing or even fully screening the city of Caen.

Normandy '44 Replay

Like the airborne landings, the beach landings are resolved using a series of die rolls. In each beach landing hex, the Allied player rolls for the assault troops and, separately, for any of the amphibious (Duplex Drive or DD) armoured units slated for that beach. At Utah Beach and Sword Beach there is one assault beach each; likewise there is one attack at Pointe du Hoc; at Omaha, Sword, and Juno, there are two assault beaches each.

Since the initial landing forces and beach defenders are set and the supporting air and naval forces are assumed to be operating according to the invasion plan, the only factor other than Fate that determines the outcome is which landing point is being attacked. In every case but one, the defenders will be eliminated--the question is how much damage will they inflict on the attacker. Utah Beach has the least chance of the attacker taking damage. Omaha Beach is the exception; a very unlucky attacker there can take losses, do no damage to the enemy, and be forced to make another landing attempt.

So, working from west to east:

Utah Beach: 4, A1/D1, Adv 2. US troops take one step loss but get to advance past the beach into the hinterland. DD Tanks: 1, -1 step. The surf is heavy...

Pointe du Hoc: 6, D1, Adv 2. The Rangers scale the cliffs and easily overrun the battery, moving inland. 5th Rangers: 1, the 5th Battalion land with their Ranger brothers at Pointe du Hoc.

Omaha, Charlie and Dog Beaches: 4, A1/D1, Adv 1. Some losses, but not as bad as it could be. DD Tanks; 6, NE. Tanks swim ashore.

Omaha, Easy and Fox Beaches: 4, A1/D1, Adv 1. The invasion is not as brutal as some officers had feared... DD Tanks: 3, -1 step.

Gold, Jig Beach: 4, A1/D1, Adv 1. The Dorsets and Hampshires make it to land. DD Tanks: 3, -1 step.

Gold, King Beach: 4, A1/D1, Adv 1. I'm waiting for the other shoe to drop. DD Tanks: 6, NE. The waves seem to have died down.

Juno, Mike Beach: 6, D1, Adv 2. The Royal Winnipeg Rifles storm ashore to find RCAF rockets have cleared most of the pillboxes on the beach. DD Tanks: 3, -1 step. The 1st Hussars lose some brave lads.

Juno, Nan Beach: 5, A1/D1, Adv 2. The Canadians are living up to their historical record of making the biggest gains on the first day. DD Tanks: 3, -1 step. An 88mm emplacement near Bernières takes out several tanks of the Fort Garry Horse.

Sword, Queen Beach: D1, Adv 2. Lion sur Mer is full of Yorkshiremen. DD Tanks: 3, -1 step. Choppy seas swamp some 13th/18th Hussars Shermans.

That's tremendously better results than the historical landings. The Allies are ashore with a firm foothold here. Let's see what Jerry does next.

The game after the airborne and beach landings.
Next: German Turn 1. Some restriction of German movement: German Ost units (made up of conscripts and volunteers from USSR territories), some units of the 711th Division (the defenders of the Cabourg/Deauville area), and the units of the Cherbourg garrison cannot move on Turn 1, and the 21st Panzer Division has reduced movement on that turn.


Monday, June 8, 2015

Commemorating the D Day Landings: Replaying the Normandy Invasion

D Day: The Airborne Landings

Gen. Eisenhower addresses US paratroopers of Co. E, 502nd PIR prior to D-Day. (Wikipedia)
The first troops of the Allied armies to arrive in France were pathfinders, small parties of paratroopers sent ahead of the main forces to set up radio and visual beacons to guide the main parachute formations to their drop zones. Both in the US and the UK drop zones, however, pathfinders had difficulties that led to poor performance of their principal mission. Some teams were
dropped in the wrong locations. Others lost their way and set up far from their intended landing zones. Some teams lost critical equipment when planes carrying it developed mechanical problems and crash landed without reaching Normandy. Others dared not light their visual beacons (without which their radio transponders were almost useless) because German troops nearby would be alerted to their presence and ambush the paratroops as they dropped. In one instance, a British pathfinder team suffered perhaps the worse fate of all; waiting to guide paratroops to land near the Merville Battery, they were bombed by RAF aircraft trying to damage the battery ahead of the paradrop.

British pathfinders synchronize watches. (Wikipedia)
Problems continued as the airborne operations went forward. Transports carrying the main forces were plagued by the same poor visibility and navigational problems that had caused some pilots to drop their pathfinder passengers in the wrong locations. Those aircraft searching for the signals of pathfinders who had lost their equipment or who had set up in the wrong position were baffled. German anti-aircraft guns had begun firing by this point, destroying and damaging planes and causing others to veer off course or accelerate beyond the speed at which it was safe to deploy parachutists. Some "chalks" of paratroopers jumped too soon, landing short of their drop zones, while others jumped too slowly, burdened by heavy equipment, and were spread far apart. Some aircraft switched on their emergency transponders, identical to the transponders used by the pathfinders, further confusing other pilots.

British paratroops and commandos in Normandy. (Wikipedia)

As a result, many American and British paratroops landed far from their intended drop zones. Individual units often found themselves scattered widely over the Norman countryside, much of it flooded by the Germans in anticipation of an Allied assault. Nearly half of one American regiment landed on the far side of the flooded Merderet River and contributed little to the division's mission on D Day. One British battalion commander took three hours to assemble a force that amounted to less than half of his unit.

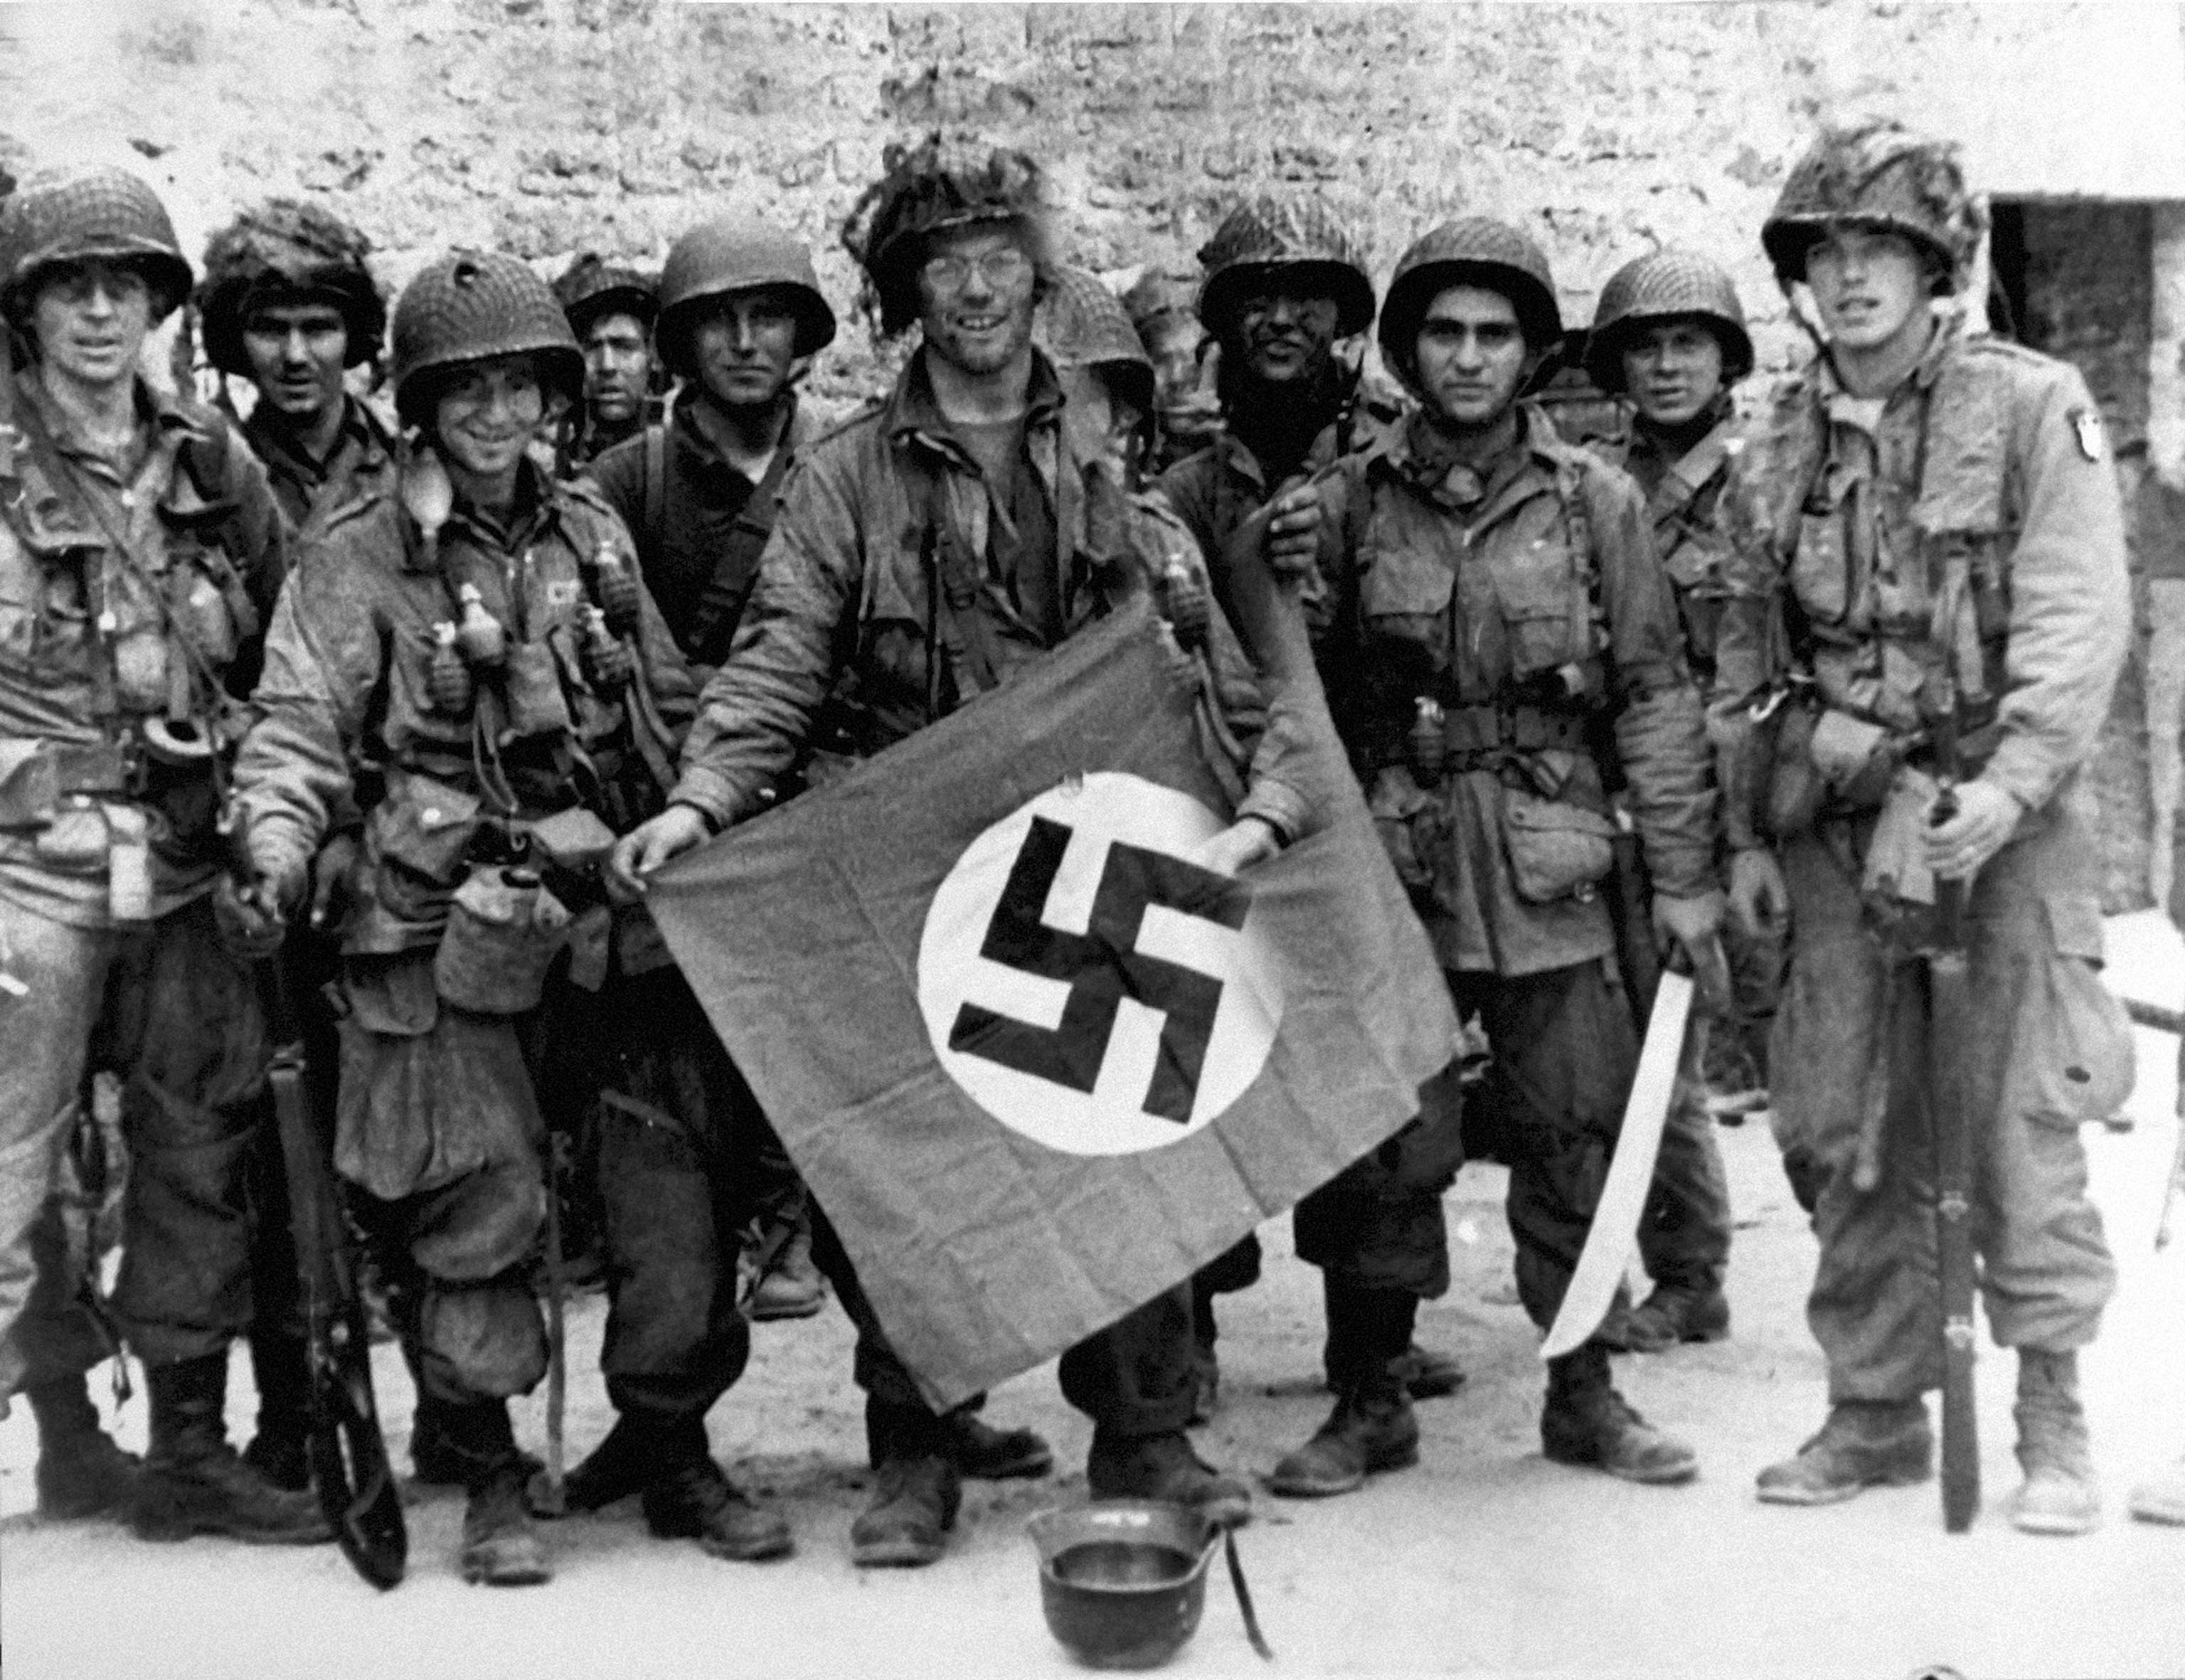
Troops of the 101st Division with a souvenir--a Nazi flag used for air identification. (Wikipedia)

Nevertheless, the US 82nd and 101st and UK 6th Airborne Divisions accomplished almost all of their D Day missions. The British 6th Airborne seized the Caen Canal and Ourne River Bridges and captured the German battery at Merville (although the battalion that assaulted the latter had only about a quarter of its men assembled when they attacked). Mission Albany, the 101st Airborne's attempt to seize the exits from Utah beach and disrupt German forces attempting to counterattack the landings, was mostly accomplished. Mission Boston, the 82nd Airborne's plan to seize Ste. Mere Eglise and establish blocking positions to protect the beachheads from German attacks, also succeeded, with the "All American" holding the pivotal town and establishing fields of fire over the Merderet crossings.

Normandy '44 Replay

In our battle for Normandy, each of the Allied units arriving by air rolls a die to see how badly they are disrupted by the weather, German flak, equipment failure, human error, and other problems. Results can include "no effect" (perfect landing), "scattered", and the possible loss of one or two steps.

Steps represent damage to the combat ability of the unit; some units have only one step, while others have two or even three steps. Each unit is rated for its ability to move, to fight, and an overall quality rating; when it loses a step, those ratings are reduced. Losing a step could represent casualties, a loss of morale, depletion of ammunition, destruction of critical equipment, or a combination of all these factors. Under some conditions, steps can be added back as replacements bring up the strength of depleted units, more ammunition and equipment are brought forward, and morale improves.

Each division had different challenges to contend with, so each has it's own column to roll on for losses. The British 6th Airborne units, dropping mostly into open terrain not affected by the flooding and close to the coast, has the best chance of arriving unharmed. The units of the 82nd, landing much further from the coast in densely hedged and wooded farm country along the flooded banks of the Merderet River, have the worst table. That of the 101st is of medium grimness.

In our game, the 82nd has problems with its drop. The 507th Parachute Infantry Regiment (PIR) is scattered and takes two step losses. One of these goes into the airborne replacement pool; it represents men who have just become temporarily separated from their units and will rejoin them later. The 505th PIR does better: scattered, but only one step lost (this also becomes a replacement). And the 508th is golden--they take no losses and arrive intact. The two scattered regiments cannot move or attack, accrue replacements, or dig in effectively. But they can defend at full strength, and they will recover after the first full Allied turn is complete.

The 101st likewise has a mixed bag of results. the 506th PIR lands without a hitch, but the 501st and 502nd both become scattered and each takes a step loss.


The British, with their usual sang-froid, roll two 5s and a 6; not even a button out of place, their troops assemble quickly and quietly in the drop zones to carry out a bloody night's work.


Next time: The main beach landings and the drama of the Rangers at Pointe Du Hoc.