Background image is Les Dernières Cartouches (The Last Cartridges) by Alphonse de Neuville
Showing posts with label AARs. Show all posts

Tuesday, April 27, 2021

Verbreitnet: a brief AAR

French Light Infantry Attacking Through Woods by Victor Huen

So, I never had a chance to provide an AAR on our Carnage & Glory game, the battle of Verbreitnet. As readers may remember from the preview, the scenario was fictional 1813 encounter between a French force (an infantry division and cavalry brigade) and an Allied command consisting of a Prussian infantry "brigade" (basically a division equivalent) and a brigade of Prussian and Russian cavalry. The two sides' forces were evenly balanced.

The battlefield included some basic terrain, but nothing to provide too great an advantage to either side. A stream or creek wound among some low hills close to the Allied side of the table (which we called the west side). Patches of woods, a few more low hills, and some grain fields were scattered over the center of the battlefield. A road ran from the west, Allied, edge of the board to the east, or French, side, roughly perpendicular to the two sides' deployment areas, with another joining it at right angles running towards the north side of the battlefield. 

The mission was a fairly straightforward "defeat the enemy" one; the intent was just to give one player an introduction to the game and the others a brush-up/reminder of the rules.

The Allies deployed with their cavalry on their right and their infantry occupying their left and center, with the right hugging the table edge and their left fairly open. The French mirrored their deployment, infantry facing infantry and cavalry facing cavalry. 

The Allies advanced their cavalry slightly then formed a holding position, waiting to see what the enemy did. In the meantime, they moved their infantry forward slowly, throwing out some light troops to extend their left flank.

The French moved forward fairly aggressively in the center while refusing their right with a battalion of légère, which sheltered from view inside a wheat field. One battery of French artillery seized a small hill in their center while another moved up the east-west road toward the junction.

The leftmost Prussian infantry regiment crossed the stream and paused, waiting to see where the bulk of the French infantry would go; meanwhile the rightmost Prussian infantry regiment held position on the near side of the stream. The French moved their right-hand brigade to meet the Prussian advance and a battle developed between the stream and the wheatfield. The Prussian riflemen on their far left moved in to support the attack but were driven back by the French légère, who advanced to the edge of the wheatfield and began volleying.

The French cavalry had moved to claim much of the ground between them and the Allied horse, using fields and low hills to screen their advance from the Allies' horse artillery, which had unlimbered on the edge of a wheatfield beside the east-west road. The French horse artillery, however, had found a good position to bombard the Allied horse from and began firing away.

An attack on the French infantry's right-hand brigade by Prussian musketeers in column of divisions was defeated, giving the French the confidence to push forward their left-hand infantry brigade along the east-west road towards the center of the Allied line. 

At this point, two squadrons of French cavalry crested the hill they were sheltering behind and launched an attack on the Allied cavalry's right flank. One squadron of Russian uhlans came out to meet them while a squadron of Russian hussars, taken on the wrong foot, failed to act and received the charge at the halt. The uhlans defeated their opponents and threw them back. The other French lancers won their action against the hussars, but took such a beating in doing so that they also fell back.

Prussian Schuetzen by Richard Knoetel

The French tried to build on success by sending in a squadron of chasseurs against the Russian uhlans; they succeeded, driving off the Russians. A squadron of Prussian hussars decided to test the French infantry that were advancing in the center and launched a charge, forcing some of the French infantry into square. Both sides' cavalry were exhausted by this flurry of activity, however, and since the Allies had taken the harder pounding, their cavalry was forced to retire from the field, while the French cavalry that was not retiring (essentially their chasseurs) would still be able to advance if they were led by a general officer.

In the center, with the Prussian cavalry retiring, the French infantry pushed forward, infantry in lines preceded by battalions of légère in extended order. In the center of the infantry battle, French and Prussians were still engaged, but the leftmost Prussian regiment had taken enough pounding in its attacks that it had also fallen back, leaving its comrades with both flanks exposed. At this point, the Allies decided to withdraw from the field before they were forced to flee.

We were hoping for several more players than we got in the end. We had three active players, an umpire, and two umpire's assistants (to move troops and measure distances, since we were playing by Zoom). For reasons I don't recall (possibly just army preference), we put the two experienced players on the same side (French) and gave the novice the Allied command. In retrospect, obviously, we should have put one experienced player on each side and drafted the two umpire's assistants as players (one was a novice C&G player, one experienced); that way we could have had an experienced player and a novice on each side, with a spare experienced player. 

We used a moderate-sized table (4' x 6') for a divisional action, but we should perhaps have started both armies a little closer together to give them room to fall back. While it would have taken away a bit of maneuver option, it would have given them a little more "backfield", so defeated troops didn't run off the edge of the table so fast. Alternately, we could have fought the action on a narrower front and used the short edges for deployment and the long edges for engagement. It can be challenging, even using the 1" = 50 paces scale, to fit a combined-arms C&G game on the average gaming table. With deployed cavalry moving 15" to 18" per turn and maneuvering cavalry moving twice that, opposing cavalry units can move onto the table from offboard and be within charge reach of each other at the end of the first turn, even when operating in line.

C&G, like any game, is a product of its designer's theory of how combat works. Unlike any other tabletop miniatures game, however, that theory can only be learned by playing the game. The designer's notes explain some elements of morale and fatigue, but it's only by playing (or hanging out in online discussion groups for the game) that one learns crucial elements of play. Artillery should initially take ranging shots with very low percentages of its total strength before engaging with the whole battery. Infantry should not advance more than 75 paces in a turn in which it plans to issue fire. If you wish to charge with a unit in Turn 2, be sure to advance towards the enemy in Turn 1, as the momentum of having done so will make a successful charge attempt more likely. 

And those are elements that one might intuit from a very close reading of the screenshots included in the manual. Other things that are laid out nowhere are the way that all the factors of an instance of firing affect its effectiveness or how the system determines what morale result will come from a combination of terrain, fatigue, firing, and combat factors. One can expect that fire from close range will be more effective than at maximum range, or that artillery that has not fired will be more effective than artillery that has been firing for several turns, using up its ammunition and fatiguing its gunners. And it's certainly more realistic that players not have formulae to make those computations exactly, as in a boardgame one can count up combat factors and compute the perfect attack given a combat results table. But one feels that going to the opposite extreme is just as unrealistic.

Thursday, January 12, 2017

Montmirail: Two Battles

The Battle of Montmirail by Vernet (National Gallery, London)

So, last weekend I staged my partial pseudo-Montmirail scenario using Black Powder rules. Because of the varying schedules of available players, we ran through the scenario twice, with somewhat differing results.

I was especially glad of the opportunity to game because it brought together three of my friends who I don't see as often as I would like. Though one gets the moniker "Mr Invisible" because of his frequent absence due to travel on the service of his country, all three are deserving of the title, as the others' late work hours (on the one hand) and high school teaching duties (on the other) keep them almost as busy. So we got a shot of The Invisibles which was, appropriately enough, shadowy and hard to see due to the (lack of) light in the room.

The (Shadowy) Invisibles
With catching-up conversations well in hand, we started into learning and experimenting with the rules. Some of us had played a game or two, but we found as we went along that we kept finding, remembering, or forgetting various bits, so the end of the game was as much a hot wash of what rules we had forgotten as how the battle had been fought.

Game 1: Both sides deploy.
In our first game we used the game's basic measurements in inches with my 15mm figure collection, most infantry units being between 12 figures (small) and 24 figures (large) in size. This lead to a very swift engagement, even though both armies entered from off board. The French deployed quickly, with one of their two divisions all in line on their right in mostly open ground and the second division advancing on their left through a vineyard and leafless orchard. The Prussians stacked their forces, with the landwehr in front, preceded by skirmishing jaegers, and the grenadiers behind. The cavalry (landwehr lancers and mounted jaegers) stalled repeatedly in attempting an encircling move from their right flank.

Game 1: French outflanking the landwehr.
The Prussians had difficulty getting the landwehr into a coordinated assault, and when they tried to push their grenadiers around to the left of the line through some woods, they also lagged. The French left turned landwehr's flank while holding up the grenadiers as they slowly emerged from the trees. Even though the Prussian cavalry finally got behind the French lines, the French infantry had more or less secured the win by that point, knocking out several landwehr battalions and all of the Prussian artillery.


Game 2: Prussian grenadiers advance.
For the second game, I reset the terrain, increased the amount of artillery on each side, and tried to make the landwehr contingent more effective by giving them more troops and a brigadier of their own. The new Prussian commander advanced those troops on his right (where they proceeded to stall), while bringing in the grenadiers in his center with the cavalry to their left. The cavalry was much more responsive than in the first game, but not much more effective. The grenadiers deployed more quickly, at the same time the French formed into attack columns with skirmisher cover and advanced. The two sides fenced there for a while, while on the French left their infantry deployed into line, looking to hold while their right attacked.

The Prussian right obligingly stalled, but with the Prussian cavalry making it hard to bring the full force of their
right wing against the enemy, the French threw their left into the attack. Meeting the landwehr, they began a see-saw battle across a series of frozen fields.The landwehr, more numerous in both numbers of units and size of battalions, ground the French Middle Guard down while the grenadiers held on on the left. Eventually the French conceded, though if we had had more time they would have gotten the historical "Michel calls on the Emperor for help" reinforcements that I had standing by.

Game 2: Prussian landwehr outnumber the Middle Guard.
Overall, I think everyone enjoyed the games. After two full battles, I was beginning to get a bit tired of rolling dice, perhaps a symptom of my long exposure to the diceless Carnage and Glory. Black Powder is accessible and fairly easy to learn and play; its only complexity is in the number of special rules that are used to add colour and character to different units and which require one to keep track of them and remember to apply them. I think that well designed order of battle sheets with all the special rules applicable to a force listed on them will help with that, as will playing with a  fairly consistent set of units often enough to remember that "oh,yes, these fellows always have X ability." Also, a few standard modifiers were getting overlooked often (the morale bonus for attack column being one, I think), but doubtless that too can be overcome with familiarity and a methodical look at the charts for a few games until they are more familiar. Using cm instead of inches in the second game slowed down the speed with which the battle came on, which allowed both sides to deploy from march in a more measured, somewhat more historical manner.

One is spoilt for choice these days, with all sorts of wargame rules available for every period and region imaginable. One advantage of Black Powder is that the basic rules are the same for every period; one can find or devise specific cases for particular conflicts, but in most cases even the special rules that give colour and character to units are fairly consistent across periods. So BP is a great set to keep in one's back pocket; learn it once, use it repeatedly. I'm a big proponent of Carnage & Glory, which uses a similar engine for several different periods, but the underlying rules that players need to know (how fast units move and change formation, how they interact on charges, etc.) are different enough that one needs to learn each period's special rules separately. Added to that is the time one needs to invest in building orders of battle; in C&G, this is somewhat of a major time investment, as computer files have to be carefully built through a form-based graphic-user-interface. With BP, one can do a bit of pencil-and-paper work and have a rough OB set up in an hour or two. So BP is an easy choice for a quick pick-up game, while C&G is likely to be my preference when I have time to design a scenario in detail, as it cleaves more closely to the historical tactics (and limitations) that battlefield commanders encountered.

Even if one fields slightly smaller units than the authors use, Black Powder (like C&G) requires a fairly large number of figures. As a result, I'm more likely when playing it to use my existing 15mm armies than I am to build new 28mm ones for BP. I do have a fair number of 28mm Napoleonics, but I think I'll save them for games with a somewhat lower figure density. I recently acquired the Chosen Men Napoleonic skirmish rules just published by Osprey and written by Mark Latham (another member of the Games Workshop fraternity), and although I've only dipped into them so far, they definitely look worth trying out.

I'm collecting votes from my fellow gamers as to the subject of our next tabletop foray. In the meantime, I have work awaiting me on the painting table and the blog drawing board, as the commencement of Project 1777 edges ever closer.

Friday, July 8, 2016

Catching Up: Early Summer 2016

While work has been busy, keeping me from doing as much blogging as I would like to do, I have also had the opportunity over the last couple of months to squeeze in a bit of wargaming here and there.

For one thing, I was able for once to get out to a meeting of our local ASL club, the DC Conscripts. I played two scenarios, WO3--Counterattack at Carentan and the venerable scenario 11--Defiance on Hill 30. I lost both, the first to Jason Sadler and the second to David Garvin, but enjoyed both games.

My Germans in their futile attack on Garvin's paratroopers.
Second, I met up with a group of gamers in Falls Church who meet somewhat regularly to play board wargames. I've now played four sessions with them. In one I finally got to play GMT's Virgin Queen, an excellent but highly complex game of European great-power politics in the 16th century. As the Ottoman Empire, I was able to rid the Mediterranean Sea of the Spanish scourge and establish my rule over almost all of the North African coast, as well as roust the Knights of Malta from their island stronghold. I came in third out of six blocs, which against some brainy opponents made me feel good.

Having thrashed the Spanish, the Ottoman navy book in for a minibreak at the Knights of Malta B&B.
In two other outings with the group I've had a chance to play GMT's new COIN game, Falling Sky, about the politics and warfare among the Romans and the Gallic states of the 1st century BCE. In the first playing I drew the Arverni, the central Gallic faction, against the two game designers, one playing the Romans and the other their Aedui allies. with a fourth player in charge of the Belgi, the warlike northern Gauls. I acquitted myself adequately there, with a drawn game when we stopped. On the next occasion I got the Belgi and was able to come close to winning when we had to stop the game for lack of time.

Our German cousins (black) regroup, but the Belgi (gold) have reclaimed all their territory.
And most recently I brought Wellington and was randomly selected to command the Iron Duke. I completed the siege of Ciudad Rodrigo in record time, recaptured Salamanca, and was able to draw Marshal Soult off from his siege of Cadiz, but he and Wellington fought to a standstill and we had to call the game before any decisive result was achieved.

My canny French opponents Adrian (Joseph, left) and Roberto (Soult, right) plot and plan.
 UPDATE: Here's a blog post by our host on recent boardgaming.

I've also managed to get in a couple of miniatures game. A couple of weeks ago several of us played two American Revolution scenarios using the new edition of Sharp Practice from the Too Fat Lardies. I'll put up some photos and comments in a future post, but my short review is that I was disappointed in the rules. They seem to have gone in just about the opposite direction I was hoping--instead of clarifying and streamlining the first edition rules, they're no clearer and have added layers of complication that (in my opinion) add nothing to the game. Instead of becoming more like a historical wargame covering small-unit actions (a field woefully bare in horse-and-musket era gaming), they've become more generic and game-y.

M&T: Mohawk warriors move forward in an attack on a French outpost.
I also played two scenarios of Muskets & Tomahawks recently. In like manner, I'll try to add a post with photos and commentary from our games soon. The game rules are much more clearly written than Sharp Practice, but I didn't find the games terribly compelling. Units are very small and combat results are therefore highly variable; a single round of shooting from one unit on another can be completely ineffective of completely catastrophic. Like Sharp Practice, the game feels more like watching a Hollywood movie than watching a historical battle unfold.

Monday, January 11, 2016

Starting Off the New Year with a Bang!: Ukraine '43


Well, that was vastly frustrating. I'd written up a long, detailed post on the playing that my friend Mr Invisible and I had started recently of GMT's Ukraine '43. Than I mis-keyed and deleted the whole damn thing.

*sigh*

We took advantage of a brief lull in his work-related travel schedule to get a coupel of games in. I've mentioned our playing of Rebel Raiders. The second GMT title we broke out was Ukraine '43. I'd owned the first edition for some time without playing it; he had recently gotten the second edition, so that was the one we set up.

Having set up and played through the opening of sister-game Normandy '44, I had some familiarity with some of the concepts common to these games: multiple flavours of movement (normal, extended, Tactical, Strategic), ZOC bonds, combat shifts, disruption, determined defense... But there is something new in each of these titles, always something that makes the specific campaign different (plus Mr Simonitch keeps refining the system).

Our set up. (Morning coffee giving way to afternoon beer.)
Having read a lot of the comments on BGG, I was expecting to have a very bloody game on my hands as the Soviet player. Perhaps I was merely too cautious, but I never had huge Red Army dead piles. But I also didn't see the huge breakthroughs that I've seen described. The Germans in the hills east of Stalino were too tough for serious attacks given what I had there, though a better setup once I sussed the game better might have helped. North of Stalino the river line was like adamant--no way I was going to penetrate that! I finally got some traction through the woods and rivers east of Kharkov after several turns, but only after pulling off most of my mechanized troops from the fronts south of there.

The Soviet steamroller lumbers into action.
I did manage to create some holes in the German line north and west of Kharkov, seizing a couple of VP in the process. But he was able to pull his own mech forces north and, with the aid of the horrifying Gross Deutschland mechanized division, he was putting together a defense that stood a good chance to contain my forces unless I came up with some magic.

Killing units is remarkably hard in this game. Time and again, I was able to surround units, either partly or fully, only to see them hang on stubbornly against my attacks until their friends were able to break through to them. Even boxing a unit up with ZOC bonds wasn't enough to cut it off and destroy it utterly in most cases. With armour shifts and more airpower and elite force bonuses, he broke though time and time again and pulled his metaphorical chestnuts out of the figurative fire.

We played only the first three (or was it four?) turns of the scenario's seven before we had to call it a day. But I do look forward to a rematch and to playing more of the related games from Mr Simonitch's stable.

Zhukov begins making holes, but too few and too small.

Monday, December 21, 2015

Rebel Raiders on the High Seas: A Test Game

USN Vice Adm. David Glasgow Farragut
My friend Eric "Mr Invisible" and I started off our inaugural monthly weeknight gaming session with a trial of GMT Games' Rebel Raiders on the High Seas. We have both recently read James McPherson's War on the Waters: The Union & Confederate Navies, 1861–1865 and were looking forward to exploring the naval portion of the American Civil War with this (relatively) new game on the subject.

We started off with dinner and some chat about work, and we had neither of us read the rules exhaustively beforehand, so we did not have time to play through the whole game at our first trial. Instead, we played the first three turns, trying out different gambits and exploring the ways that different rules provisions work. I think we'll be better prepared to  play a full game now that we've had a training session.

And play a full game I think we certainly will, as we both enjoyed the game a great deal. It has fairly simple mechanics and achieves detail through varying them in different circumstances. The same basic mechanic is used for ships trying to locate enemy ships in order to attack them, for instance; but CSA commerce raiders and be searched for in all sea and coastal areas, whereas the faster and more maneuverable blockade runners can only be found when they are in a "blockade station"--the approaches to a specific port--or in a port itself. Blockade runners being designed entirely for speed, however, are captured/destroyed if they are found, whereas the sturdier commerce raiders can give Union ships a fight for their money.

The land combat aspect of the war is highly abstracted; as the chiefs of naval operation, the players are most concerned with two main theatres: the maritime war of Southern commerce raiders and blockade runners and the Union attempt to gradually choke off their access to the sea, and the riverine warfare on the Mississippi and its tributaries. The armies appear in the form of assaults, which the Union can launch 2-4 times per turn (turns represent four months), and some supplemental card effects. The Confederates get a counterattack every so often, which can retake ground lost to the USA but cannot conquer any Union territory. Union assaults in the first year of the war are feeble stuff; over time they become more effective, as the wartime economy gears up and the ineffective generals are slowly weeded out.

U.S.S. St. Louis, Eads-built ironclad gunboat
Despite the preponderance of Union forces (as its increasingly capable armies capture more Confederate territory, the Union strips more and more of the resources the South needs to build more ships), the Confederacy wins the vast majority of games, according to player reports. This is not to say that the Confederacy wins the war and survives, but that players better the record of their historical counterparts. Though we played just the truncated year of 1861, I was certainly (as the Union player) feeling the frustration that McPherson describes as filling the Navy Department at the number of fast ships rushing in and out of Southern ports to pick up contraband in Europe and Cuba and bringing it back to Confederate shores with the Union Navy little able to respond due its woefully small numbers.

I tried an early assault on Norfolk, hoping to capture back the Navy Yard there and enable a two-track land
campaign against Richmond (hope of one of the CSA's major foundries and a big deal for naval support). But I fell at the first hurdle, as the Confederate defenses proved too much for my tiny armada. I did capture a few blockade runners and sank at least one commerce raider in the Gulf of Mexico.

Vicksburg, MS, levee and steamboats
But I also had little joy of attempts to push south in the riverine war; my attacks on Island Number 10 and on Forts Henry and Donelson achieved no progress but cost me a number of gunboats. Eric began fortifying Key West, clearly planning to use it as the base of a host of fast ships to run back and forth to Havana. I could see I'd have to turn my attention to reducing that soon, too. The early Union game feels entirely too much like a game of whack-a-mole.

Back east, things got worse, as Robert E. Lee came on the scene and prevented any land attacks in the Eastern Theatre, as the Army was too occupied defending against his wily thrusts to launch any of their own.

We stopped after the December 1861 turn for lack of time, and since it was a learning game we didn't even consider noting down all the locations of pieces for a later resumption. But I think we will get this back on the table soon. Especially if one doesn't interject any of the more specialized optional rules, RRotHS is a fast, fun, simple game that, at first glance seems to give a good impression of the naval aspects of the Civil War.

Wednesday, December 16, 2015

Boardgame: The Napoleonic Wars

My gaming opportunities have been unusually numerous of late, for which I am very grateful. Last Sunday, two friends and I managed to squeeze in a learning game of GMT's The Napoleonic Wars. The game has a well-deserved 7.06 rating on BGG; my own rating for it is higher, as it seems a very enjoyable game, with a lot of replayability, a lot of historical authenticity, and a high but not outrageous level of complexity. ADG's Empires in Arms will probably remain my all-time favourite Napoleonic game at the strategic level, but this comes a close second based on the most recent playing and rather vague memories of my first time through the game, several years ago.

TNW is another in GMT's stable of card-driven games (CDGs). Each of these titles has its own unique design elements, but they share a general mechanic: the meat of a turn's action consists of players alternating plays from hands of cards, each of which either results in a historical event taking place (with specific game-defined effects) or the player receiving a certain number of generic command points to conduct various operations. At the end of the turn, players refill their hands from the common deck based on some limit, sometimes being allowed to retain one or more cards from their old hand.

Events are often one-off (a given event can occur only once in the play of a given game), and players are often required to play a card for its event effect under a certain set of circumstances. Playing a card for event effect often puts it out of play for the remainder of the game (especially if the even effect is very powerful), whereas other cards are continually recycled. The more beneficial the event effect, the larger the number of operational resources allotted if the card is not played as an event, thus creating tension for the player in choosing between the two options, particularly when playing the event will remove the card from play. And the number of cards players receive is never sufficient for them to achieve all the tasks they would like to, presenting an excellent example of the quandary of resource allocation.

Some CDG innovations include splitting the deck into segments to represent different phases of the conflict, splitting the deck into opposing sides (so no cards are shared), varying the effect of event cards based on which player puts them into play, requiring  that Card A must have been played as an event before Card B can be played as an event, the opposite effect in which playing a particular event prevents another event from being played in the future, and giving players some "home" cards with event effects specific to their faction that they can play every turn.

My gaming comrade Eric (aka Mr Invisible) and I have played several of GMT's CDGs, including Paths of Glory, Here I Stand, and Stalin's War. Other CDG favourites of mine include Thirty Years War, Twilight Struggle, Wilderness War, and We The People/Washington's War (which I think started the whole CDG genre). TNW is a worthy entrant into that field.

Phil (Britain/Austria) contemplates his capture of Madrid, as Eric (Prussia/Russia) deplores the loss of Berlin.


We realized we would not be able to learn and play the entire TNW five-turn campaign scenario in the time we had for gaming Sunday (roughly six hours). We tried to shorten the learning process by reading ahead in the rules (the "living" version of the rules and the playbook are available on GMT's website), but no one ever has as much time as they hope to for read-aheads (as I can attest from many a professional conference). So we picked the one-turn scenario for the 1813 campaign as our test piece. And we finished the game handily within about five hours, allowing time for the standard wargamer "social conversation" periods in and around actual game learning and game play.

We took sides more or less by default after setting up: Phil got Britain, its minor ally Spain, and Austria, which begins the scenario neutral but enters after one complete round of play by the other powers. Eric got Prussia and Russia and their minor ally Sweden (ruled by the turncoat French Marshal Bernadotte), and I rather uncharacteristically played France and its tiny ally Denmark.

France starts out with a large hand of cards, which give it several advantages. First of all, it gives France lots of options and a better shot at getting the high-value cards. Second, it makes France the preempting player at the start of the scenario. This role is a TNW special feature; it allows the power with the largest hand (when players control more than one power, they must keep their cards separate) to interrupt a power before it plays its card. The interrupting power plays a card of its own, then the interrupted power may take its turn. Various details prevent the interrupting power from completely dominating play, and the more times a power interrupts, the fewer cards it has and thus the sooner it lose the ability to interrupt.

Joseph Bonaparte: Bro, can't you spare a general?
France starts with a moderate-sized army in Spain, but one that is spread out and has no army commanders to unify it and get it moving. The largest French armies are in Germany, with a few garrisons in Poland and Ruthenia and leaders in Paris and Naples ready to raise new armies and move them toward the theatres of war.

Britain has its classic small but powerful army in Spain; per the 1813 scenario rules, it cannot attack elsewhere until it has conquered Spain (naval action and diplomacy, two big British occupations historically, are not used in 1813; the Ottoman Turks are also omitted).

Russia and Prussia start with various armies scattered across north and eastern Germany, Poland, and Russia. Their greatest problem is coordinating their efforts; apart from Blucher, they don't have any leaders capable of commanding large armies to start with, so they have to subsist on army groups, which take more resources to move. Also, none of their generals are as good as Napoleon in battle, so they have to exhaust him with numbers. And the Russian numbers take time to build and move west to where the fighting is.

Austria sits quietly for the first set of impulses, but once they enter, Schwartzenberg is a capable army leader and the access of forces Austria brings to the Allies will stretch the French ability to react in all theatres at once. If the French don't keep multiple forces operating in central Europe, the Prussians or Swedes can squirt past and start liberating north Germany. If they don't keep armies operating in Italy, Austria will burst across the Alps and start liberating its former possessions. And if the French don't send a serious army commander south to Spain, Wellington will roll right through the garrisons they've left around and start eating up southern France (which will also allow them to land troops elsewhere on the Continent).

Unless France manages to drive one of the Allies out of the war at the end of the scenario (an uncertain thing at best), players decide victory by comparing how many keys each possesses. The map is made up of linked points, representing regions, cities, or major formations. Some points are considered crucial to victory and are referred to as keys: national capitols (e.g., Paris, Vienna, Berlin), major cities (e.g., York, Orleans, Zagreb, Warsaw), or strategic locations (e.g., Gibraltar). Essentially, whoever had captured more of the others' keys by the time we ran out of cards would be the winner.

I rather rashly took a chance, gathering up a large force under Marshal Davout and attacking the main Allied army in Germany. What I failed to consider is that armies can either attempt to evade (flee to an adjacent space when attacked) or intercept (reach out and attack an enemy army moving into an adjacent space). The Allies attempted to flee, failed, then called on nearby armies to "intercept" and join them. I won the resulting engagement, doing some damage to the Allies, but lost some troops myself, as I had fought more of the enemy than I intended.

The Prussians, feeling their oats after battle with Davout, moved west and liberated Hannover. This was a bit of a blow, and it left them crouching like a black vulture over the Low Countries and northern France, but I had Soult and an army in Paris that could be reinforced if need be, so I looked at what they had left behind--an open path straight to the under-garrisoned Berlin!

Graf von Kleist
Napoleon sprang into action, picking up several corps, including the doughty Davout, and racing towards Kleist and his band of defenders. After a brief thrashing, we drove the Prussians out of their capitol! It was at that point that I realised that possession of the capitol only allowed a *roll* for conquest, it didn't mandate it. And that the roll comes at the end of the turn (in this case, the entire scenario) rather than immediately. Curses! If only I had read fully, instead of skimming. Still, I held another Prussian key, knocking them down to three (Davout had captured Leipzig from Blucher).

The Russians struck France with a corn shortage, but it had little effect. Spain tried to bleed my armies with guerrillas, but Joseph must have been ruling well that month, as no losses resulted. Clearly Jupiter and Mars were on my side!

Wellington advanced on Madrid and was beaten back by its small garrison. But he rounded up more of the British expeditionary force and attacked again, steamrollering the garrison and liberating the Spanish capitol. Well, the gods are fickle.

I brought Murat up from his Naples vacation to command a new Army of Italy. I moved Soult south to face off against Wellington, while building up the Paris National Guard.

But doom was coming. My memory of the next few impulses is sketchy (it was so painful!), but I think it went like this.

Phil and Eric spent some time discussing what the best way of combining *all* the Russian and Prussian forces so as to generate a kill stack that could take on Napoleon. A Russian army group joined up with Kleist, and the next step would be for Blucher to gather them up and descend on Napoleon. So Napoleon decided to preempt that attack and intercept Kleist and his Russian friends before Blucher could join them.

The problem with this plan was ... luck. Although the French went into the battle with good odds, they completely whiffed. Napoleon had the second-worst day of his career. The French Army of Germany melted like early snow on a warm day. Napoleon, Davout, and a few scattered divisions fell back on Leipzig while the Prussians and Russians celebrated.

Then Blucher gathered up his forces, swung through Berlin to pick up the recently victorious armies of Kleist and Tormassov, and descended on Leipzig. Napoleon had quite definitely the worst day of his career; only he, Davout, and a few thousand troops escaped this battle. And, at that point, I decided to concede.

I had, if I recall correctly, three cards left, which would have been enough to rebuild one army and bring it back into combat with Blucher. But I had lost Hannover and Madrid and was about (as soon as Austria moved) to lose both Munich and Milan, and there was no way I could recoup those losses with the hand of cards remaining before the end of the turn. I'd gotten tossed out of Berlin, so I wouldn't be able to Conquer Prussia at the end of the turn; ditto with Spain.

We agreed that the game was challenging and enjoyable, one we would like to play again. Not only does the full scenario beckon (starting in 1805 and running as many as five two-year turns, though capable of ending sooner), but there is also an aftermarket 1792 scenario that I'd really like to explore. My rating for this game is 8 out of 10.

Monday, December 7, 2015

The Battle of Montgomery (again...)

A portion of a 17th century map of Montgomery
I recently had occasion to run a Carnage & Glory game at Games and Stuff in Glen Burnie for the Army of Central Maryland (AOCM).

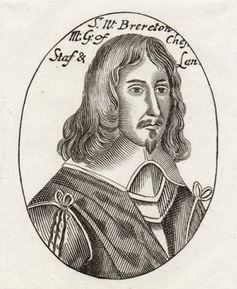
I had originally thought to continue the British Civil War (BCW) adventures of Sir William Brereton by putting on a recreation of the Battle of Hopton Heath (also discussed briefly here), but I had second thoughts. Hopton Heath is not one of the larger battles of the war (less than 3,000 combatants total), and I was afraid that I might end up with more players than commands, so I moved to a slightly larger action. I picked the 1644 Battle of Montgomery, which was much larger (over 5,000 combatants). 


Alas, I chose Montgomery without knowing that not just one but two other GMs had portrayed this battle at AOCM in recent years.

Montgomery is in some ways a challenging action to make a fun game out of. For wargamers, fun battles are those where both sides feel as if they have a good chance to win. This may come from both armies having roughly comparable numbers of troops; or if the armies are unequal in numbers, the smaller side has better training or morale, or a terrain advantage, or better weapons and equipment. At Montgomery, the main difference seemed to be that the smaller side (Parliament) had some stellar leaders (Sir John Meldrum, an experienced professional Scots military officer, and my buddy Sir William Brereton, an experienced officer who had held Cheshire for Parliament) who managed to rally their force when things looked black and turn a defeat into a resounding victory.

I hoped to give Parliament the chance of creating this same event by giving their commanders, especially their CinC, Meldrum, and their infantry commander, Sir William Fairfax, top ratings. Sir William Brereton and  Maj Gen Lothian also got highly rated. The Royalists under Sir John Byron got good officers, but not outstanding ones.


Sir John Meldrum

On the day, after some tiresome delays with getting things printed, I got to the shop and started getting set up. I briefed the Royalist players, then watched them set up while the Parliamentarian players did some shopping, then the Royalists stepped away while I briefed their opponents and they set up.

Mission

The Parliamentary forces that had been gathered to relieve the Royalist siege of Montgomery Castle consisted of about 2,000 foot, men of Yorkshire and Cheshire, along with 1,500 horse under Sir Thomas Myddleton, men from Denbigh and Cheshire. Their intent had been to chase off the Royalist army and to restore the town and castle of Montgomery to Parliament. But the Royalists had also assembled a large force (2,800 foot, 300 dragoons, 1,400 horse), considerably outnumbering Parliament's troops. So while their goal remained to defeat the enemy, Parliament's back-up plan was to fall back across the river Camladd and towards Welshpool. In order to do so, they would need to hold Salt Bridge, the one crossing point accessible to their army.

The Royalists, rather more simply, needed to attack and disperse the enemy force. Historically, Sir John Byron took the opportunity of attacking on the day that a large body of enemy horse had been sent out to forage, thus accentuating his advantage in numbers.

Troops

The Royalists deployed first, along a ridge overlooking the Camladd river, with a road (I think what is now the B4388 Welshpool-Montgomery road) running perpendicular to their front along their left flank, towards Salt Bridge.

They arrayed their infantry to the left--with dismounted dragoons screening the flank and heading towards some rough country, perfect terrain for them--and their horse on their right, massed to make a single strike force.

Sir William Brereton
The Parliamentary players decided on a more traditional formation: infantry in the center, with horse on both flanks. They had another force of mounted troops off-board, the foragers under Sir William Brereton, due to return shortly after the beginning of the battle.

Terrain

West of the road and south of the river there was an area of bad ground--shrubberies, swamps, and broken terrain--which the Royalist dragoons hoped to make their own. East of the ridge along which the Royalists deployed there was an area of many small hills, but the battle never reached that area. Most of the combat took place up and down a rolling hillside, not terribly steep, and quite open. Looking at satellite imagery of the area on Google Maps and assuming that at the time it was not as enclosed as similar land might be in central England, this looks like perfect cavalry terrain.

Execution

In our battle, Sir John Meldrum and Parliament had the initiative at the outset, and they lost no time in attacking on their left with two units of horse. On the right, one unit of horse surged forward, hoping to overthrow the Royalist dragoons, which were dismounted and holding a line along the Royalist flank. In the center, the Parliament's foot held its ground.

The attacks on both flanks went poorly. The horse vs. horse action on the eastern flank was very evenly matched, but Parliament lost both of the initial encounters. On the west, the dragoons levelled and gave a devastating opening volley, putting the brakes on the enemy's cavalry charge. Parliament's cavalry on this side of the battle remained in a confused and disordered state, unable to advance and unwilling to go backwards. Once the foragers arrived, these horse had just decided to retire and turned the tricky operation of deploying a force in march column across a defile into an unfortunate traffic jam.

On the east, several squadrons of Royalist horse pursued their defeated foes far into the rear of the Parliamentary lines. More engagements went much the way of the first, with the one Parly horse unit that defeated an enemy troop quickly hit by another Royalist cavalry unit and forced to retire.

The Parliamentary foragers did return quite speedily and might have turned the tide against the King's men. Unfortunately, I had misread the historical course of events and had them enter from Parliament's rear area rather than from their left flank. As a result, the horse were held up for some time crossing over Salt Bridge and trying to deploy while the rest of Parliament's forces were being pushed back towards them.

In the center, the Royalists had taken the initiative in the foot battle, with their more numerous pike and shot pressing the Parliamentary center so hard that they took to flight. True to history, these footmen fell back toward the river and then (most of them) rallied and faced the enemy again. As in 1644, the men of Cheshire refused to be defeated.

By that point, however, the Parliamentary commanders had failed their personal morale checks and conceded the battle.

Aftermath

I think the scenario is still a viable one, but I think it needs some retouching. For one thing, the Parliament's foragers need to come on in the right place! Having three additional units of horse on the flank where the cavalry battle is taking place would make the chances that Parliament could historically defeat the Royalist horse much higher.

For another thing, deployment should probably be set, not free form. Our Parliament players split their horse between two wings, even after seeing the Royalist deployment with all its horse on one wing, and one of those Parliament wings accomplished essentially nothing in the ensuing battle, as it was left unused after its initial repulse by the Royalist dragoons.

Both sides should have a slightly higher number of officers; this is a judgement call, as there is nothing comparable to the historical unit structure to say how many officers should be represented in a C&G order of battle. But given the importance of officers in the combat and morale system of C&G, the scenario should probably represent all the major officers, not just most of them.

Finally, while chance delivered something like the remarkable rally of the Cheshire foot that took place historically, it would behoove the moderator to award the Parliament player a few "resets" of troop morale for their foot to represent what took place at the original battle. This would allow the OB to keep most of them as trained, rather than veteran troops, while giving them a chance to repeat the dogged determination of their historical forebears.

Photos

I do have some photos to add, but I didn't want to wait to post this any longer. I'll have a follow-up post with photos. 

Other References

Wikipedia article on the relief of Montgomery Castle

Cromwell Association page on Montgomery

Photos of a Montgomery game using a different set of rules

Monday, July 13, 2015

Philip Passes with Flying Colors

Droits de L'Homme, 74, strikes her colors.
Last Saturday, I introduced my friend Philip to the boardgame Flying Colors, GMT's game of age of sail naval warfare. Phil is not a dyed-in-the-wool wargamer (yet ;-), but he's an aficionado of the period and the genre, being an avid consumer of Patrick O'Brian's tales of Captain Aubrey and Doctor Maturin.

I picked the Audierne Bay scenario as a good one to start with, given its lower vessel count and relatively straightforward nature. Phil took Sir Edward Pellew, commanding the frigates Indefatigable and Amazon, while I commanded the French 74 Droits de l'Homme. Packed with troops and unable to open her lower gun ports because of the heavy seas, DdH was fighting effectively as a heavy 4th rate. Holding the weather gauge, Pellew brought his frigates up to windward of the French ship as she carried a large body of infantry up the Brittany coast. Indy and Amazon are both 5th rates, though Indy being a 44 counts as heavy.

We read through the rules and played ten turns in about three to three and a half hours. Although this scenario features only three ships, I think that larger numbers will not take more time in direct proportion, since larger engagements are fought primarily in formations (to allow for command and control), so fighting a squadron of ten or fifteen ships will be more like maneuvering two or three multi-part elements than moving fifteen different ships.

My comments:

Though the French were able to concentrate considerable fire on the Amazon, cutting her rigging to shreds, the plucky 36 gave as good as she got, and the French ship of the line slowed considerably, her hull battered and blood streaming from her scuppers. Thinking she had at least temporarily immobilized the Amazon, DdH ran up the wind to engage the Indy (though the fight was bringing the whole group closer to shoal water along a lee shore).

But Indy dealt the French ship several shrewd blows, and the Amazon caught the wind and got enough speed to rejoin the fight in time to slam a broadside into the stern of the Frenchman, raking her decks cruelly and doing enough damage that the DdH finally struck her colors.

Fight of the Droits de l'Homme by Léopold Le Guen
His comments:
I was advised by a friend who also frequently war-games not to discuss what I had intended to do, or was planning as it might give others the key to beating me in the future. Since winning is not my over-all goal, but rather a more in-depth understanding of historical, martial decision-making I do wish to talk about how I went about this scenario.

My two frigates began running before the wind in line-abreast. As I had the weather-gage I had sought to maintain it for as long as possible. Additionally, I wanted to get into line-ahead. I turned to port (read larboard) into line-ahead with the Amazon in the van. Since I went from running to reaching I lost no speed.

After a series of turns on both sides, I broke from line-ahead and sent Amazon (running) to cross DdH's stern while Indefatigable continued on her base course with the hopes of taking DdH between two fires. I miscalculated here as I had forgotten that in Flying Colors, a ship of the line is able to turn as quickly as a frigate. And so DdH, after taking Amazon's raking broadside and returning her own, was able to come about and send a broadside with her port battery.

This left Amazon with substantial rigging damage and afire. Indefatigable at this point was on the other side of DdH and only able to play at long-bowls and so I had left her out of position to bring her heavier guns in close. Here I made another error. Even though Indefatigable's guns were having a gradual effect on DdH's firepower, in my over-concern for the Amazon I lost awareness of the wind.

View of the Wreck of the French Ship Droits de l'Homme by John Fairburn
And so because of this, and her damaged rigging, Amazon was already slow and forced to tack. She was virtually motionless for a period and so had to endure a raking broadside. Here, however, the British tactic of firing at the hull began to show an advantage. As DdH had turned to close Indefatigable, Amazon (while very slow) still had her full broadside available. After an exchange with Indomitable, Amazon was able to come up and so I finally had DdH between two fires. A turn later she was effectively armed "en flute" and so struck.

I took some lessons from this:

I gave up strength of formation for an easy, but unsupported stern rake. Had I kept to line ahead, I could have forced DdH to accept two broadsides while I took only one.

Giving up the weather-gage may have had to happen at some point, but losing awareness of the direction of the wind nearly cost me a frigate.

Thursday, August 14, 2014

An Asian DBA battle

While I spun up (or just spin my wheels) to publish about my own projects, here's a link to a photo journal, the first of a series, but David Schlanger of WADBAG on local DBA battles. This report features a battle between Burmese and Ming Chinese armies--colourful and unusual!

Sunday, January 26, 2014

end of year wrap-up and recent gaming

Crusaders fighting Muslims (Bibliothèque Boulogne-s-Mer)
So, I didn't ever get a chance to write up either the PBP of the Charlemagne scenario or the subsequent playing of most of the Crusade scenario of EOMA. The end of 2013 came very quickly and a rush of (non-gaming) endeavours washed away my time for blogging before the year departed.

We did have a grand time with the Crusades scenario; we had all but one of the positions filled (no Poland for us). Well, most of us had a grand time. My friend Amir, who was playing France was hit by two "Leader Dies Heirless" events in quick succession, with an "Epidemic" thrown in for good measure. Germany (Eric) confronted some serious unrest throughout his empire but managed not only to hold most of it together but to begin growing slightly eastward (the joys of not having a Polish threat from the east). The Norman Sicilians were not able to expand into Byzantine territory very far, but they did start chipping away at the HRE a bit. As King of England, I was able to settle the British Isles down a bit and started a reverse conquest of Scandinavia. I also picked up Flanders when it rebelled in one of the LDE events. We recorded the game so we could play the final third of it (maybe), but even with the handicaps, Germany was well ahead at the point we stopped.

Mr Invisible and I finally managed to get our first game of Labyrinth in. Well, almost. We played through about two-thirds or three-quarters of a one deck game when I had to admit that the illness that had been twingeing all day (what turned out to be a stomach flu) was going to make it impossible for me to finish. :-\ It was unfortunate, as I had managed to bring at least one additional country to the Caliphate, but the West had managed to counteract this by conquering Afghanistan and bringing it into good governance.

In recent Euro gaming, I've traded a couple of games of (original) Carcassonne with my long-distance friend Kirstin. I played a new acquisition, Carcassonne: New World with three friends. I've also played Ticket to Ride (Marklin edition) with my chums the Grrlz. Both were fun. TTR:M I've played a number of times. the new version of Carc is funky; it is set on the eastern seaboard of the British colonies in the Americas, and as players build westward, pieces that are left on uncompleted roads or towns are recycled and returned to the players' hands. So you have to complete items fairly quickly or they will be overcome by events.

In miniatures, I got to play a quick game of DBA with my new DBA chum Jeff. He took my Sassanid Persians and tried to fight my Tamils with them. The Persians, despite that I love them, are a bit of a handicap to start with, having as they do an elephant and two hordes (a pip sump, as it were). And he had awful dice to go with them. And I got to defend, so I laid out a good deal of bad going that my raiders and psiloi were able to maneuver through. And I got good pips to maneuver my big block of elephants with. The combination meant that I hammered him unmercifully, 5-0 I think. We then joined a Cover Your 6 game of USN F-8s versus PAVN MIGs where both sides lost one aircraft down and one or two more damaged.

I have a wealth of boardgames that I've acquired recently that I'd love to get on the table but haven't had time to play yet. Still waiting to get The Hunters on the table, and some other GMT titles (1914 Offense a l'Outrance, Next War: Korea), MMP titles (Karelia 44, Baltic Gap, Rock of the Marne), and second-hand acquisitions (Republic of Rome, Blue & Gray Quad, Tokyo Express). Not sure how this will all happen, but I'll manage it somehow. Oh, and a new (to me) Euro: Brass, designed by the excellent Martin Wallace. It will give me a chance to polish up my Lancashire accent. :-)

And, to finish off, I've started up playing ASL again. I've been introducing some of my droogs to Starter Kit (we played ), and I've found a PBEM match (ASL28 Ambush!) to play via VASL.

Friday, November 1, 2013

recent boardgaming shenanigans

I've been very fortunate in getting to do a fair amount of gaming of late. I'll start off the catalog by mentioning some of the boardgames involved, then move to miniature gaming.

At the Gates of Loyang is a favourite option when I go to game with my ex Chris and her wife Mel. Though we've played Troyes a good deal too in the recent past, and we've also included Glory to Rome and Alhambra (especially appealing to them since they've had the opportunity to explore the original), Loyang has been our most common go-to option of late, eclipsing even Agricola.

Interestingly, though, Loyang has started presenting a bit of a dilemma. The grrlz tend rather to frown on overly defensive play ("I'll just consume all these resources, even though I don't need them, so they won't be available to other players"). But after repeated playings of Loyang, they're feeling that maybe it doesn't have enough player interaction. Given that one does compete for cards in the marketplace at the beginning of the turn, and that various helpers allow you to use other players' assets during play, this suggests that someone is looking for a bit more defensive play, whether they want to think of it that way or not.

Offensive-defensive play is key to Lost Cities, which Mel and I had two games of the other day after we all had Sunday brunch and Chris then had to go off to work. A good part of the play of the game is deciding which cards to hold onto, even if you can't use them, because you don't want to give the other player the opportunity to play them as part of one of their expeditions. It's one of two major dilemmas of the game, the other being "when do you decide that you have enough cards of an expedition to risk starting it?" Do you wait until you're sure you will break even? By that time it may be too late...

My Wednesday nights are generally spent with my friends Bryan and Peter. Bryan has been known to describe our get-togethers as "We have some beers and talk and Jan tries to get us to play a game." That's a fair description. :-) They've been fairly obliging lately; we've added three games to our repertoire: Cuba Libre, Downfall of Pompeii, and Byzantium.

Cuba Libre is one of the growing stable of COIN (counterinsurgency) wargames masterminded by Volko Ruhnke and published by GMT Games. Smaller in size and scope then the first title in the series (Andean Abyss, centered on the insurgency and drug war in Colombia), CL is described admiringly by one reviewer as "a knife fight in a phonebooth". Four factions (the standard model for the COIN series) fight over the Cuba of 1957-58. The government player attempts to maintain the stranglehold of the island's corrupt oligarchs, while two rebel movements, the Revolutionary Directorate and the 26th July Movement attempt to overthrow the regime. The fourth player, the Syndicate, nominally supports the government but seeks primarily to make money through the growth of its casino chain and the corrupt control of the island's primary economic resources.

Bryan, ever the staunch supporter of law and order, took the Government side; red revolutionary that I am, I took the 26 July; and Peter, showing an unexpected mercenary, chose the Syndicate. We played most of the way through the deck, with the Government and the Syndicate running neck and neck for the latter portion of the game. I made a sad mess of the revolution, my pitch partly queered by a powerful Directory performance (the game includes a very effective text-based AI for each of the four players, allowing it to be anything from a four-player match to a solitaire game). I'll consult my notes, but my memory is that Peter pipped Bryan at the post. I'm hoping we get another chance to play this again soon, maybe with a fourth human player to round it out. I also have Andean Abyss and A Distant Plain, the third COIN game, which covers the US war in Afghanistan, and I hope I can get the guys to give those a try too.

But the next week we had a go at a new game I had picked up, Downfall of Pompeii. This had gotten fairly good reviews on BoardgameGeek, so I hazarded purchasing it and was not disappointed. The Boyyz and I played it three times in an evening, and I later played it twice in an evening with the Grrlz. It plays in two stages: in the first, players fill the city with their meeples (and their families who, oddly, come flocking into the city once there's news that the volcano might explode). Then in the second phase players try to save their meeples by rushing as many of them as possible back out of the city again, as the pyroclastic flows engulf whole neighbourhoods, burying unlucky meeples or cutting them off from the city gates.

We enjoyed this quite a bit on both occasions. It can be tricky trying to place your people so as to give them the best chance of escape but, at the same time, clustering them as much as possible (since this increases the number of their country cousins who are added in the "relatives" round).

Then, just this week, the Boyyz and I tried out Byzantium. I've had this game for years, but only played it once before, some time ago. It's a curious game in that, while its focus is the struggle between the Byzantine Empire and the rising Islamic caliphate, the players don't take sides between the two. Each player controls an Arab army and a Byzantine one and tries as best as possible to balance the victory points s/he earns for each. Each turn, the players alternate taking actions (move and attack, tax, reinforce armies, or a list of more specialized actions) until all have exhausted their supply of action markers (or choose to stop). Income is then collected and armies paid for, then a new turn is started. After three turns, the game ends and the player with the highest combined score for both Arabs and Byzantines is the winner. A player can play one side (Byzantine or Arab) all out, but if one VP total is less than half the other, one only gets whichever one is larger.

We played this through once, and the scores were very close. One gets VP for claiming Byzantine or Arab cities at the beginning of the game, for capturing them from other players during the game, for spending money building mosques or churches, and for cities that you control at the end of the game. Battles between armies are bloody but sieges are relatively painless, so there's a definite advantage to getting one of your armies where opposing ones are not and snapping up lots of their cities. Of course, if your army is off doing that, the other players' armies might be doing the same...

In addition to all of these multiplayer games, I've had the opportunity to solo-play two other games. I'll cover those in my next post. Then I should have a shout about recent miniatures gaming. And I'll try to provide some photos of all of these endeavours once I have my camera photos downloaded, uploaded, and organized.