Background image is Les Dernières Cartouches (The Last Cartridges) by Alphonse de Neuville
Showing posts with label Carnage & Glory. Show all posts

Tuesday, April 27, 2021

Verbreitnet: a brief AAR

French Light Infantry Attacking Through Woods by Victor Huen

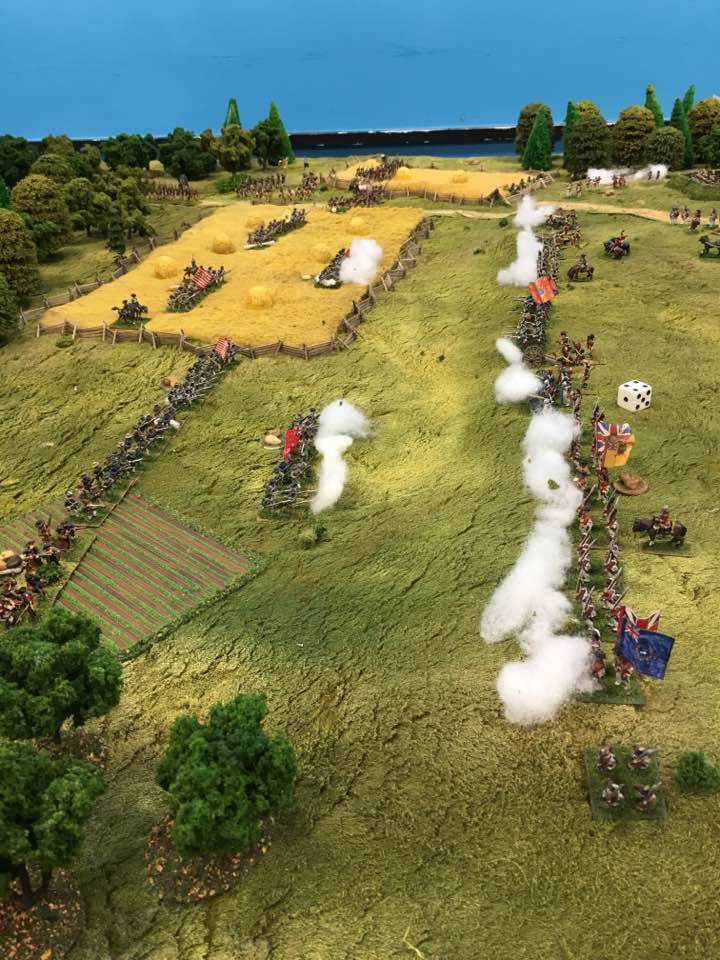
So, I never had a chance to provide an AAR on our Carnage & Glory game, the battle of Verbreitnet. As readers may remember from the preview, the scenario was fictional 1813 encounter between a French force (an infantry division and cavalry brigade) and an Allied command consisting of a Prussian infantry "brigade" (basically a division equivalent) and a brigade of Prussian and Russian cavalry. The two sides' forces were evenly balanced.

The battlefield included some basic terrain, but nothing to provide too great an advantage to either side. A stream or creek wound among some low hills close to the Allied side of the table (which we called the west side). Patches of woods, a few more low hills, and some grain fields were scattered over the center of the battlefield. A road ran from the west, Allied, edge of the board to the east, or French, side, roughly perpendicular to the two sides' deployment areas, with another joining it at right angles running towards the north side of the battlefield. 

The mission was a fairly straightforward "defeat the enemy" one; the intent was just to give one player an introduction to the game and the others a brush-up/reminder of the rules.

The Allies deployed with their cavalry on their right and their infantry occupying their left and center, with the right hugging the table edge and their left fairly open. The French mirrored their deployment, infantry facing infantry and cavalry facing cavalry. 

The Allies advanced their cavalry slightly then formed a holding position, waiting to see what the enemy did. In the meantime, they moved their infantry forward slowly, throwing out some light troops to extend their left flank.

The French moved forward fairly aggressively in the center while refusing their right with a battalion of légère, which sheltered from view inside a wheat field. One battery of French artillery seized a small hill in their center while another moved up the east-west road toward the junction.

The leftmost Prussian infantry regiment crossed the stream and paused, waiting to see where the bulk of the French infantry would go; meanwhile the rightmost Prussian infantry regiment held position on the near side of the stream. The French moved their right-hand brigade to meet the Prussian advance and a battle developed between the stream and the wheatfield. The Prussian riflemen on their far left moved in to support the attack but were driven back by the French légère, who advanced to the edge of the wheatfield and began volleying.

The French cavalry had moved to claim much of the ground between them and the Allied horse, using fields and low hills to screen their advance from the Allies' horse artillery, which had unlimbered on the edge of a wheatfield beside the east-west road. The French horse artillery, however, had found a good position to bombard the Allied horse from and began firing away.

An attack on the French infantry's right-hand brigade by Prussian musketeers in column of divisions was defeated, giving the French the confidence to push forward their left-hand infantry brigade along the east-west road towards the center of the Allied line. 

At this point, two squadrons of French cavalry crested the hill they were sheltering behind and launched an attack on the Allied cavalry's right flank. One squadron of Russian uhlans came out to meet them while a squadron of Russian hussars, taken on the wrong foot, failed to act and received the charge at the halt. The uhlans defeated their opponents and threw them back. The other French lancers won their action against the hussars, but took such a beating in doing so that they also fell back.

Prussian Schuetzen by Richard Knoetel

The French tried to build on success by sending in a squadron of chasseurs against the Russian uhlans; they succeeded, driving off the Russians. A squadron of Prussian hussars decided to test the French infantry that were advancing in the center and launched a charge, forcing some of the French infantry into square. Both sides' cavalry were exhausted by this flurry of activity, however, and since the Allies had taken the harder pounding, their cavalry was forced to retire from the field, while the French cavalry that was not retiring (essentially their chasseurs) would still be able to advance if they were led by a general officer.

In the center, with the Prussian cavalry retiring, the French infantry pushed forward, infantry in lines preceded by battalions of légère in extended order. In the center of the infantry battle, French and Prussians were still engaged, but the leftmost Prussian regiment had taken enough pounding in its attacks that it had also fallen back, leaving its comrades with both flanks exposed. At this point, the Allies decided to withdraw from the field before they were forced to flee.

We were hoping for several more players than we got in the end. We had three active players, an umpire, and two umpire's assistants (to move troops and measure distances, since we were playing by Zoom). For reasons I don't recall (possibly just army preference), we put the two experienced players on the same side (French) and gave the novice the Allied command. In retrospect, obviously, we should have put one experienced player on each side and drafted the two umpire's assistants as players (one was a novice C&G player, one experienced); that way we could have had an experienced player and a novice on each side, with a spare experienced player. 

We used a moderate-sized table (4' x 6') for a divisional action, but we should perhaps have started both armies a little closer together to give them room to fall back. While it would have taken away a bit of maneuver option, it would have given them a little more "backfield", so defeated troops didn't run off the edge of the table so fast. Alternately, we could have fought the action on a narrower front and used the short edges for deployment and the long edges for engagement. It can be challenging, even using the 1" = 50 paces scale, to fit a combined-arms C&G game on the average gaming table. With deployed cavalry moving 15" to 18" per turn and maneuvering cavalry moving twice that, opposing cavalry units can move onto the table from offboard and be within charge reach of each other at the end of the first turn, even when operating in line.

C&G, like any game, is a product of its designer's theory of how combat works. Unlike any other tabletop miniatures game, however, that theory can only be learned by playing the game. The designer's notes explain some elements of morale and fatigue, but it's only by playing (or hanging out in online discussion groups for the game) that one learns crucial elements of play. Artillery should initially take ranging shots with very low percentages of its total strength before engaging with the whole battery. Infantry should not advance more than 75 paces in a turn in which it plans to issue fire. If you wish to charge with a unit in Turn 2, be sure to advance towards the enemy in Turn 1, as the momentum of having done so will make a successful charge attempt more likely. 

And those are elements that one might intuit from a very close reading of the screenshots included in the manual. Other things that are laid out nowhere are the way that all the factors of an instance of firing affect its effectiveness or how the system determines what morale result will come from a combination of terrain, fatigue, firing, and combat factors. One can expect that fire from close range will be more effective than at maximum range, or that artillery that has not fired will be more effective than artillery that has been firing for several turns, using up its ammunition and fatiguing its gunners. And it's certainly more realistic that players not have formulae to make those computations exactly, as in a boardgame one can count up combat factors and compute the perfect attack given a combat results table. But one feels that going to the opposite extreme is just as unrealistic.

Friday, February 26, 2021

Our Test Battle: Verbreitnet

Here are some previews of our test battle for tomorrow, the imaginary 1813 battle of Verbreitnet.

Gebhard Leberecht von Blücher in Bautzen, 1813 by Bogdan Willewalde

First, Terrain

As described in my blog post the other day, terrain can affect movement and line of sight or both. Terrain that affects movement can be in the form of linear obstacles or disruptive terrain.

I don't want to make terrain a big complication in tomorrow's game, so we'll have four types of terrain:

Medium woods: disruptive area terrain that can slows movement by 50%, acts as light cover, and blocks line of sight of more than 150 paces from one unit to another in the woods. Line of sight is not obstructed to/from units on the perimeter of medium woods. Units must be on the perimeter to charge or be charged by units not in the woods. Movement into or through woods must be input as movement in disruptive terrain.

Streams: simple linear obstacles that have no effect on line of sight. Movement to cross streams must be input as movement crossing a linear obstacle.

Gentle hills: simple line of sight obstacles that do not affect movement. We won't worry about crests; units entirely on the other side of a hill (not on the hill) will not be visible to units on the opposite side; if on the hill they will be visible.

Fields: grain fields that do not affect movement but block line of sight to/from units on ground level unless to/from a unit on the perimeter of the field. EXCEPTION: the line of sight to/from units on hills will not be affected by fields. Artillery bouncethrough will not be blocked by fields if the fire is at an otherwise visible target.


Orders of Battle

Below are the orders of battle for the two sides in the battle of Verbreitnet

The French have a division that consists of two brigades of infantry and an attached cavalry brigade. Their total strength is thus ten battalions of light and line infantry,  two batteries of artillery, two composite regiments of light cavalry, and a battery of horse artillery).

The Allies have a division that consists of two brigades of infantry and a brigade of cavalry. The infantry brigades each consist of a regiment of line infantry with attachments (in one case a battalion of grenadiers and an artillery battery, in the other a battalion of riflemen, two battalions of poorly trained reserve infantry, and an artillery battery). The cavalry brigade consists of six detachments of light cavalry (three Prussian and three Russian) and a battery of horse artillery.

Each officer and each unit has a three-digit number, a name, and some defining characteristics. 

The letter ratings you'll see work just like classroom scores: an A+ is the best and a D- is the worst (it actually goes below D but, like all high school students, we'll hope you don't see any scores like that!)

Distances are all measured in paces; for our 15mm battle, we'll be treating each inch as 50 paces.

Officer characteristics are a letter grade that summarizes their leadership and tactical ability and a distance--the officer's zone of influence. When it's time to attach and detach leaders to help boost units' abilities, officers can attach to any unit within their zone of influence (but it's best to attach them to units they or their subordinates command).

Unit characteristics are more complicated. 
  • First is their total casualties and their starting strength (hopefully every unit's first number is 0, since battle hasn't yet commenced!). 
  • Then a letter rating summarizing their shooting, close combat, class, and experience. I wish that the OB printouts would show those factors separately, but wishes are not, alas, horses.
  • Then a cryptic note indicating their skirmish abilities. This will start with a capital E if the unit can adopt extended order (up to half its strength in a dispersed skirmish line and the remainder in close order providing supports). Then either sk+ or sk-. the first indicates a unit with offensive skirmish ability--usually a company trained to skirmish well in front when the rest of the unit is formed into line or column. The latter means a unit with defensive skirmish ability, usually units able to send their third rank forward to protect the unit's immediate front when deployed, but not fully trained subunits capable of moving well ahead and disrupting the enemy.
  • Finally, there's arms information: the unit's primary firearm (cannon for artillery, longarm for infantry and cavalry) and that weapon's ranges (canister and roundshot-effective for artillery, close and maximum for longarms; artillery roundshot-maximum range is a little more than twice effective range in most cases).

French Forces

Division Grise - Attack
  [ 101] General de Division Grise - Active D+ [650 paces]
	[ 111] 1/3rd Artillerie                  0/ 200 [ 8] C+            6pdr [Medium] [400  750]
	[ 112] 2/3rd Artillerie                  0/ 200 [ 8] C+            6pdr [Medium] [400  750]

    Brigade Jaune - Attack
    [ 102] General de Brigade Jaune - Active C- [300 paces]
	[ 101] 1/6th Legere                      0/ 600      B- Esk+       SB.Musk.[1st] [ 75  200]
	[ 102] 2/6th Legere                      0/ 450      B- Esk+       SB.Musk.[1st] [ 75  200]
    Regiment Argent - Attack
    [ 105] Colonel Argent - Active B+ [250 paces]
	[ 103] 1/37th Ligne                      0/ 750      C  Esk+       SB.Musk.[1st] [ 75  200]
	[ 104] 2/37th Ligne                      0/ 600      C  Esk+       SB.Musk.[1st] [ 75  200]
	[ 105] 3/37th Ligne                      0/ 600      C  Esk+       SB.Musk.[1st] [ 75  200]

    Brigade Vert - Attack
    [ 103] General de Brigade Vert - Active B- [500 paces]
	[ 106] 1/14th Legere                     0/ 450      C+ Esk+       SB.Musk.[1st] [ 75  200]
	[ 107] 2/14th Legere                     0/ 450      C  Esk+       SB.Musk.[1st] [ 75  200]
    Regiment Lilas - Attack
    [ 106] Colonel Lilas - Active C+ [175 paces]
	[ 108] 1/49th Ligne                      0/ 750      C- Esk+       SB.Musk.[1st] [ 75  200]
	[ 109] 2/49th Ligne                      0/ 750      C- Esk+       SB.Musk.[1st] [ 75  200]
	[ 110] 3/49th Ligne                      0/ 600      C- Esk+       SB.Musk.[1st] [ 75  200]

    Brigade Cramoisi - Attack
    [ 104] General de Brigade Cramoisi - Active B+ [500 paces]
	[ 113] 1/1st Artillerie de Cheval        0/ 150 [ 6] C+            6pdr [Light]  [400  550]
    Regiment Blanc - Attack
    [ 107] Colonel Blanc - Active C [175 paces]
	[ 114] 8th Chasseur a Cheval             0/ 300      C- Esk+       SB.Carbine    [ 50  100]
	[ 115] 12th Chasseur a Cheval            0/ 240      C- Esk+       SB.Carbine    [ 50  100]
	[ 116] 21st Chasseur a Cheval            0/ 240      C- Esk+       SB.Carbine    [ 50  100]
    Regiment Noir - Attack
    [ 108] Colonel Noir - Active C [225 paces]
	[ 117] 2nd Chevau Leger                  0/ 240      C- Esk+       SB.Carbine    [ 50  100]
	[ 118] 4th Chevau Leger                  0/ 240      C- Esk+       SB.Carbine    [ 50  100]
	[ 119] 6th Chevau Leger                  0/ 240      C- Esk+       SB.Carbine    [ 50  100]

	Strengths:
		losses/active
		     0/  6000	Bayonets
		     0/  1500	Sabres
		     0/   550	Artillerists
		     0/    22	Cannon

		     0/  8050	Total of all arms
		            9	Colors present

Allied Forces

Division von Gruen - Attack
  [ 501] Generalleutnant von Gruen - Active C- [650 paces]

    Brigade Blau - Attack
    [ 502] Oberst Blau - Active C- [300 paces]
	[ 501] 1st Silesian Grenadiers           0/ 600      B   sk-       SB.Musk.[1st] [ 75  200]
	[ 505] #2 Foot Artillery                 0/ 200 [ 8] C             6pdr [Medium] [400  750]
    Regiment Vier - Attack
    [ 504] Major Vier - Active C+ [225 paces]
	[ 502] 1/1st Silesian Infantry           0/ 600      C   sk+       SB.Musk.[1st] [ 75  200]
	[ 503] 2/1st Silesian Infantry           0/ 600      C   sk+       SB.Musk.[1st] [ 75  200]
	[ 504] Fus/1st Silesian Infantry         0/ 600      C+ Esk+       SB.Musk.[1st] [ 75  200]

    Brigade Gelb - Attack
    [ 503] Oberst Gelb - Active C [350 paces]
	[ 506] 1st West Prussian Schuetzen       0/ 600      C  Esk+       Rifled Musket [125  300]
	[ 510] 1/1st West Prussian Reserve       0/ 600      C-  sk-       SB.Musk.[2nd] [ 75  200]
	[ 511] 2/1st West Prussian Reserve       0/ 600      C-  sk-       SB.Musk.[2nd] [ 75  200]
	[ 512] #4 Foot Artillery                 0/ 200 [ 8] C             6pdr [Medium] [400  750]
    Regiment Sieven - Attack
    [ 505] Major Sieven - Active C [175 paces]
	[ 507] 1/1st West Prussian Infantry      0/ 600      C   sk+       SB.Musk.[1st] [ 75  200]
	[ 508] 2/1st West Prussian Infantry      0/ 600      C   sk+       SB.Musk.[1st] [ 75  200]
	[ 509] Fus/1st West Prussian Infantry    0/ 600      C+ Esk+       SB.Musk.[1st] [ 75  200]

    Brigade Krasny - Attack
    [ 506] Generalmajor Krasny - Active C+ [450 paces]
	[ 513] #6 Horse Artillery                0/ 200 [ 8] C             6pdr [Light]  [400  550]
    Brigade Grau - Attack
    [ 507] Oberst Grau - Active B [500 paces]
	[ 514] 1&2/1st Silesian Hussars          0/ 240      C+ Esk+       SB.Carbine    [ 50  100]
	[ 515] 1&2/2nd Pomeranian Hussars        0/ 240      C+ Esk+       SB.Carbine    [ 50  100]
	[ 516] 1&2/2nd Silesian Uhlans           0/ 240      C- Esk+       SB.Carbine    [ 50  100]
    Brigade Chernit - Attack
    [ 508] Colonel Chernit - Active C [300 paces]
	[ 517] 1/Tatar Uhlans                    0/ 240      C  Esk+       SB.Carbine    [ 50  100]
	[ 518] 1/Grondo Hussars                  0/ 240      C  Esk+       SB.Carbine    [ 50  100]
	[ 519] Pskov Dragoons                    0/ 240      D+            SB.Musketoon  [ 75  200]

	Strengths:
		losses/active
		     0/  6000	Bayonets
		     0/  1440	Sabres
		     0/   600	Artillerists
		     0/    24	Cannon

		     0/  8040	Total of all arms 
10 Colors present 

Next Time: Charges, Firing, and Rallying!

Monday, February 22, 2021

Carnage & Glory: Infantry, Artillery, and Terrain

 Continuing our introduction to Carnage & Glory...

Prince Bagration at the Battle of Borodino by A.Y. Averyanov

Infantry

Infantry, like cavalry, have a type (heavy or light), a strength, a number of subunits (in this case companies--all infantry units are battalions), weapon type (some type of smoothbore or rifled musket; very backward troops may also have some proportion of pikes or even simply hand weapons), and may have one or more colors. Infantry units may also be assigned battalion guns--small, light cannon that are dragged by hand with the infantry as it advances or retires. 

Infantry, like cavalry, are also rated for combat, fire, class, and experience. And, also like cavalry, infantry may be trained to fight in extended order (a large part of the unit dispersed in a loose firing line with the remaining portion in close order behind them) and/or capable of skirmishing defensively (small numbers of skirmishers protecting the unit from other skirmishers) or offensively (larger numbers acting both defensively and aggressively to disrupt opposing units with fire).

French Imperial Guard Artillery artist unknown

Artillery

Artillery units represent batteries (their subunits are sections), which were generally company-sized units. They are either horse artillery (in which not only the caissons and limbers have horse teams, but all the gunners have riding horses as well) or foot artillery (in which most of the the gunners must trudge along on foot). Artillery are also rated as having military or civilian trains. Most armies had stopped using civilians to manage the teams that pulled their artillery limbers and ammunition caissons, as they would often leave untimely, taking the horses with them and leaving the gunner high and dry. Some armies, however, could not afford to replace the cheaper civilian teamsters with expensive military units and had to take the chance that their guns might suddenly find themselves stranded.

Artillery unit strength is computed by multiplying the number of artillery pieces in the unit by 25. They can be assigned a variety of different types of cannon or howitzers as the primary battery pieces (even rockets are available!), and a battery assigned cannon can also be allotted a number of howitzers. These latter are deducted from the total number of guns input from the battery and assigned an appropriate type based on the main battery strength; so, for instance, a six-gun battery composed of light six-pounder cannon that is allotted two howitzers will end up with four light six-pounders and two light howitzers. Many nations assigned howitzers in this way to supplement a battery's cannon, while some formed batteries entirely of howitzers. Like cavalry and infantry, artillery are rated for combat, fire, class, and experience. 

Closing the Gates of Hougomont by Robert Gibbs

Terrain 

In Carnage & Glory terrain affects line of sight and movement. Line of sight is important both for fire and because units can only charge units they can see at the beginning of a turn. You, the player, may know that there's a line of enemy infantry on the other side of that ridge, but until your cavalry crest the ridge, they can't declare a charge on the blighters. 

For movement purposes, terrain either doesn't materially affect movement (unobstructed open ground that's either flat or very gently rolling) or slows movement and disrupts formations. The latter types of terrain are further divided into either linear obstacles (hedges, walls, streams, creeks) or disruptive terrain (area terrain such as swamps, brush, woods, or much more significant linear barriers, like entrenchments, fordable rivers, or ravines). Included among disruptive terrain are BUAs (built-up areas--villages and towns) and strongpoints, one of the most famous of which is the Belgian ferme-chateau of Hougomont, shown above. Linear obstacles include deployed artillery batteries (a relatively narrow band of obstacles that need to be passed), while disruptive terrain includes limbered artillery (a much broader area that has to be navigated). Linear obstacles can be affected by engineering work during a game; for example, pioneers might be detailed to break a hole in a stone wall for artillery to pass through.

In our introductory scenario, I want to keep complexities to a minimum, so I'm inclined to keep the terrain pretty simple--nothing as complex as buildings or fortifications, maybe some woods, a stream, and some gentle hills.

Next Time: Charges, Firing, and Rallying!

Sunday, February 21, 2021

Carnage & Glory: Officers and Cavalry and Developing a Scenario

 
The Battle of Leipzig by Vladimir Moshkov

Onward To Battle!

OK, having hit the high points of the rules, the next thing we need is a scenario to try them out. I have all the different modules, but I also know that the player who suggested the game, Scott "La Salle" B. is goofy about the French First Empire, so a Napoleonic scenario seemed warranted. I looked through the figures I had ready to hand, and a late-war (1813+) battle between French and Prussians seemed to be suitable. 

A historical battle or a hypothetical or imaginary one? A historical scenario, using a historical order of battle (OB) has the appeal of seeming more "real" and allowing players to match their wits against those of their historical counterparts. But history also has all kinds of funny angles, rough edges, and pointy bits that interfere with smoothness and simplicity. So for this test case, I'm going to make up a small engagement that might have been fought, drawing on historical OBs for inspiration, but also smoothed and simplified to make things easier and less distracting. Since in 1813 it was surely fought in Germany somewhere, I'll call it Die Schlacht bei Verbreitnet. I had a clever idea of naming it after the German word for example or test case, or sample, but I seem to have goofed somewhere, as this seems to mean "spreads", but I'm stuck with it now, so let's move on.

What size of battle? Something the battle of Leipzig (pictured above) is probably beyond the scope of C&G even with a whole club's resources. But since at least one of our players will be a C&G novice, the size of the battle should be constrained. I want to keep the number of troop units per player manageable, since a beginning player will be new to thinking out what all the options are for using their troops.

Another reason to keep the OB on the smaller side is the table I can easily set up for video gaming, a tabletop measuring 4' x 6'. Even when using 15mm figures and C&G's 1 inch = 50 paces, a table that size should not be overloaded with troops. So I thought maybe a division of infantry and a brigade of cavalry on each side. 

Napoleon Conferring With Desaix at Marengo by Keith Rocco

Officers

Command in C&G is mostly about being able to rally and encourage troops. Orders exist and do constrain action, but they're limited part of the game. Also, officers are "used" on a unit-by-unit basis; if an officer succeeds in supporting a unit (encouraging it in combat, rallying it afterwards), he's usually done for that turn. So even having good officers, a force can be handicapped if they don't have enough officers. So the number of officers has to scale to the number of units. If one side has a division of two brigades, getting a divisional commander and two brigadiers is going to be almost useless if each of the brigades has 4-6 units; three officers for ten or more units is too few.

Officers have to be rated for command level, leadership ability, and tactical ability. Command level determines what the range of their effectiveness will be once battle begins--the more senior the command, the larger his zone of influence. Leadership ability determines how well the officer issues and receives orders, but more importantly how they help units deal with adversity--it helps keep units in line when the enemy attack and it helps rally them to the standard when morale is faltering. And leadership contributes to the army's initiative. Tactical ability also contributes to initiative; it also guides the leader's eye when planning an attack and helps when units are seeking to charge.

1807, Friedland by Ernest Meissonier

Cavalry

How to represent cavalry units on the tabletop? Each regiment was composed of a number of squadrons, each squadron of a number of companies or troops, and each troop had a certain number of officers, NCOs, and common soldiers. When creating an OB, what should our tabletop units represent--regiments, squadrons, or troops? The designer has remarked that he tends to vary cavalry representation by how much flexibility he wants to give a commander. Very flexible? Each unit is a squadron. Less flexible? Each unit represents several squadrons. Least flexible? Each unit is a regiment. Of course, this varies too by the size of the unit; a 200-man 1814 cavalry regiment is like a large squadron, while a full-strength Russian light cavalry unit of 1,000+ men would be impossibly huge to represent as a single unit. One also has to think again about manageability; if one side has a division of infantry, that may be eight or more infantry battalions (single units in C&G). But a division of cavalry represented as individual squadrons might be sixteen or more squadrons. If each of those is a unit the player has to maneuver, fight, and rally, the player will run out of focus (and officers) far too quickly. For larger battles with more units, it's best to make cavalry units represent larger formations--groups of squadrons or (especially if the regiments are low in manpower) entire regiments.

In addition to how to represent cavalry units, each unit has its characteristics, like those of leaders, that have to be determined. Most important is its type (heavy, light, lancer) and its strength in numbers. Other factors include how many subunits it consists of (which will determine how nimble it is in executing evolutions), what sort of firearm it carries (if any: almost all cavalry carried some sort of musketoon or carbine for skirmishing and dismounted use, though many never used them in full-scale battles), and whether it carries colors (very important in the morale result of combats, if unit should lose a color or capture one of the enemy's), and who it reports to (what its chain of command is). Is the unit trained in skirmishing? And most important of all are its ratings for shooting and for combat (excellent, good, average, poor, contemptible), its class (guard, elite, line, militia, irregular), and experience (crack, veteran, trained, conscript). All units are rated on these characteristics, and the interaction of these (which do not change in the course of a battle) with a unit's actions and those of its opponents help to determine its fatigue and morale state (which generally start a battle at a high state, unless otherwise dictated by a campaign or historic battle circumstance).

Next Time: Infantry, Artillery, and Terrain!

Saturday, February 20, 2021

Carnage & Glory: A Few Basics

With the 1757 kleiner Feldzug over, my next project is introducing a friend to Nigel Marsh's excellent computer-moderated Carnage and Glory II miniature wargaming rules. One of the other players in the KF1757 campaign suggested it, and I gladly agreed, as I'm fond of the game. In fact, from trawling through my email archive, I'd guess that I've been playing these rules on and off for about ten years. Readers who have been with this blog for a while will recall my mentioning it a few times before, in the context of playing battles of the American Revolution and, before that, of the British Civil War.

Carnage & Glory: Scope

The C&G rules cover a goodly portion of European and American military history of the gunpowder era from 1600 to 1871, with modules for pike and shot, the late seventeenth/early eighteenth century, the era of Frederick, the Napoleonic era, and the early industrial era (the American Civil War and those of mid- to late-nineteenth century Europe). In my opinion, the rules fit well into the tactical arena; a beginners' game might feature a brigade or two on each side, but with sufficient space and players, one can play corps-sized actions with them. Playing a full-scale battle of the 18th or 19th century, with multiple corps on each side, is a significant challenge, I believe, given that all the communication and resolution of action has to be routed through a single instance of the program. It might be possible to find some way for several users to tag-team on a single platform, or to break a single large battlefield into separate sections run simultaneously. But the system's command and control system is somewhat basic; a grand battle like Austerlitz or Solferino would probably be suited for playing with a system that's more specifically focused on command and control and that handles units at a slightly higher scale.

Carnage & Glory: Method

The game is played jointly on the tabletop--with miniatures (or with counters)--and on the computer. Most often, one player acts as umpire, collating input from players and feeding it to the program, then taking the "replies" from the program and passing them back to the players. An example of this sort of exchange might see a player call out, "The Foot Guards battalion, number 101, fires a full volley, 100 percent, at the Regiment Auvergne, number 503, at 50 paces," with the umpire replying, "The French are staggered, taking 20 casualties!" 

The program keeps track of a variety of data about the units and leaders in combat, including order and disorder, unit formation, morale, casualties, fatigue, and ammunition. This allows the system to deal with more complex interactions than players would be able to handle without a great many markers and a good deal of rules fatigue. While players can always petition the umpire for detailed information about their units (petitions the umpire is free to grant or refuse), the most that players generally know about their troops is their facing and formation, a general indicator of their morale (good, hesitant, failing, routing), and the feedback they get when they attempt some fatiguing action (changing formation, moving through difficult terrain, firing, or charging or defending against a charge). 

One aspect that is not always greeted with joy is that the program handles all the randomization as well. Many wargamers, especially miniature gamers, are used to rolling their own dice; a good deal of the story-telling that surrounds this sort of gaming concerns players' luck--good or bad--with dice, and rolling dice gives players an (illusory) sense of control over the fate of their miniature battalions.

Carnage & Glory: The Black Box

The downside of the system holding all the information and only releasing bits of it at a time is that it can be something of a black box. Not only do players not have complete information about the units under their command at any given time, they don't have complete information about how the system works.

In most wargames, players can estimate the effect of actions by using the data that they have about their units and the charts and tables the game includes to derive, if not certainties, at least estimates about likely outcomes. If units with a given strength attack an enemy of a known strength under certain conditions, they will not know the outcome for certain, but they know the range of likely outcomes and the percentages associated with them. For example, an attack of 3:1 odds will produce a complete defeat of the enemy 1/6 of the time, a repulse of the enemy 2/3 of the time, and a repulse of the attackers 1/6 of the time, with established modifiers should the enemy be holding especially defensible ground, the weather be bad (rain or snow), or leaders on one or both sides be especially likely to affect the outcome.

In Carnage & Glory, none of these sorts of computations can be made. Not only do players not know with any degree of certainty many of the factors that influence the strength of their own forces, they know even less about the enemy. And most importantly, they know nothing about the calculations that in another game would be represented by the combat results table. Instead, players must attempt to make assessments of likely outcomes based on their knowledge of the tactics of the period as understood by modern military history. And, of course, they have to rely on that knowledge and understanding being common between them and the game designer. Lacking that knowledge, they have to rely on the experience of other players familiar with the system, on insights provided by the designer in his notes on the rules, and/or on trial and error.

Carnage & Glory: Some Insights To Start Off With

Fortunately, the designer provides a good deal of helpful advice in his manuals. He provides clear descriptions of what the basic unit status (what the player sees on the table) means, results like Unsteady, Disordered, or Shaken. He explains what the compulsory movement markers that units may get mean (No Advance, Halt, Retire/Retreat, and Rout), and he explains what morale (of both units and armies) and fatigue represent, how they can be lost, and how they can (sometimes) be restored.

Without going into too much detail, one can summarize threats to morale and causes of fatigue rather simply: don't try to do too much. 

Of course, army and unit morale at the start of a battle will be based on the experience and training of the units in question. They'll be reduced as troops become fatigued and as units take casualties. They can be recovered (at least to some degree) by the active intervention of officers. And not just any officers; units respond best to officers from their chain of command. Any unit will be glad of attention from the army commander (assuming he isn't a buffoon), but the infantrymen won't be very impressed by the dashing hussar officer sent over from a nearby cavalry brigade, any more than the hussars would have much faith in the plodding infantry brigadier waving his little spadroon.

Fatigue itself will accumulate as units do "work": move at faster than regular speeds--either running or running away--change unit formation, move through difficult terrain, or engage in physical labor like building bridges or clearing obstructions. Units also accumulate fatigue in combat: by firing ranged weapons and by engaging in close combat. Fatigue can be erased by standing down and moving out of the combat zone, but it is removed much more slowly than it is accumulated. Thus a unit that had marched several turns at the double-quick and changed from road column to field column and from field column to line, then marched up a steep hill or through a swampy field, might well be exhausted before it's fired a shot. Likewise, a battery that finds a prominent position and begins firing all its guns continuously at an enemy as soon at they are sighted may well be wholly fatigued with its caissons empty by the time the enemy has arrived at close range and is preparing to charge.

Carnage & Glory: How Does A Turn Go?

The sequence of play in the game is fairly straightforward. There are some details, but essentially consists of 

  • Movement
  • Combat
  • Rallying

At the start of each turn, the system gives the umpire some news as to environmental factors (has it started to snow? is there fog covering the battlefield?), the state of each army's morale, and the arrival of any troops not currently on the battlefield. Which side will have the initiative in the turn ahead is also indicated; that side may decide whether it wishes to move first or second in the coming turn. Players may then issue general orders (orders restrict units' actions somewhat but are not a very big part of the game) and have units begin any engineering work they have in mind (warning: this will be fatiguing and slow--best to do your bridge-building or fortification before the battle begins).

Then comes movement. First, players secretly note and simultaneously announce their intentions to attempt charges with units. These attempts are resolved, placing units that succeed in charging close to their targets. Then the rest of movement takes place, in the order previously determined. Simple movement at a unit's normal movement rate is accomplished without informing the game system, but anything that would involve fatigue (wheeling, changing formation, moving through difficult terrain) is relayed to the umpire so that the system can assess fatigue (and, in some cases, indicate the maximum distance to be moved).

Once movement is completed, all units wishing to fire resolve that action, with the fire of units that are being charged first being resolved first. That activity also serves as a time to test the morale of these targets of charge, to see if they will stand and fight. After those fires are resolved, those of all other units are resolved and the effects assessed (changes in morale/order marked).
After fire combat comes the melee! The results of charges are determined. In most cases, one side's troops or the other's will fall back; in a few rare instances, troops may remain locked in combat until the next turn. If a defender is badly/quickly defeated, attackers may surge past their broken foe and hit another enemy in the same combat phase.

After melee is concluded, available officers are assigned to rally faltering troops. Depending on their rank and ability, officers have a certain zone of influence and may be assigned to any units needing inspiration that are within that radius of them during the rally phase. The system determines the success or failure of officers in rallying troops and may insist that officer remain with the unit in the following turn, or indicate that one officer's influence was not enough to achieve the desired result and allow another to be assigned, if available. 

Here is where the number of officers assigned to an army in its order of battle becomes critical. Officers represent a morale resource for an army, so assigning them in the order of battle is less simply a reflection of the historical rank structure and more an indication of an army's ability to withstand adversity. Both the Blue and Red armies would have regimental commanders, adjutants, brigadiers, and aides de camp (ADCs), but if Blue's command and morale resources were low, a brigade OB might include only the brigadier and its regimental commanders, while a Red formation rich in effective command might be assigned a brigadier with an ADC and all its regimental commanders and their adjutants.

After rally actions have been adjudicated, the system performs morale checks and informs the umpire what units' state is at the end of the turn and which are engaging in compulsory movement (retreating, routing, or pursuing routing enemies).

Coming Next Time!

That's it for my basic summary of the game system. The next post will introduce our test bed for next weekend's game, the Napoleoninc battle of Verbreitnet.

Wednesday, April 19, 2017

Recreating Bound Brook: A Preview

Johann Ewald's map of the Bound Brook action (Wikimedia)
I'll be running my first re-creation of the Bound Brook action this weekend. The original engagement was almost literally a walk over for the British; I hope the ideas I've come up with make it more challenging and interesting for both sides while still retaining a sense of what the historic action was about.

To recap quickly, the Bound Brook garrison was an American post in advance of their main winter cantonments. It was being used to support New Jersey militia raids on the British lines and attacks on British foraging expeditions. The British assaulted it partly to destroy its usefulness as a forward operating base and perhaps partly in hopes of drawing the main American army, or a portion of it, into a general engagement.

The gradual escalation of the Forage War and the seeming intelligence domination of the battlefield by the Americans had left the British in the Jerseys, like Frederick the Great when operating in Austrian territory, completely in the dark as to enemy strengths and locations. To begin with, the vastly underestimated the forces they would face in small-war operations. When they sent a company, a battalion of American appeared. When they sent a battalion, it was attacked by a brigade. By the end of the winter, then, they were prone to employ overwhelming force in any operation, no matter how small. So this attack was planned to feature four converging columns totalling almost 4,000 men to attack an outpost that they expected to have only 1,000 men in it (in fact, by April 13th, the American garrison had shrunk to 500 men).
The assault force easily overran the post, though failure to coordinate the columns perfectly meant an uneasy start to the action for the initially unsupported jaegers. The failure of coordination also meant that the bulk of the Americans escaped, rather than being captured. The British then left the area before the American relief force, a division under MG Nathanael Greene, came up. It's not clear if that force was sent to contest the post with the British or just to reclaim it once they had departed; the British had brought neither guns nor engineers, so it is unlikely they planned to hold the position once captured.

The Area of Operations: The highlighteds areas are (New) Brunswick and Raritan Landing ("Old Bridge") in the SE, where British troops were based; Bound Brook in the center, just E of Bridgewater; and Baskeridge (or Basking Ridge), where Greene seems to have been posted. (Wikipedia)
I'm going to give the Americans a force stronger than what defended the post historically, and Greene will be waiting in the wings. I'll give the British access to the same forces that they had historically and let them plan their attack (I hope to even have some facsimiles of period maps). I'll then inflict some of the same uncertanties on both sides that attended (or could have attended) the historic event and see what result we get. Given the size of the forces (10-15 units per side: larger than our last game, a bit smaller than a "regular" C&G game), we may be over quickly and have time for a replay, or it may prove a full game.

Another view of the AO, with highlights, from a Hessian map of the theatre. (West Jersey History Project)

Tuesday, November 29, 2016

Project 1777, JJ's Talavera project, and Giving Tuesday

Jonathan Jones has posted on the coming culmination of his three-year effort to reproduce the Napoleonic battle of Talavera, a project that inspired my own Project 1777. The work he's done impresses me tremendously, and the determination he's displayed in keeping the project going is inspiring. I get bogged down in other things and run out of steam from time to time, so it's nice to have an example of stick-to-it-ive-ness like this.

Like Jonathan, I love the history of my period, and I'm enjoying delving into the personalities of the leaders that have formed the larger part of my posts so far. I look forward to learning more about all these gentlemen, and, who knows? Maybe some day it will spur an effort like that of my Jacqueline Reiter, soon to be published biographer of an underappreciated British peer and military figure.

Also like Jonathan, I appreciate the hard work of Nigel Marsh, the author of the Carnage and Glory simulation software that powers both JJ's Peninsular set-tos and my own Pennsylvania battles.

And I appreciate Mr J's linking his project to a worthy charity. In abject emulation, and since it's Giving Tuesday here in the US, here's a link to the Brandywine Battlefield Park Association. The association provides tours of Washington's headquarters at Brandywine, battlefield tours to visitors and school groups, staff rides for military officers and cadets, hosts a summer history camp, and provides on-request leadership seminars drawing on the example of Revolutionary War officers. The Association's website includes history, maps, information on battlefield preservation, and assistance on genealogical research.

Other great historic charities include
and of course
  • Colonial Williamsburg, the institution that first got me interested in American colonial history, and where I had my first history-facing job. :-)

Wednesday, November 9, 2016

catching up: early Autumn 2016

While I haven't posted recently, I've not been neglecting my wargaming entirely. :-)

Black Powder AWI at Army of Central Maryland
I recently ran a Revolutionary War game at the local club using the Black Powder ruleset; I'll soon have a post about that and some related games I'm planning.


A few weeks before that, I also ran a Rev War Black Powder game at a friend's house, mostly as a trial and to gain familiarity with the rules.
Black Powder AWI at Peter's

Before that, I've played a good deal of Advanced Squad Leader (three games in a month, which is kind of a record for me),

ASL with Gorkowski
ASL with Fortenberry

ASL with Frum
 played Red Poppies: Ypres Campaign with the designer,

Gorkowski explains my cruel but inevitable defeat.
 played Star Wars: Armada with my best friend while his teenaged son refereed (with lots of heavy sighs at our adult ineptitude),

Star Wars:Armada with Peter
played a British Grenadier scenario of Frayser's Farm,
Burgoyne's British let loose a volley.
and refought the battle of Vendôme with Bruce Weigle's excellent 1871 rules at the author's house.

Another of Bruce's incredible battlefields.
I also took a day off work last week and had a full weekend at Fall In. I played four different games: two Carnage & Glory games set in the Polish Commonwealth (17th century),

My Russian nobles about to kick Polish husaria ass!
one medieval game with Bob Bryant's new small-battle Clans and Companies rules, and a final Carnage & Glory game set in the American Revolution. I had several other games on my list to try to get into, but none of them panned out, alas. I also did a bit of shopping for an upcoming project.

I'll try to arrange for a few posts to summarize these exploits and get a few more photos up. Needless to say, I've also been continuing to read and learn about the 1777 Philadelphia campaign and to enlarge my Rev War research library.

I've also expanded my board wargame library a bit and taken up two new sports, curling and German longsword fencing. So, it's not like I've been sitting on my duff. :-)

Wednesday, May 11, 2016

Project 1777: Addendum concerning orders of battle.

"So, what does that mean, again?" (siftingthepast.com)
Some folks have asked about my system of notation on orders of battle.

The larger number next to a unit is its historical strength, or my best approximation of it. The number in brackets is the number of stands used in the game to represent it.

Additionally, I should perhaps explain "wings". Because units, especially British units, often used very wide spacing between files, large units became hard for a commander to maneuver easily. So units over about 300 or 400 men were often broken into two subunits or wings that operated as separate units. Thus, for instance, the Queens Rangers at Short Hills are a 400-man battalion represented on the tabletop by two 4-stand wings.

As far as troops go, most will have muskets of some quality. I'm relying on research in historic records that a friend of mine did many years ago to determine which American units are likely to have been provided with bayonets.

Only a few units on the American side, and on the British side the German jaegers and a few units of Provincials carried rifles throughout. There isn't any way in C&G, currently, to reflect the practice of arming one company of a battalion, or one platoon of a company, with rifles, as the Crown Forces often did, other than treating that body as a separate unit. That's more the province of a lower-echelon game, where individual platoons are the maneuver units.

I'll add commander ratings later on, after I've had time to do a little more research and evaluation.  But at the higher level my read is that Cornwallis and Greene were some of the best general officers who served during the war, both in terms of tactical insight, organizational skill, and their ability to inspire and motivate their men. Alexander was undeniably brave, but a bit foolhardy. Grant was well-connected (a good friend of Howe's and with experience of and friends in British political circles) but alternated between rash boldness and overconfident torpor.

Carl von Donop (Wikipedia)
Von Donop sounds to have been a bit of a martinet, but generally a capable commander; he had good instincts for arranging his posts in New Jersey that were overridden by Howe, and he conducted his withdrawal in the face of the American surprise attack capably and without rush or fuss. His attack on and death at Red Bank seems to have been due more to bad intelligence about the fort and its defenders than anything else.

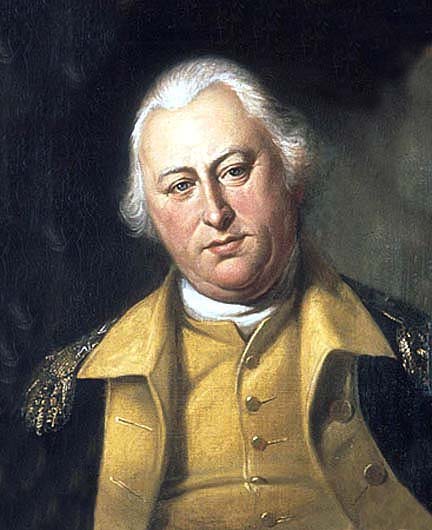
Benjamin Lincoln is a challenge to rate: he had a largely undistinguished and unsuccessful career as a general officer, being alternately commander of a rear guard that was not hard pressed, commander of reserves that saw no action, surprised and chased out of his billet in his nightshirt, wounded in a pointless skirmish, superintendent of a failed capaign hamstrung by poor troops and lukewarm civilian support, forced into the most humiliating surrender of American forces during the war, and then unsuccessful in his first combat command after returning to the army. On the other hand, Washington seems to have thought fairly highly of him. He recommended Lincoln for a general's commission despite his lack of experience. And he continued to put him in positions of command after repeated reverses. My guess, after a quick read, is that he was an able administrator and competent, if not distinguished, field commander who was simply cursed with some of the worst luck going.

Peter Muhlenberg seems to have been a competent, somewhat inspirational officer. George Weedon sounds as if he were very competent (or connected) given how regularly he was promoted and then tipped for adjutant general, but also hot-headed (given his leaving the service over the question of his senority). Washington seems to have blown hot and cold on him, praising him in 1777 and then many years later damning him with faint praise and implying he was a drinker. My historian friend remarks "I see Weedon and Muhlenberg as fine administrators and solid battlefield commanders (not thrilling but reliable).  Weedon had more fire in his belly early in the war.  Both inspired their men with great confidence."

Saturday, April 30, 2016

Project 1777: the Battle of Short Hills

Apologies, faithful readers! Life has kept me busy with family matters and projects at work that have eaten up my time and energy. Weekend time to devote to work on Project 1777 has been sparse. I still mean to get a playing or two of some of these early skirmishes under my belt, both to re-familiarize myself and some of my comrades with the game system and to test out some of my ratings for the units involved.

Until I can make that happen, though, I have another battle synopsis to share with you. This engagement, though still a bit one-sided historically, could be touched up to make an interesting game a little more easily than Bound Brook.

Nathanael Greene (Wikipedia)
Back to 1777

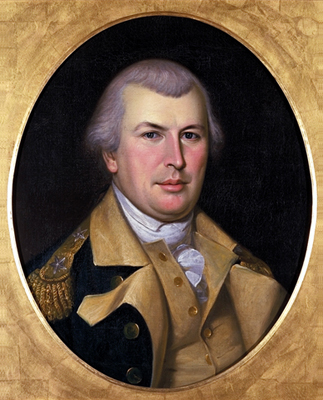
When we last left General Sir William Howe, his ploy to draw the American Army into a trap at their forward post of Bound Brook had failed. Lt. Gen. Lord Cornwallis had surrounded and attacked the American post, chasing off Maj. Gen. Benjamin Lincoln in his nightshirt (possibly even without that!) and capturing several cannon. But the Americans' nearest supports, Maj. Gen. Nathanael Greene's division, had not arrived to reinforce Lincoln until after the British forces had left. Greene harassed the rearguard of the retreating British, then ensconced himself in Bound Brook.

However, after Greene had waited several weeks to see what else might develop, Lt. Gen. George Washington had pulled Greene's division back, leaving Bound Brook to lie in the debatable zone between the two armies. Bound Brook was too far from the main American position at Morristown to be supported adequately; it was too vulnerable to sudden attack to be a suitable forward base.

Nevertheless, Washington gave Howe some room to hope that the rebel commander could still be drawn out of his fastness in the Watchung Mountains. On May 28th, two days after Greene was recalled from Bound Brook, the American army moved from its winter camp at Morristown to Middlebrook, still in the mountains but closer to the British advanced base at (New) Brunswick.

A Cunning Plan...Foiled

In June, Howe feinted, trying again to bring the Americans down out of the mountains and onto the plains of New Jersey where he hoped to defeat them in detail. Attempting to convince the Americans that he was marching toward the Delaware River and Philadelphia, the American capitol, Howe moved the main British army out of New York into New Jersey and settled for several days at Somerset Court House, south of Brunswick. But spies had told the Americans that the British bridging train, without which they could not cross the Delaware River, had remained in New York. Other supplies had also been left behind, meaning that the British could not stay in the field for long.Washington did not bite on Howe's proffered bait.

William Alexander, Lord Stirling (Hidden New Jersey)
Instead, Washington waited, and when Howe began moving back towards New York, the Americans came down from the mountains into the foothills, shadowing the King's army as it moved back to its base and picking off any stragglers who fell behind on the march. With his main army at the delightfully named Quibbletown, Washington sent an advanced guard under Maj. Gen. William Alexander to harass the British rearguard, much as Greene had chivvied Cornwallis's men after Bound Brook.

Alexander, sometimes known as Lord Stirling because he claimed to have inherited that Scottish title, had a reputation for bravery forged at the battle of Long Island the previous summer. Holding the right of the American line in that battle, Stirling had eventually been surrounded and his command forced to flee or surrender. His force had taken heavy losses, but through its sacrifice it had prevented the encirclement and capture of the entire American army. Alexander was later exchanged for Monfort Browne, the Governor of the Bahamas, who had been captured during an American raid on the islands in March of 1776. After returning to the army, Alexander commanded a brigade under Greene in the winter 1776/1777 campaign, leading the center of the American line at the battle of Trenton.

Now he sought to inflict some losses on the British rear guard as their army retreated to Perth Amboy, from there presumably to return to New York.

Barking at the Heels of the British Army

Howe determined to deal a sharp blow to Alexander's force and, as always, hoped that in the process he could draw the American field army into a decisive battle. Cornwallis, Howe's most aggressive general officer, received command of a strike force designed for speed and power. Cornwallis set off an hour after midnight with a task force of light dragoons, mounted and foot jaegers, the Queen's Rangers, a unit of Guards, and battalions of British and German grenadiers. Howe and Maj. Gen. John Vaughn followed with more jaegers, more British grenadiers, and a force of British light infantry.

A Hessian officer's map of the battle of Short Hills (Wikipedia)
As shown in the map drawn by Friedrich von Wangenheim, a Hessian mounted jaeger officer, Cornwallis' force and that under Howe advanced on parallel road, hunting for Alexander's division. Cornwallis made contact first, his jaegers coming into contact with American riflemen of Morgan's Corps just after dawn. The riflemen fought hard, not falling back until charged with the bayonet. As they were pressed, the riflemen fell back on Ottendorf's Corps, an independent light infantry force commanded by Lt. Col. Charles Armand Tuffin in the absence of its titular leader, and a body of New Jersey infantry--either militia or Continentals from Brig. Gen. William Maxwell's brigade--backed up by several artillery pieces. These supports helped stiffen the riflemen's resistance, but as more troops were deployed from the British column to the attack, the Americans were forced further back.

A Bitter Fight

Charles Armand Tuffin, Marquis de la Rouerie (Wikipedia)
Alexander had selected a defensive position on a ridge running perpendicular to the road. There he placed the main strength of his force, the remainder of Maxwell's brigade and a brigade of Pennsylvanians under Brig. Gen. Thomas Conway. Cornwallis tried to outflank this position by sending a battalion of Hessian grenadiers in a wide sweep around the Americans' left flank, but this was stalled by a battery of four French artillery pieces, carefully concealed in enfilade on a wooded hillside. One Guards officer foolishly attempted to capture the battery single-handed and was shot down at Alexander's direction. But a force of less than 2,000 men, even possessed of good defensive terrain, cannot hold against nearly 4,000 indefinitely. Eventually the pressure of the British attack forced Alexander's troops backwards, through the town of Westfield and over another line of wooded hills to the edge of the Watchung Mountains. The British, exhausted by nearly six solid hours of fighting, set to plundering Westfield. Joined by Howe's column, the expedition camped in area around the town that night and then marched back towards Staten Island the next day by way of Rahway.

Howe had again failed to draw out Washington's army, and he had missed even the prize of surrounding and capturing Alexander's division, though the British did take three of Alexander's four French guns back to New York with them. One amateur historian alleges that Washington heard the initial gunfire between the jaegers and Morgan's riflemen ten or fifteen miles away in Quibbletown and that the terrified commander immediately ordered his main army to begin fleeing back into the Newark Mountains.This seems unlikely, as does the claim that Alexander's fight at Short Hills was a brilliant strategic victory, allowing the main army time to escape a British trap. The trap had been set for Alexander, who did deftly avoid it, but Howe had not expected, when he set out in the dead of night, to encircle the American main army, only its somewhat dangerously advanced guard. One account even goes so far as to suggest that Alexander deliberately ignored an order from Washington to fall back from contact with the British main force; if that is true, Alexander was lucky to keep his command, escape or no.

A Tentative Order of Battle

My preliminary order of battle for this engagement (drawn from returns and assuming that Howe's column proves, as it did historically, to be too far away to support Cornwallis) looks something like this, much smaller than some of the fanciful and inflated numbers of some modern accounts. (Note: The larger number next to a unit is its historical strength, or my best approximation of it. The number in brackets is the number of stands used in the game to represent it: four-figure stands for infantry, two-figure stands for cavalry.)

Major General William Alexander, Lord Stirling (1,800 of all arms)

Lieutenant Colonel Charles Armand Tuffin
Ottendorf's Independent Corps (100 [2]): Line, Trained, Poor, Average
Morgan's Provisional Rifle Corps, detachment (100 [2]): Elite, Crack, Average, Excellent

Brigadier General William Maxwell
1st & 2nd New Jersey Continentals (300 [4]): Line, Trained, Average, Average
3rd & 4th New Jersey Continentals (300 [4]): Line, Trained, Average, Average
Spencer's Additional Continental Regiment (200 [3]): Line, Trained, Poor, Average
New Jersey state artillery (two sections of two four-pounders, 100): Line, Trained, Average, Average

Brigadier General Thomas Conway
3rd & 6th Pennsylvania Continentals (300 [4]): Line, Trained, Poor, Average
9th & 12th Pennsylvania Continentals (300 [4]): Line, Trained, Poor, Average
Pennsylvania state artillery (two sections of two four-pounders, 100) Line, Trained, Average, Average

Lieutenant General Charles, Lord Cornwallis (3,600 of all arms)

Captain James Weymss
Queen's Rangers (400 in two wings of [4] each): Line, Veteran, Average, Good
Ferguson's Rifle Corps (120 [2]): Line, Trained, Average, Excellent
16th Light Dragoons (300 in three squadrons of [1] each): Line, Veteran, Average, Poor 
Royal Artillery (two sections of two six-pounder guns, 100): Elite, Veteran, Average, Good

Brigadier General Carl von Donop
Hesse-Kassel Feld Jaeger Korps, foot companies (100 [2]): Elite, Crack, Good, Excellent
Hesse-Kassel Feld Jaeger Korps, mounted company (80 [1]): Elite, Crack, Good, Excellent
Linsing Grenadier Battalion (430[5]): Elite, Veteran, Good, Poor
Minningerode Grenadier Battalion (430[5]): Elite, Veteran, Good, Poor
Lengerke Grenadier Battalion (440[5]): Elite, Veteran, Good, Poor
Hessian artillery (three sections of two four-pounder guns, 150): Line, Veteran, Average, Good

Lieutenant Colonel Sir George Osborn
1st Foot Guard Battalion (450 in two wings of [5]): Elite, Veteran, Good, Average
2nd Grenadier Battalion (500 in two wings of [5]): Elite, Crack, Good, Average
Royal Artillery (two sections of two three-pounder guns, 100): Elite, Veteran, Average, Good

Tuesday, February 2, 2016

Project 1777: The State of the War in the Spring of 1777 and the battle of Bound Brook

Prologue
Sir William Howe (Anne SK Brown MHC)


Depending on how one chooses to date, 1777 might be said to have been the third year of the American Revolution. In 1775, the frequently violent political unrest in New England had become open warfare when British troops, searching for cannon stolen from the militia depot in Boston, came under fire from American rebels in Lexington and Concord. After the sanguinary battle of Bunker Hill, a siege of Boston had ensued. This was brought to a head in January 1776 by the arrival at the siege of a "noble train of artillery", cannon, howitzers, and mortars from the captured British fort at Ticonderoga, weapons that, once emplaced on Dorchester Heights, rendered the city indefensible. In March the British army evacuated Boston for Halifax, Nova Scotia, where it was retrained and reinforced.

In late June and early July of 1776, the British army under its commander in chief General William Howe sailed south to New York; in August they landed on Long Island and chased the American army from their positions there. September saw the British occupy Manhattan while the American army fell back to Harlem. In October the Americans lost another battle at White Plains. They fell back into New Jersey in November after the loss of Forts Washington and Lee, then fell back before another British advance, ending the year in Pennsylvania.

Gen. Geo. Washington, 1776 (Brooklyn Museum)
Although his army was exhausted and about to dissolve as enlistments expired, Continental commander in chief Gen. George Washington persuaded his men to make one more effort. In a lightning strike, he attacked the British Army's outpost at Trenton on Christmas Day, 1776, retreated, and attacked again in a feint at Brunswick, the main British depot in the Jerseys. Under pressure from a British sally from New York under Lt. Gen. Lord  Cornwallis, Washington conducted an effective fighting withdrawal to a strong defensive position on Assunpink Creek, then stole a march on the British, attacking their rear echelon at Princeton, before falling back to winter quarters at Morristown in New Jersey's Watchung Mountains.

After doing nothing but taking body blows for a year, the American army had retorted with several shrewd jabs. It could not yet take on the British Army in the field without a tremendous advantage in numbers or position, but British hopes for a speedy end to the war with a quick victory over green militia had been decisively dashed. The Americans meant to fight.

1777: What Next?
Howe (now Sir William, after being knighted for his successful campaign in New York) began the new year with a divided command and a strategic puzzle. The main portion of his army was in and around New York City; it had spent the rest of the winter fighting a bitter petite guerre, a war of outposts and skirmishes, with the Americans over what supplies could still be foraged in the Jerseys. Now that Spring was drawing near, Howe wanted to find some way to come to grips with Washington and his army. But as Commander in Chief in North America, Howe's responsibilities (and available forces) lay beyond just the army in New York.

Another portion of the army held Rhode Island; a relatively simple operation the previous year under Lt. Gen. Lord Percy and Maj. Gen. Henry Clinton had seized Newport as a foothold in New England for the Crown Forces. (Clinton had earlier tried without success to capture the southern city of Charleston, South Carolina.)

Canada had originally held a small garrison under General Guy Carleton. This force had proved sufficient to fight off a confused and undersupported attempt to invade Canada by various American forces in 1775. Carleton's counteroffensive in 1776 had gotten far enough to drive American naval forces from Lake Champlain, but he had not done so soon enough to allow him also to recapture Fort Ticonderoga, the crucial base at the south end of the lake, from the rebels before winter set in.

Maj. Gen. Burgoyne (Frick Collection)
And in the meanwhile, Maj. Gen. John Burgoyne, having undermined Carleton's reputation with the government in London, had wheedled away command of British forces in Canada for himself. He aimed to move south to capture Albany and isolate the rebellion in New England from the rest of the American Colonies. His plan depended upon support from an ancillary force of British, Loyalist, and Native American troops moving east from Lake Ontario along the Mohawk Valley, which he hoped would distract the commanders of American forces in upstate New York. He also looked south to Howe for help.

Howe had originally suggested that if he were given a considerable reinforcement of troops, he could conduct operations against the American main army and also support an attack south from Canada. If he did not get these reinforcements, however, he planned to seize the American capital at Philadelphia, both for the moral effect of capturing or dispersing the enemy government and in hopes that this threat would be enough to bring the American main army to the one conclusive battle he still hoped could destroy it and end the war.

No Peace Without Victory

General Sir William Howe and his elder brother Vice Admiral Richard, Viscount Howe, had been named in 1776 as peace commissioners by the British government, though with only limited ability to make terms. Sir William had met in September 1776 with a group of Congressmen representing the American government, but no one had been able (or willing) to make the necessary concessions that would have led to a suspension of hostilities. Howe felt sure that until he could completely defeat and disperse the American army under Washington, Congress would continue to believe that it could face down the Crown. Britain held one of the most wealthy and important cities in revolt (New York). If they could seize another in Philadelphia (and even, in one of Howe's early plans, reach out from Rhode Island and recapture Boston), it would force the colonies to their knees economically and bring the American army out of hiding in the mountains of New Jersey to the open plain, where he could crush them.

Unearthing the Fox

But attacking Philadelphia would almost certainly require moving the entire army by sea again, as it had been moved from Halifax to New York. Recovering from that move had taken nearly a month. The army could move by land across the Jerseys, but that area had been stripped bare of supplies in the winter's Forage War, and the army would still have to cross the Delaware River, a major obstacle (Howe's engineers began assembling a bridging train to support that option). Faster and less troublesome than either of these alternatives, though, would be to fight the Americans here in the area around New York. Howe made several attacks and feints, hoping to prod Washington into attacking back or to lure him into assaulting the British while they were on the march. These led to the battles of Bound Brook in April 1777 and of Short Hills the following June.

Maj. Gen. Benjamin Lincoln (City of Philadelphia)
Bound Brook

In April 1777, Maj. Gen. Benjamin Lincoln commanded a Pennsylvanian brigade of Continental regular infantry and artillery and state militia. This force was stationed at the town of Bound Brook, where the stream of the same name entered the Raritan River. They served to guard the approaches from the British base at Brunswick to the American army's winter quarters at Morristown. They were also positioned to intercept supplies moving to British along the Raritan.

Originally around 1,000 men, this garrison had dwindled to about 500 as enlistments ran out. It was not intended to stand up to a full assault by British regulars, but it could delay a moving column long enough to send word to the next largest American outpost and then fall back. And it provided the troops for patrols around the countryside, interfering with British foraging and intelligence gathering and carrying out those tasks themselves.

Howe calculated that attacking such a post might draw the American army into an engagement, perhaps piecemeal as a larger force reinforced Lincoln, thinking he was only somewhat overmatched. Then, as that force became overwhelmed, it would call out for help. As long as none of the American forces could be extricated whole, the British could slowly swallow the whole American army in this trap. And, if the Americans did not reinforce the post, at the very least he would have captured a major general and a good quantity of men and guns.

Howe sent Cornwallis, easily his most able general and likely burning for another chance to bag Washington, in command of this force. Taking no chances, Cornwallis took 4,000 men-- a force of British infantry commanded by himself and Maj. Gen. James Grant, one of Hessian troops under Col. Carl von Donop, and a detachment of light infantry and light dragoons under Lt. Col. William Harcourt of the 16th Light Dragoons. The force advanced in four converging columns, seeking to surround the American base. Grant's advance guard, under the aggressive and talented jaeger officer Capt. Johann von Ewald, made contact first and nearly overran the American position before finding themselves outnumbered. Von Donop's force came up in good time, and he and Cornwallis put the Americans to flight. Harcourt's column came across Lincoln and his staff staying at a large house outside of the town and nearly captured them, but the American general and most of his men managed to escape, leaving behind three brass cannon and most of the American artillery detachment that manned them.

Maj. Gen. Nathanael Greene commanded the nearest American supporting force. On learning of the British attack, he moved his force immediately towards Bound Brook, but they were too late to do anything but harass Cornwallis' force as it returned to Brunswick.

Realizing this position was exposed and too far from the main American army at Morristown, Washington relinquished the Bound Brook post in May but moved his forces south from Morristown to Middlebrook, still protected by the Watchung Mountains but closer to the British base of operations. He could see Howe's plan to draw him out of his hilly stronghold, but he was not foolish enough to comply.

A Tentative Order of Battle for Bound Brook
Accounts differ as to who made up the different British columns, even as to how many columns there were. Cornwallis nominally commanded the raid, but it would appear that he did not participate. Grant notionally led the main attack column, but although von Ewald was supposed to be under his command, von Ewald arrived at the town first and von Donop's grenadiers ended up arriving second and providing him support, not the rest of Grant's column. Some authors say that Grant's role was to stay at Raritan Landing and provide support if needed, so I've left him there, along with the larger of several accounts of his force. Von Donop may have had guns with him also, which would make sense in military terms since they had intelligence that the Americans had constructed a fort*, but to include these in the game seems like over-egging the British pudding.

Strengths are a combination of recorded numbers at the time of the actual skirmish and unit strengths from Brandywine in September. If I can find better numbers, I'll update them. (Note: The larger number next to a unit is its historical strength, or my best approximation of it. The number in brackets is the number of stands used in the game to represent it: four-figure stands for infantry, two-figure stands for cavalry.)

Lieutenant General Charles, Lord Cornwallis

Capt. Johann von Ewald (arriving first)
Hesse-Kassel Feld Jaeger Korps (30 [1]): Elite, Crack, Good, Excellent

Col. Carl von Donop (arriving second)
Linsing Grenadier Battalion (430 [5]): Elite, Veteran, Good, Poor
Minningerode Grenadier Battalion (430 [5]): Elite, Veteran, Good, Poor

Lt. Col. William Harcourt (arriving a rather late third)
16th Light Dragoons (detachment) (50 [1]): Line, Veteran, Average, Poor
1st Battalion, the Light Infantry (two wings of 300 [6] each): Elite, Crack, Good, Good
2nd Battalion, the Light Infantry (one wing of 300 [6]): Elite, Crack, Good, Good
1st Battalion, the Grenadiers (two wings of 350 [7]): Elite, Crack, Good, Average

Maj. John Maitland (arriving a very late fifth, if at all)
2nd Battalion, the Light Infantry (one wing of 300 [6]): Elite, Crack, Good, Good

Maj. Gen. James Grant  (in reserve at Raritan Landing)
1st Battalion, combined Foot Guards (two wings of 245 [5] each): Elite, Veteran, Good, Average
16th Light Dragoons (detachment) (50 [1]): Line, Veteran, Average, Poor

Maj. Gen. Benjamin Lincoln

8th Pennsylvania Regiment (200 [3]): Line, Veteran, Average, Average
Wyoming Valley militia (200 [3]): Militia, Raw, Contemptible, Poor
1st New Jersey militia  (300 [4]): Militia, Raw, Contemptible, Poor
2nd New Jersey militia  (300 [4]): Militia, Raw, Contemptible, Poor
Proctor's Company, Pennsylvania Artillery, two sections of two six-pounders) (100)

I've bumped up the American numbers to what they were mid-March when the operation was originally planned by von Ewald (at Cornwallis' direction). And I added one gun, so the Americans could have both the two by the American HQ at Horne's Plantation and two more in the Half Moon Battery.

Maj. Gen. Nathanael Greene (arriving after receiving intelligence that the British were advancing from Brunswick)

This is simply a very crude approximation based on Greene's organization at Brandywine, five months later. The numbers are a guess based on his having 2,500 men at Brandywine. If I can find better organization for mid-April and better numbers, I'll update them.

Brig. Gen. Peter Muhlenberg
1st Virginia Regiment (200 [3]): Line, Crack, Average, Average
5th Virginia Regiment (250 [3]): Line, Veteran, Average, Average
9th Virginia Regiment (250 [3]): Line, Trained, Average, Average
13th Virginia Regiment (300 [4]): Line, Trained, Poor, Average
The German Battalion (250 [3]): Line, Veteran, Average, Average [not actually part of 1st VA Bde. until May]

Brig. Gen. George Weedon
2nd Virginia Regiment (200 [3]): Line, Crack, Average, Average
6th Virginia Regiment (250 [3]): Line, Veteran, Average, Average
10th Virginia Regiment (250 [3]): Line, Trained, Poor, Average
14th Virginia Regiment (300 [4]): Line, Trained, Poor, Average
Pennsylvania State Regiment of Foot (250 [3]): Line, Veteran, Average, Good ]actually reorganizing until 30 April, probably not available for Bound Brook]

Next time:
The action at Short Hills.

* Rall is criticized for not constructing a redoubt at Trenton. Lincoln's men at Bound Brook had done so, but we see what happens when a force is surprised and greatly outnumbered by an aggressive enemy arriving late at night or early in the morning, fort or no. What Rall should have done (and what Lincoln largely did) was set out more and better pickets and be ready to retire in the face of superior numbers.